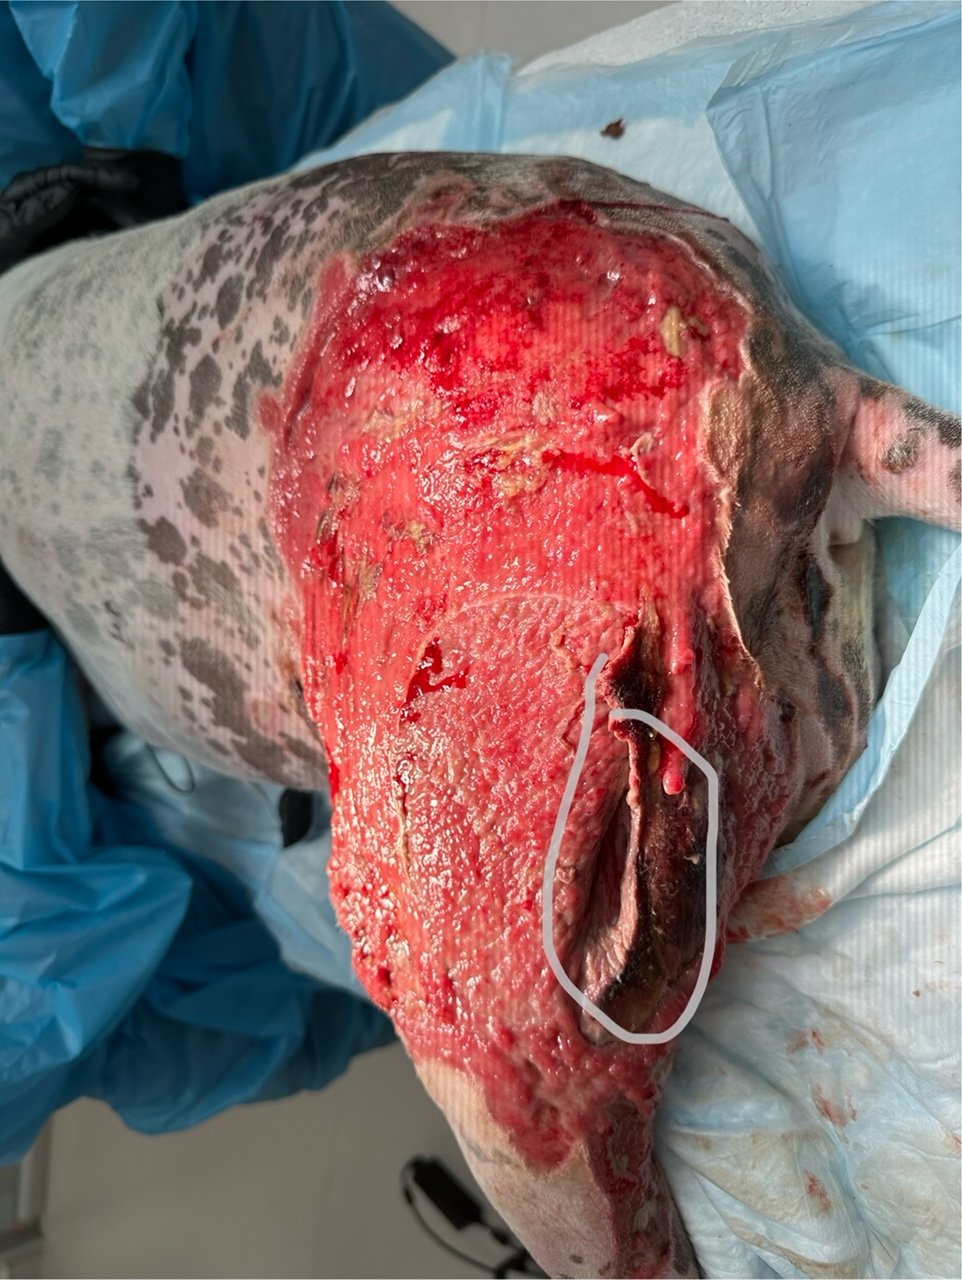
Patient Name: Charlie
Signalment: 6yr old male, neutered boxer
Source of Wound: Iatrogenic burn from warm air heating device used whilst patient was anesthetized.
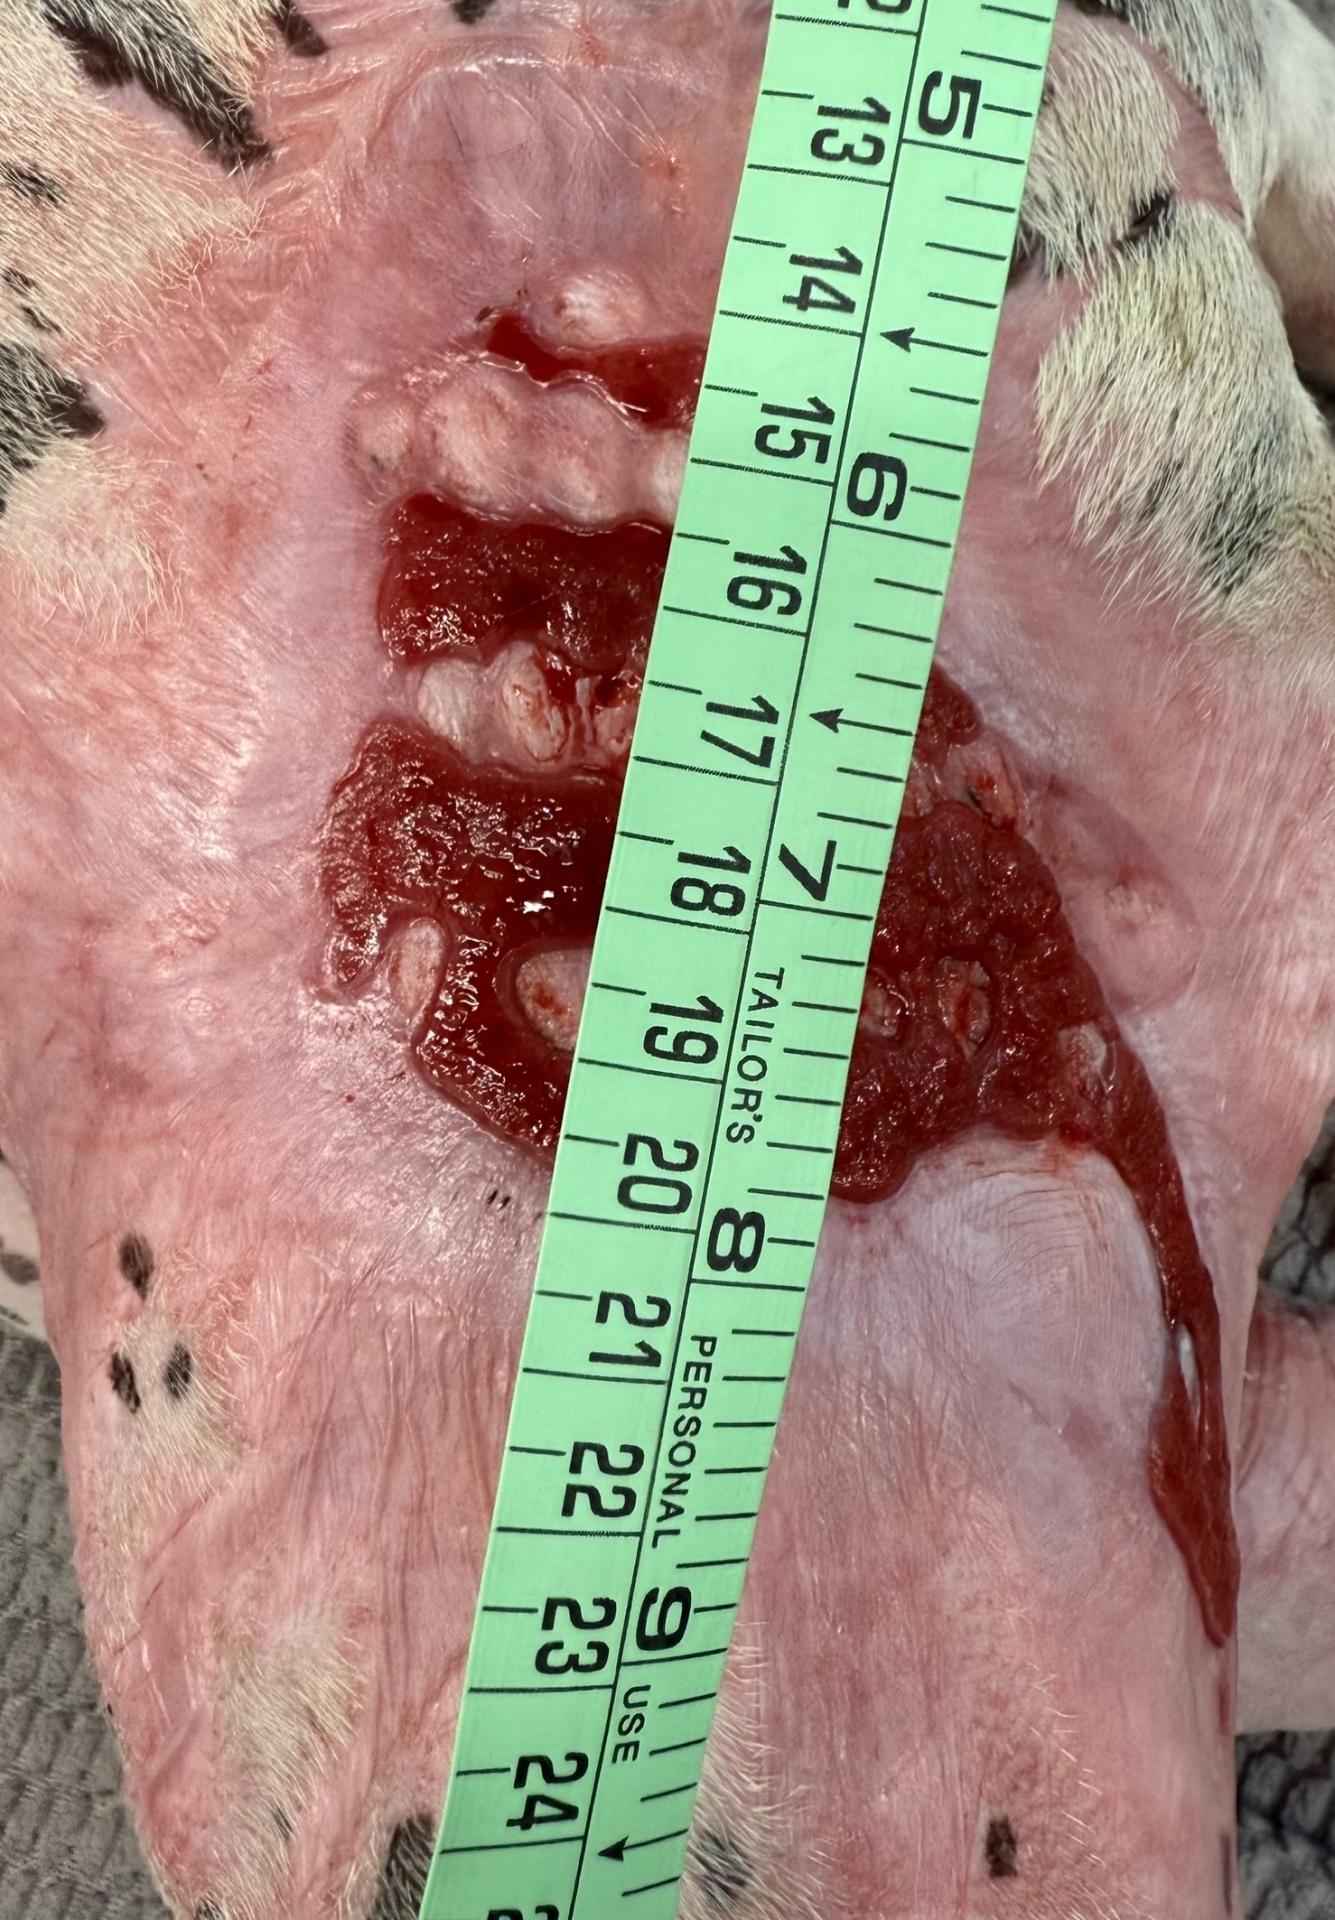
Charlie was undergoing anesthesia for a mass removal and dental care. Whilst under anesthesia he sustained a thermal injury from a warm air device which resulted in full thickness burns (in human medicine these are referred to as third degree burns) to both of his pelvic limbs.
Day 1
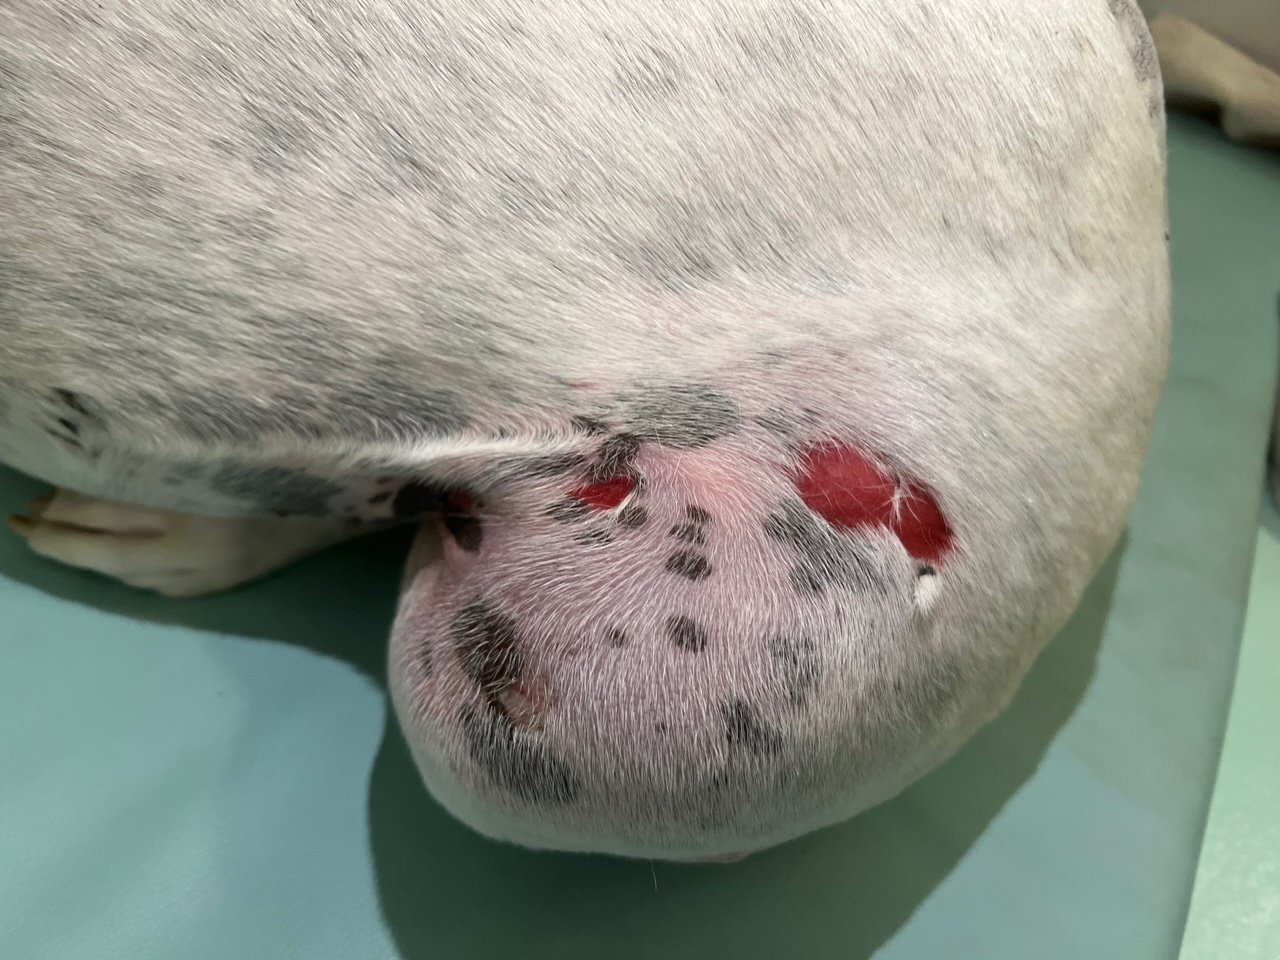
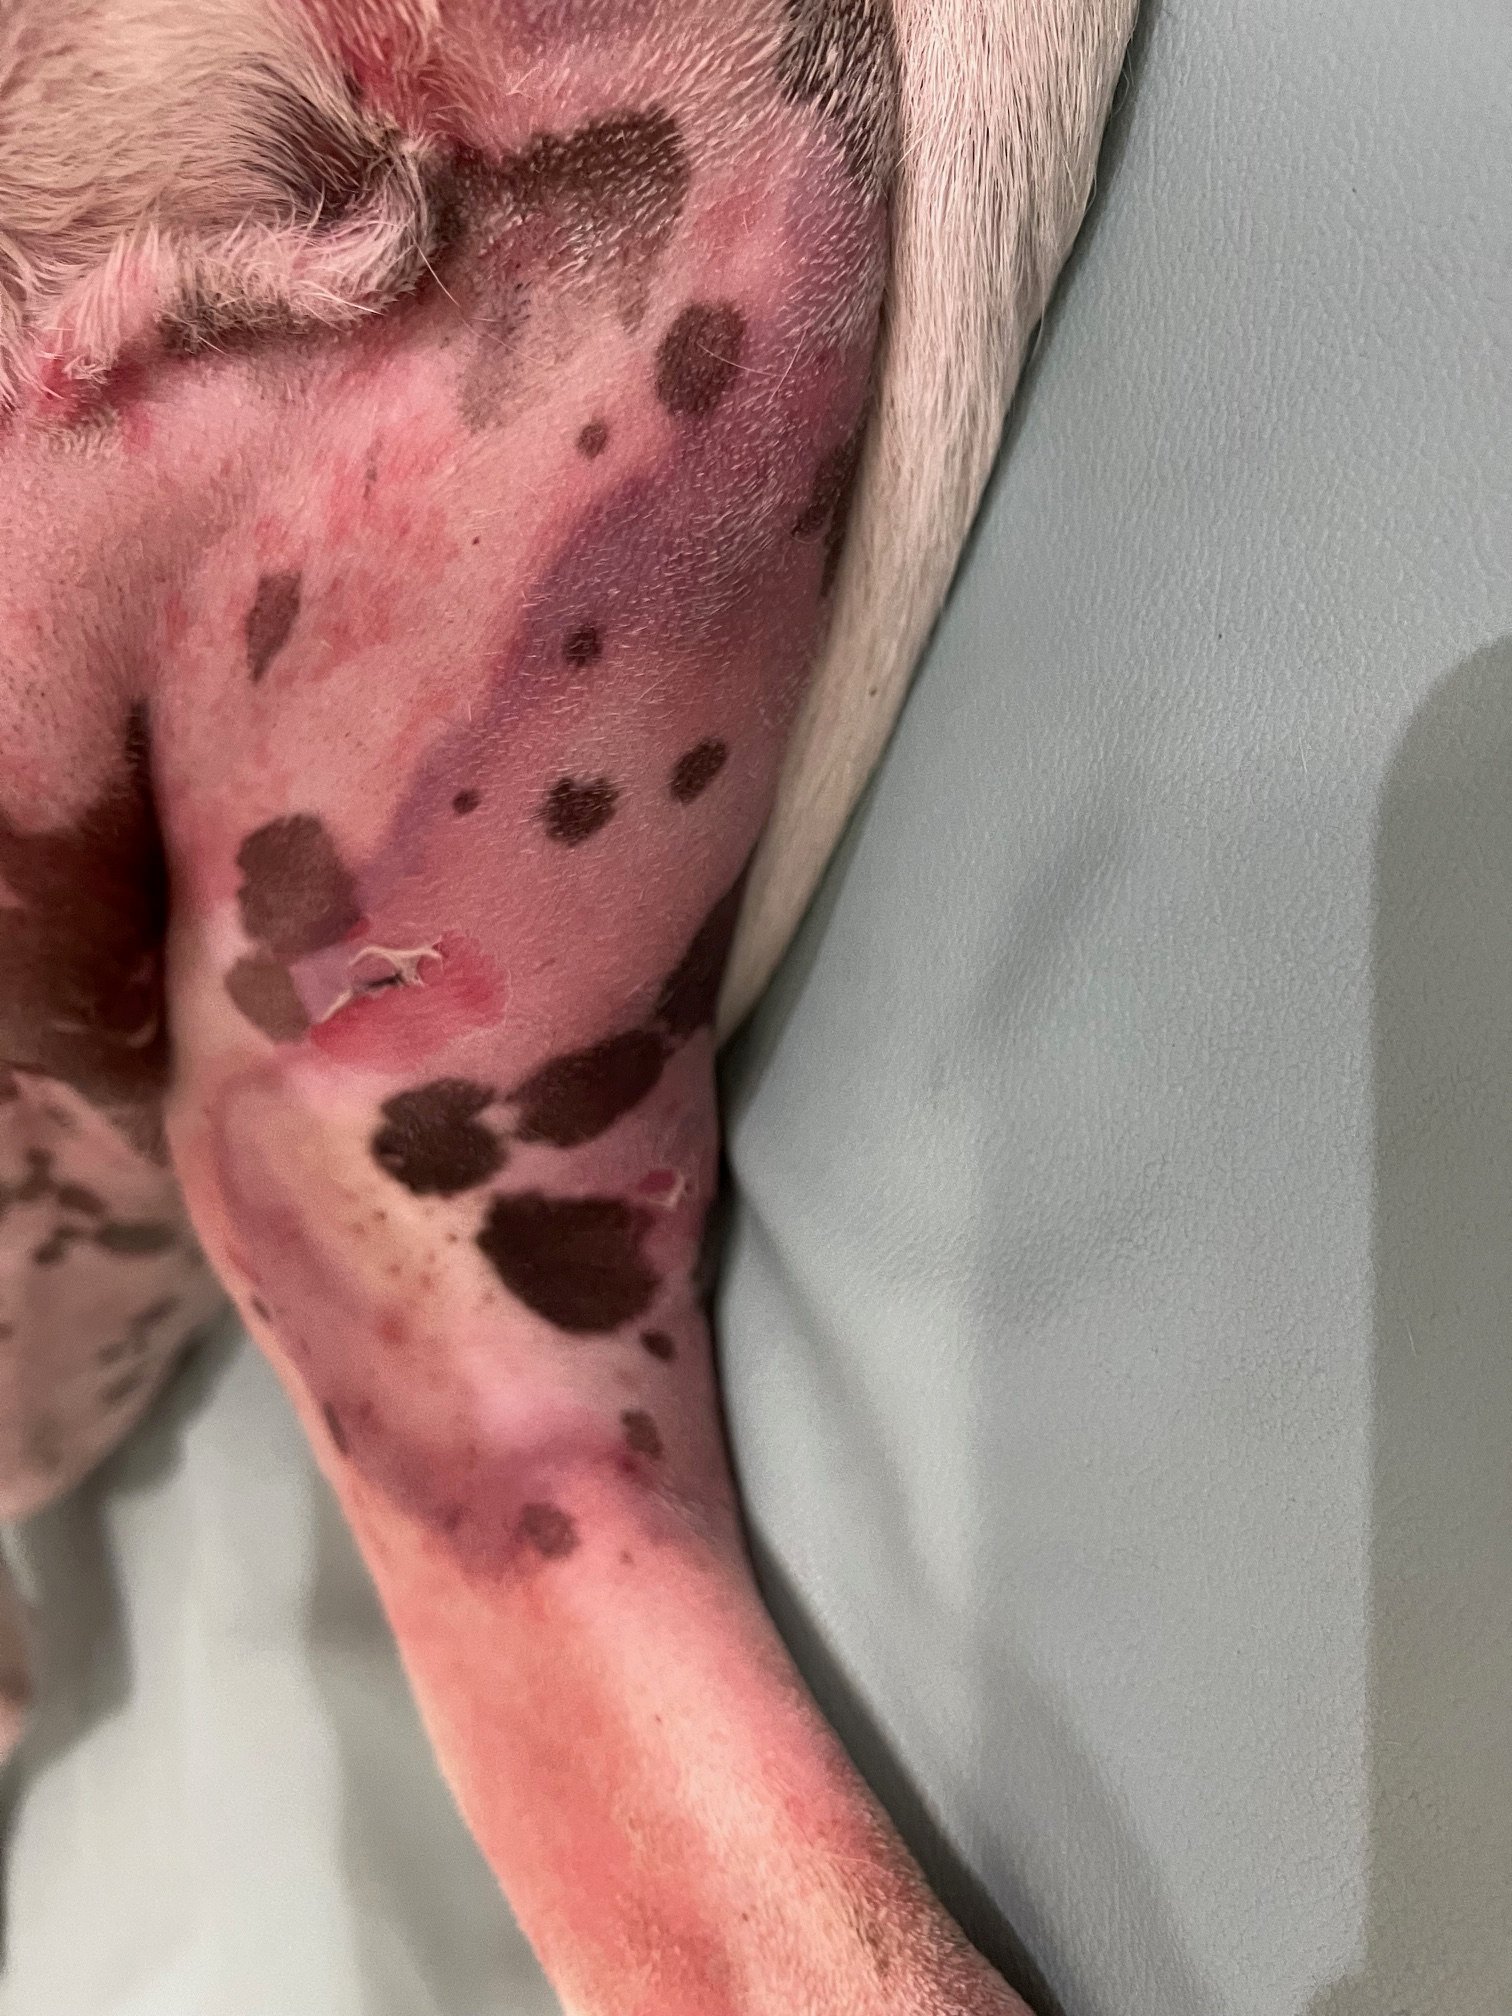
Initially wound management consisted of a debridement surgery to remove the bulk of the necrotic tissue. A tie over dressing was placed with a wet to dry dressing to further assist with debridement. SSD cream was applied to the skin and around the wound and directly over the exposed tissue within the wound bed.
Day 5
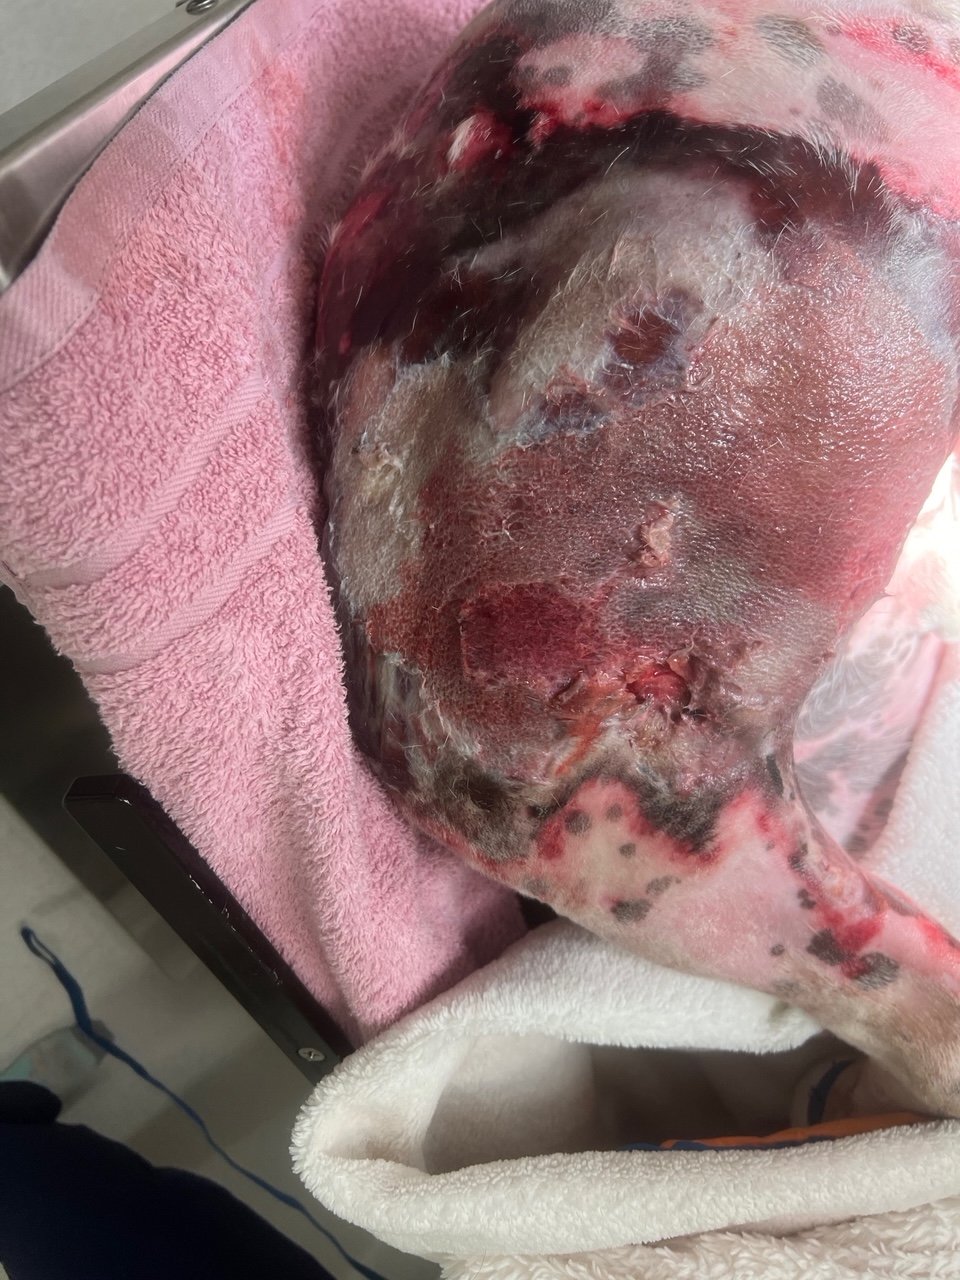
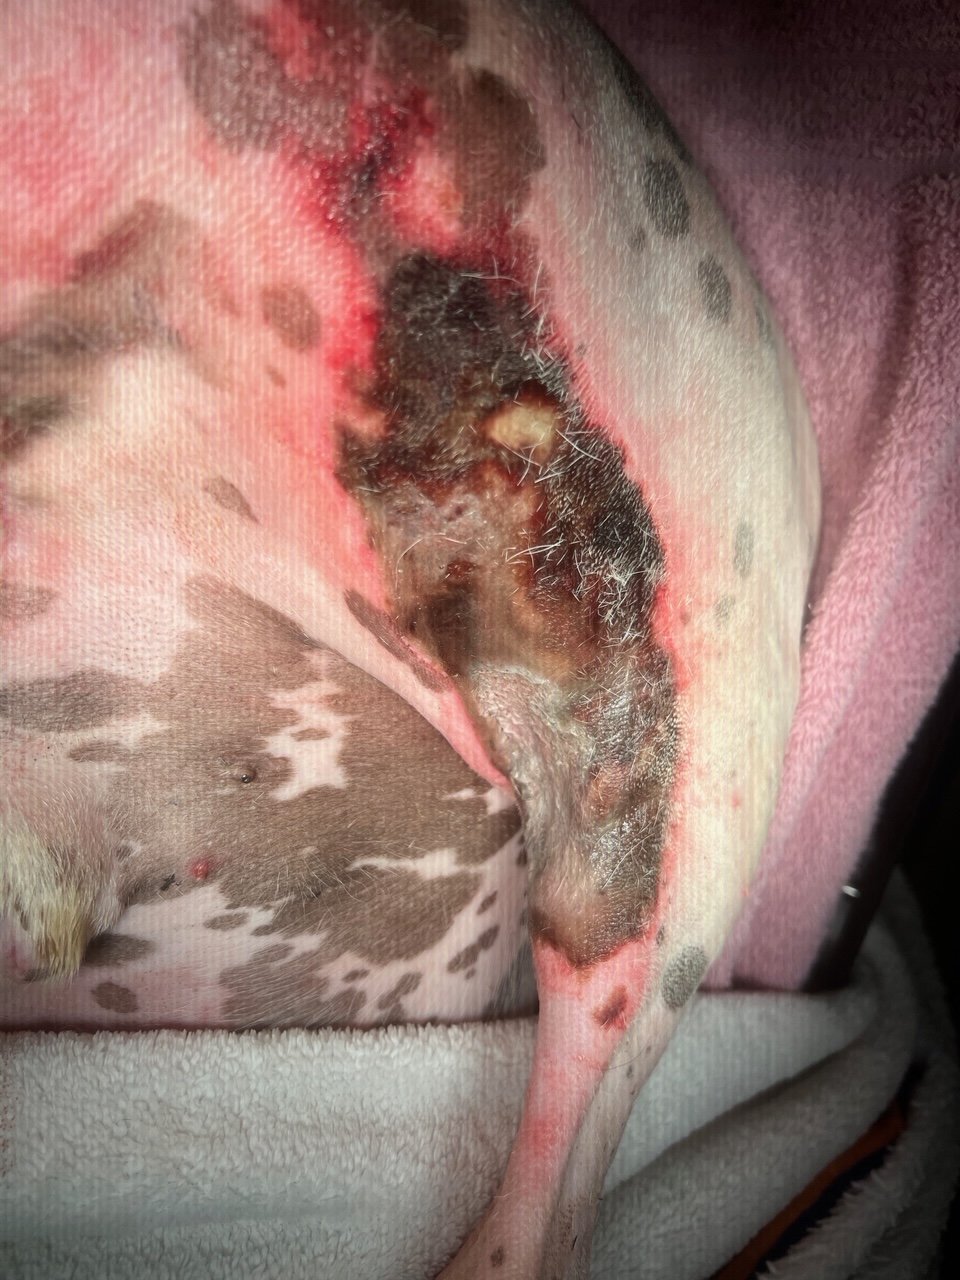
Day 6
As areas of skin, fat and muscle around the periphery of the wound became more obviously avascular and started showing signs of necrosis, the tissue was debrided with sharp dissection at the time of wound dressing changes.
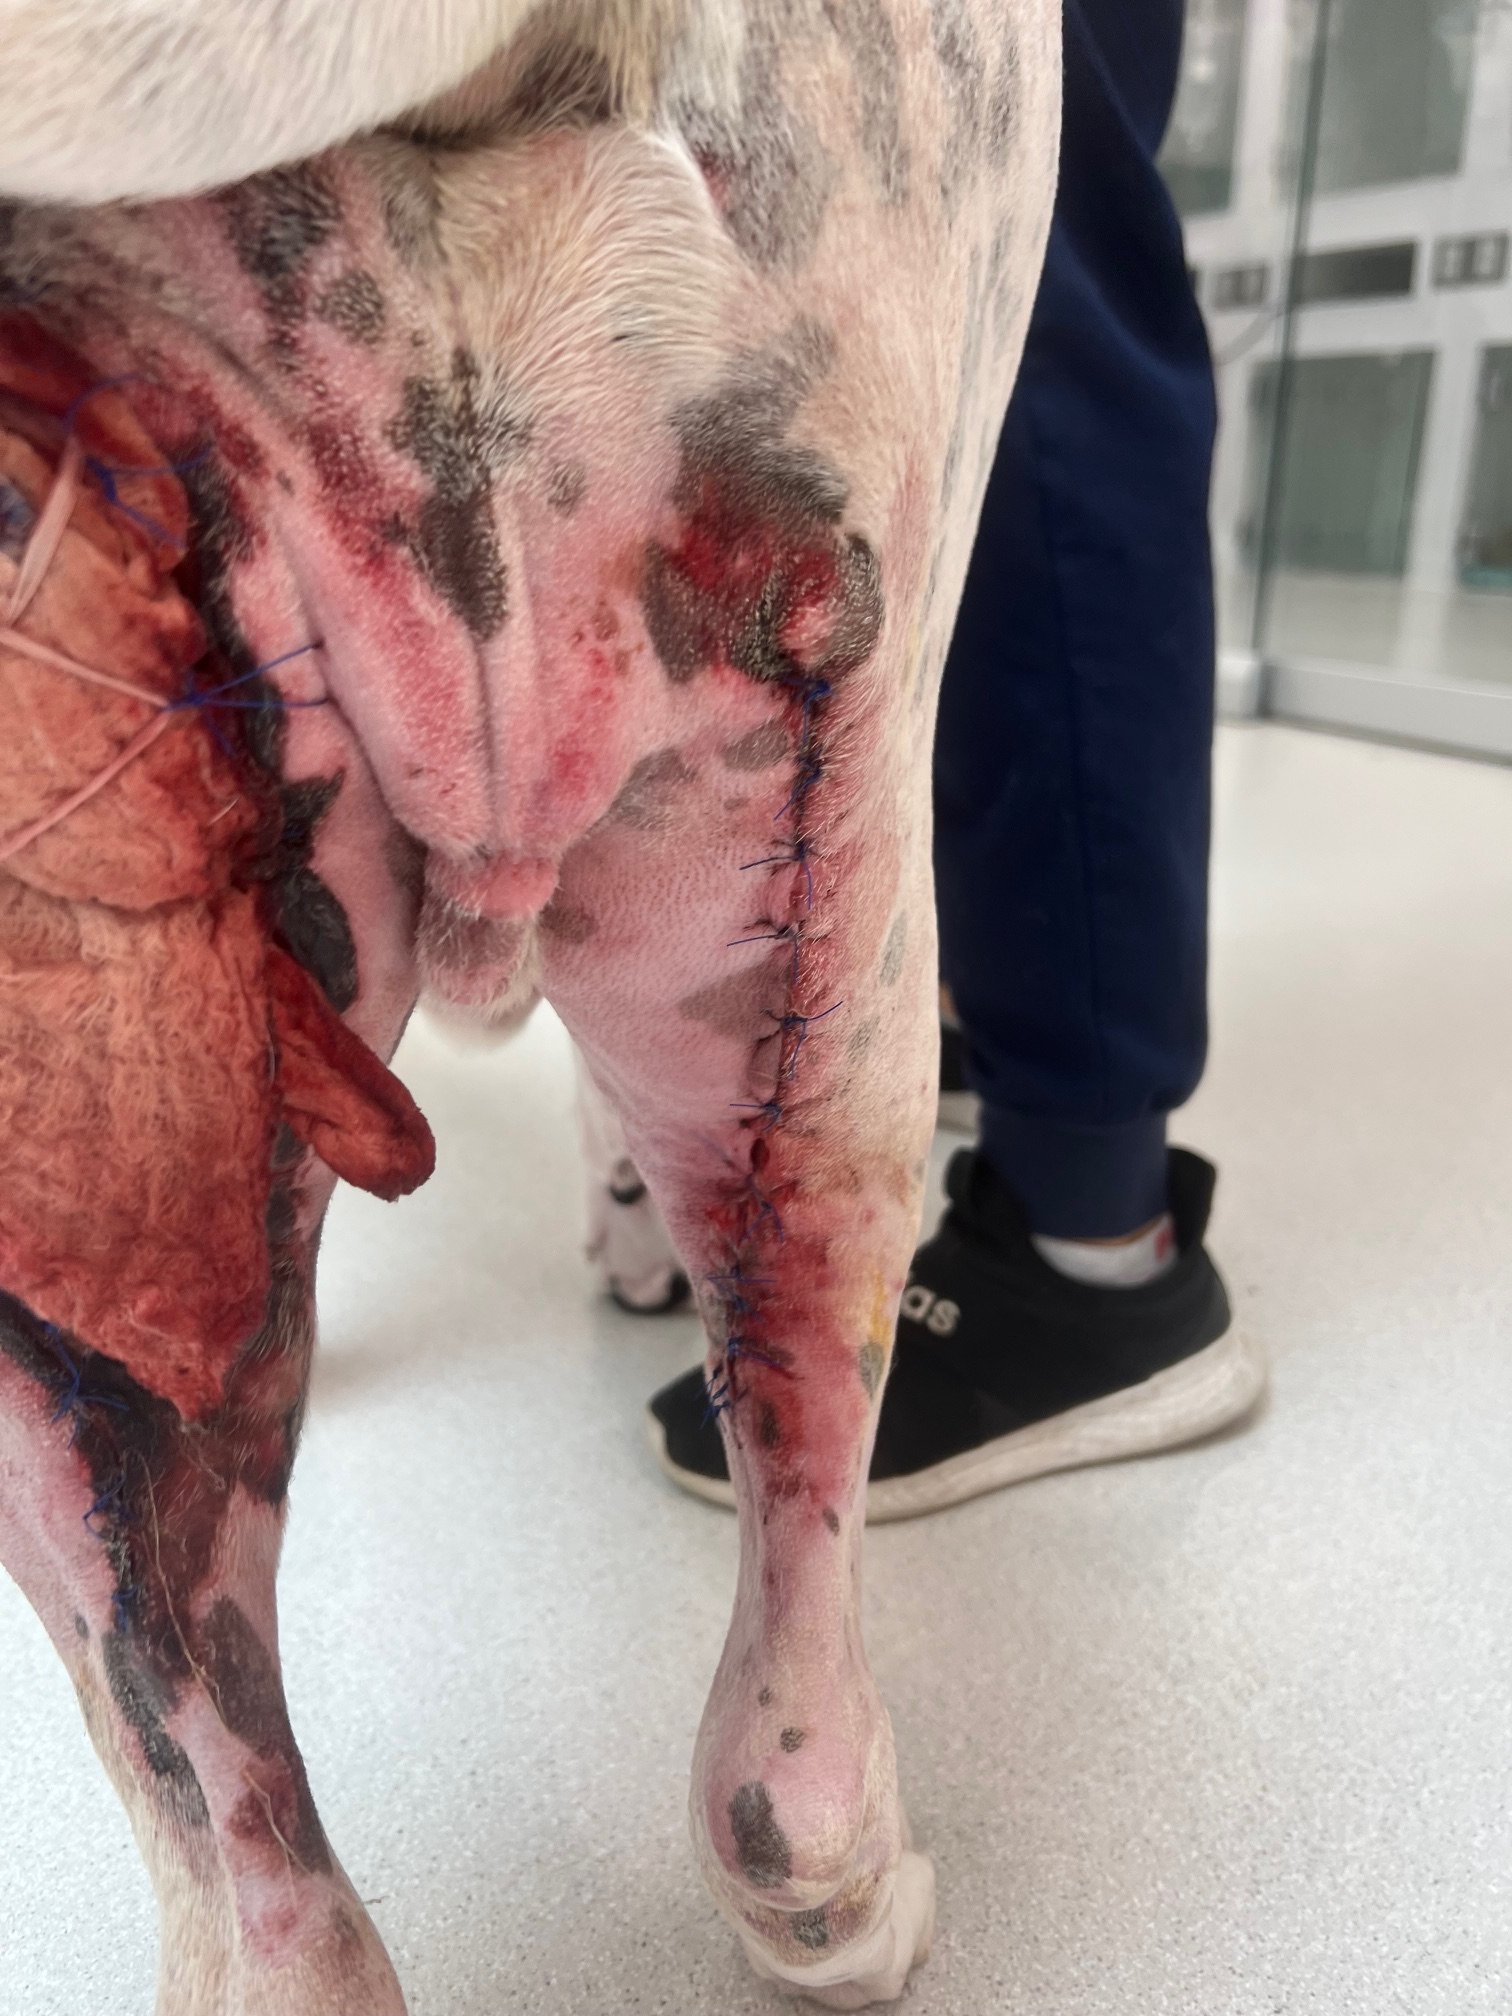
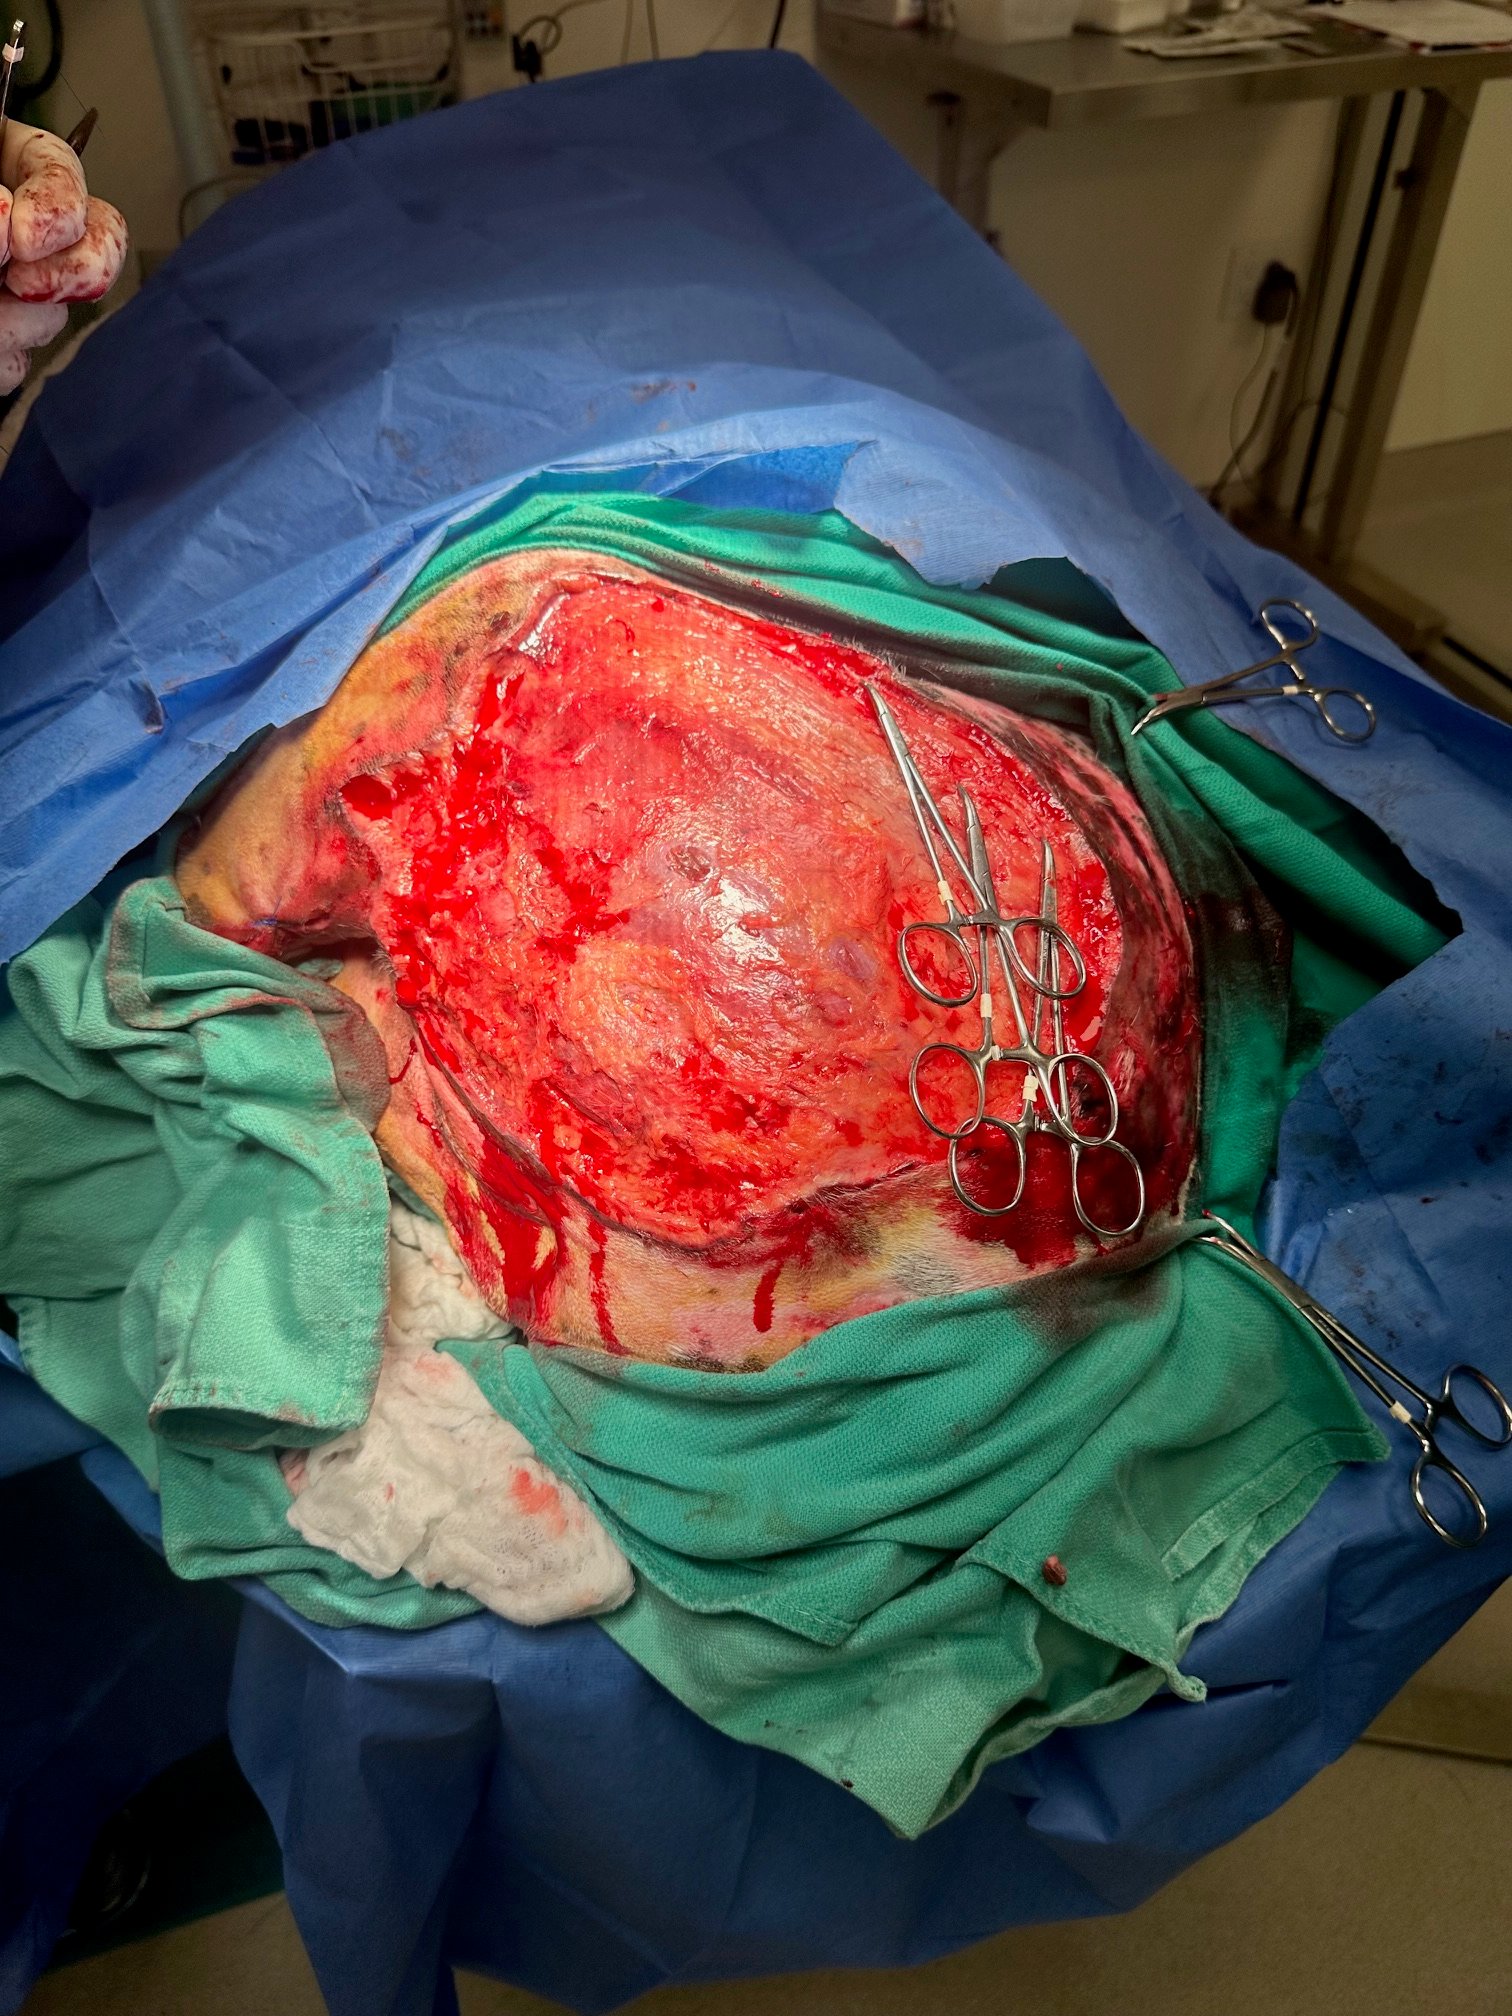
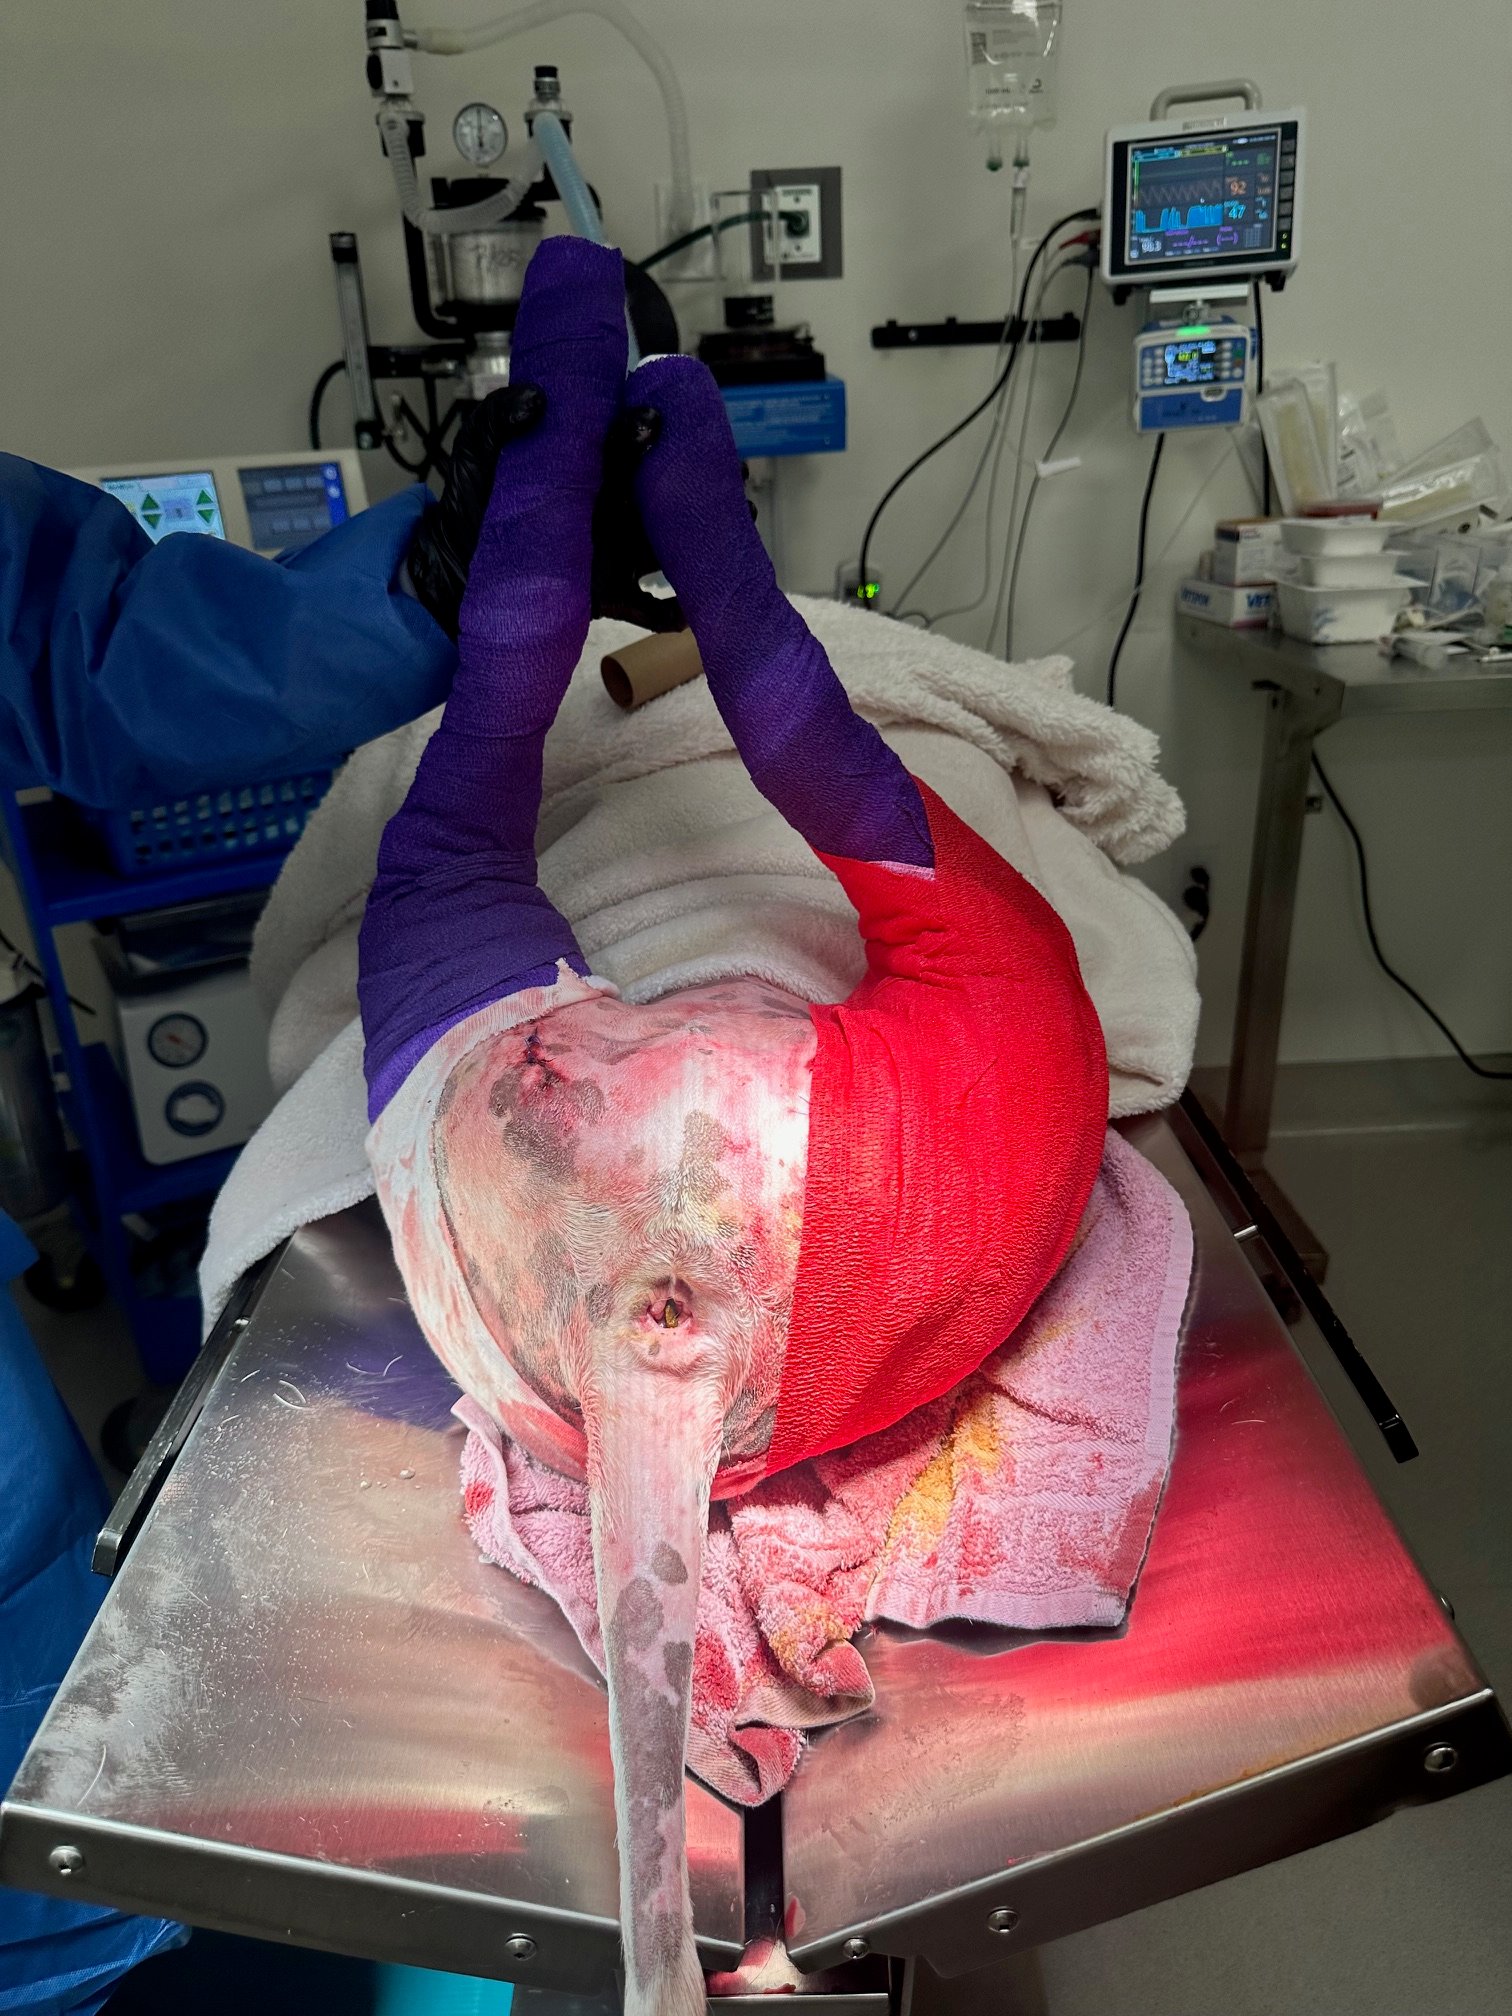
Day 8
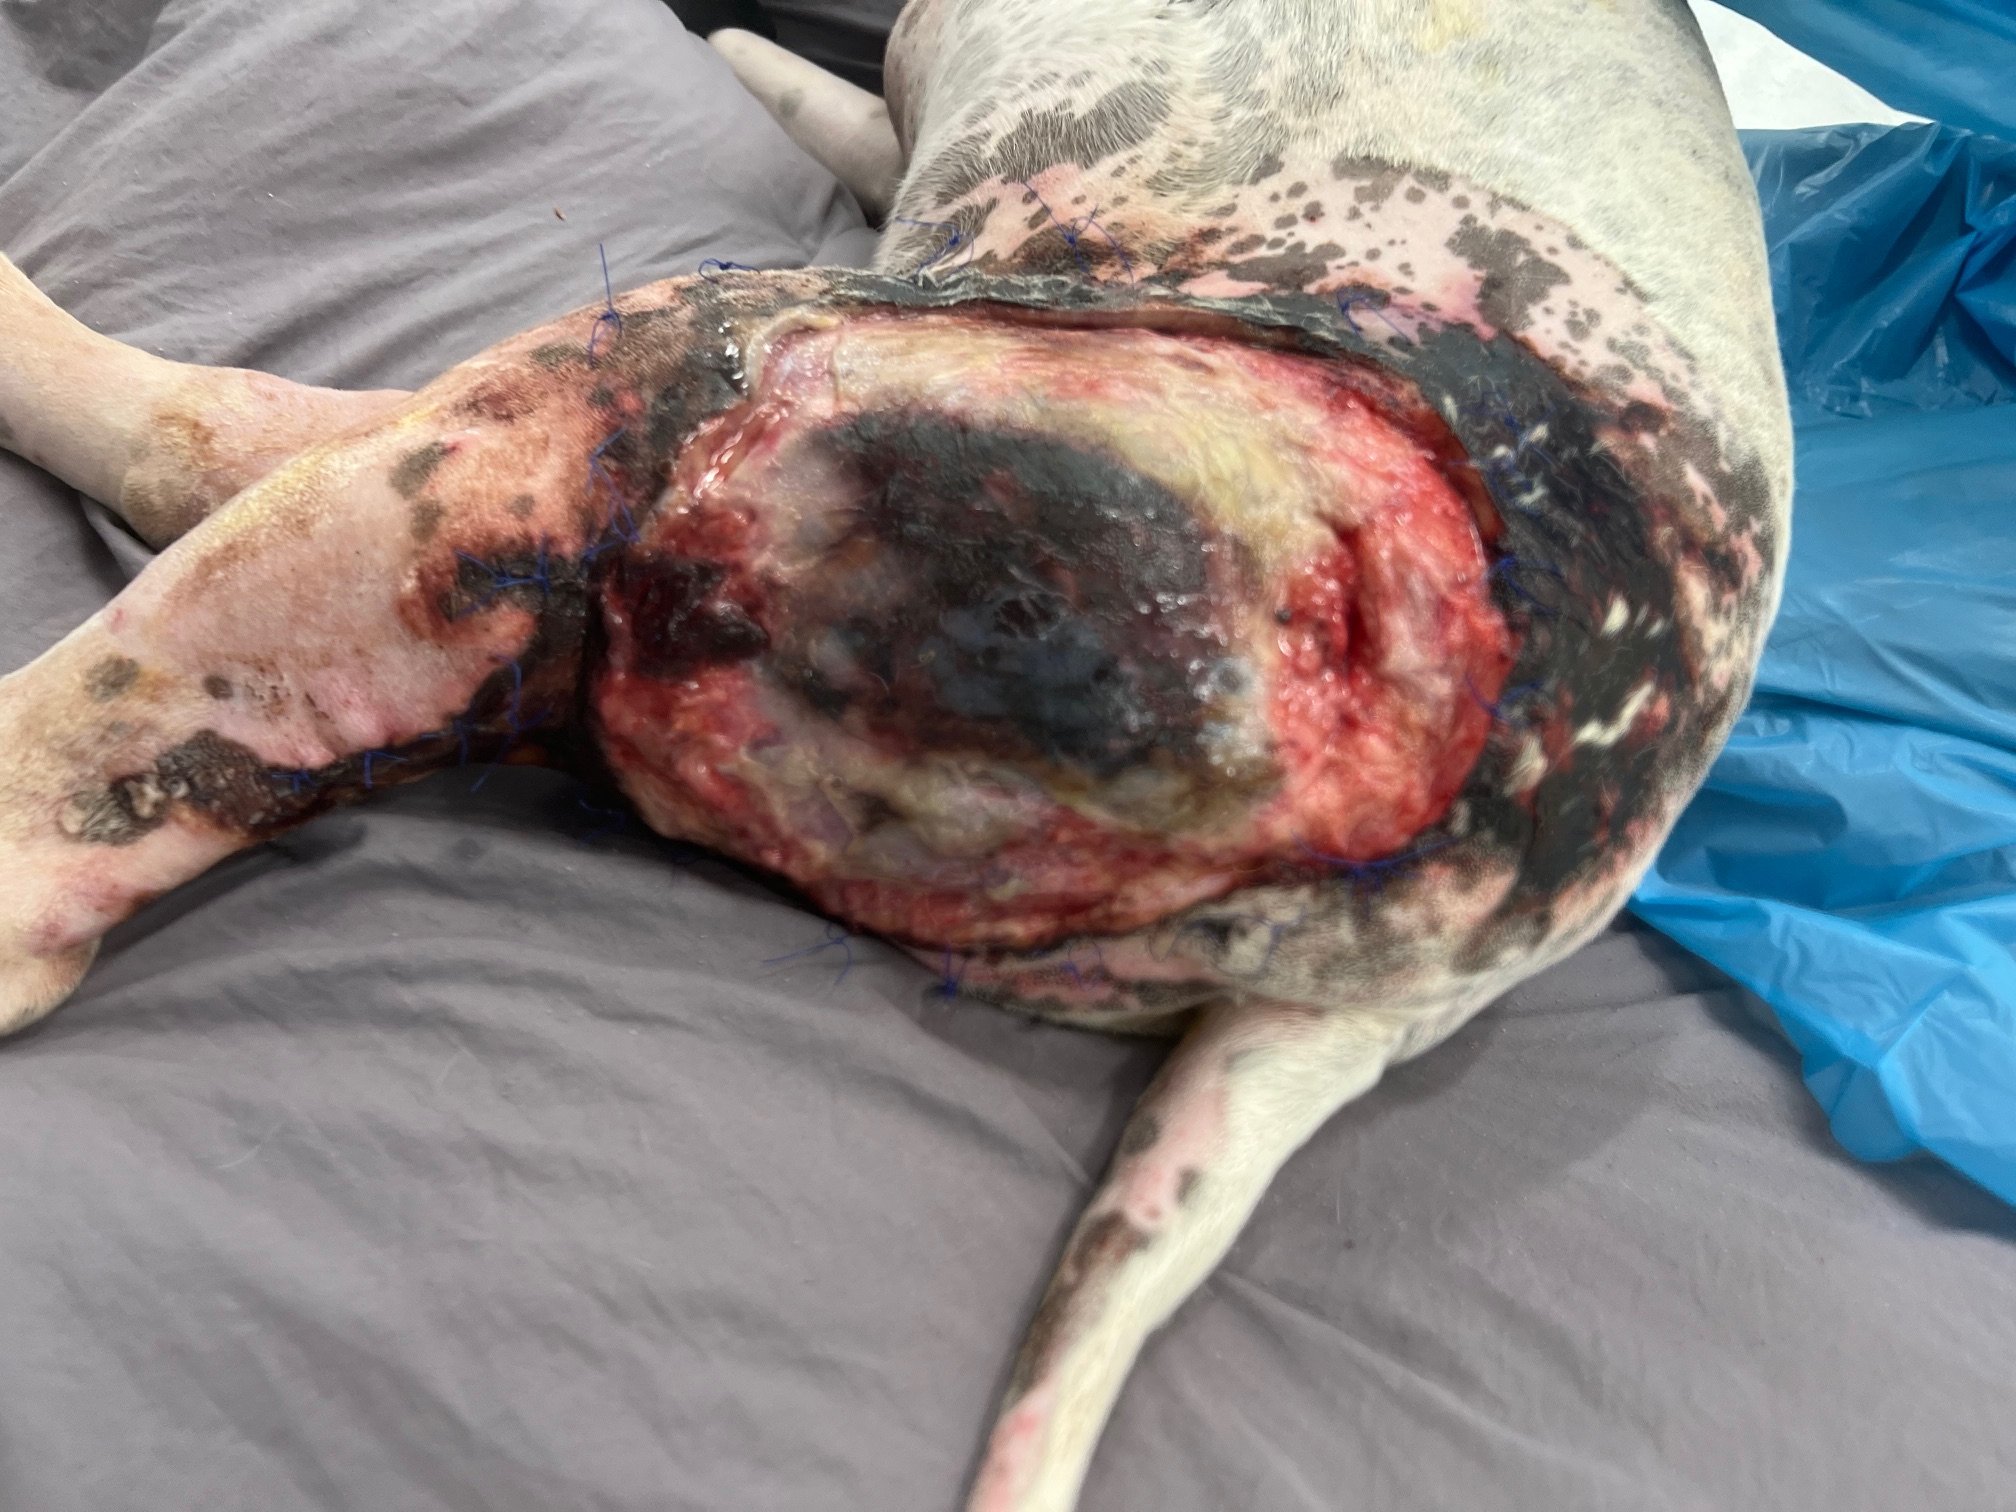
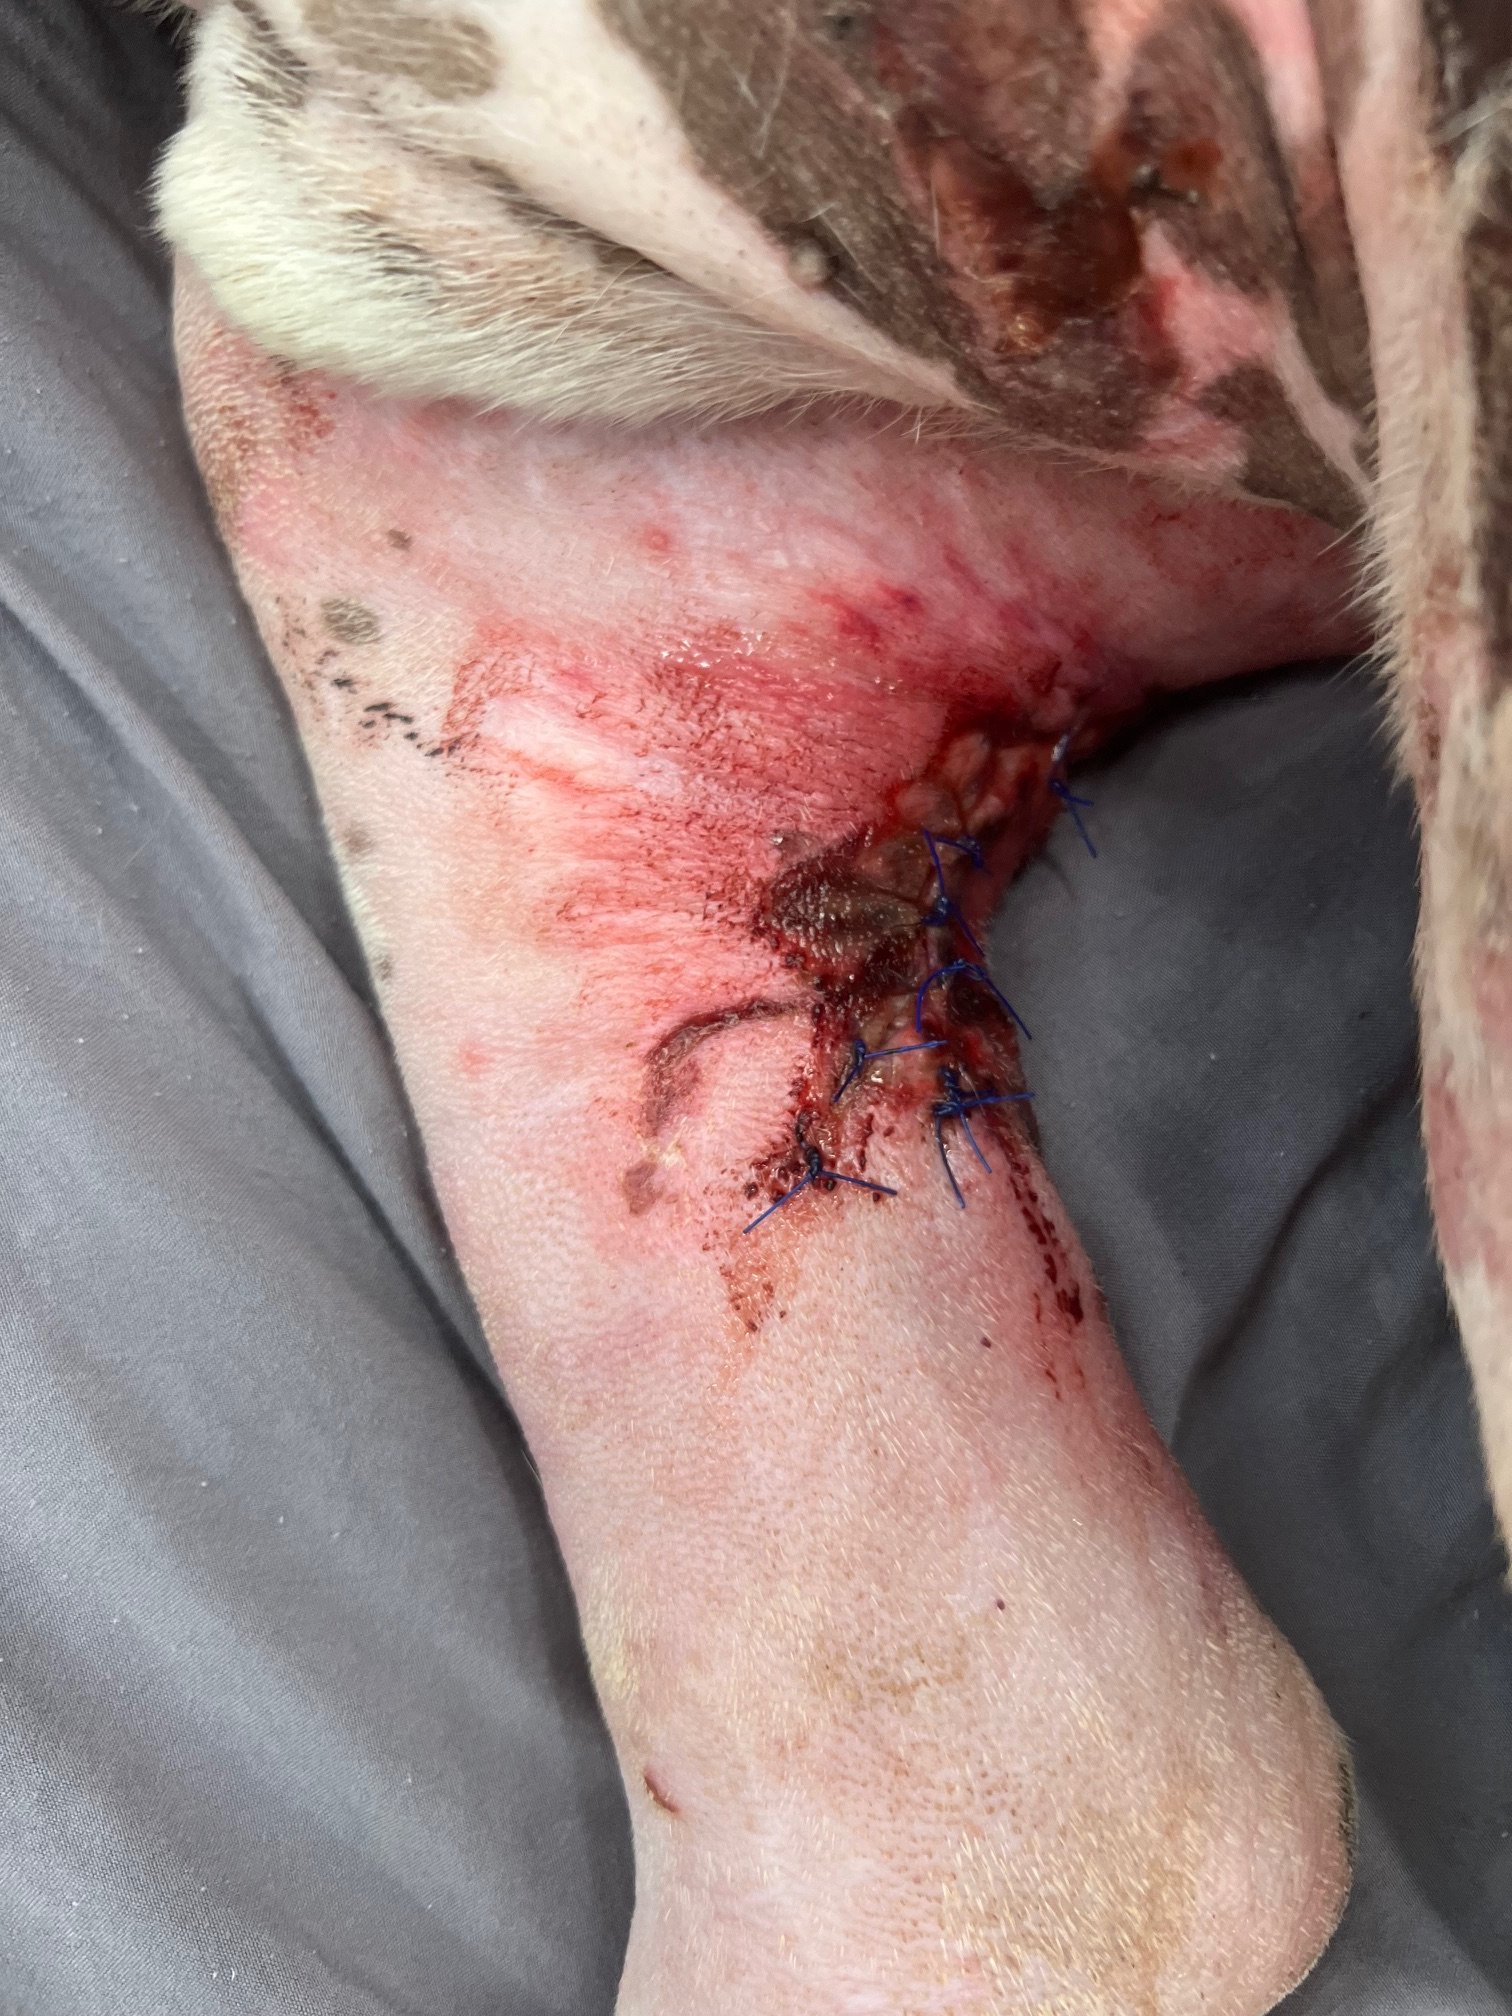
Day 9
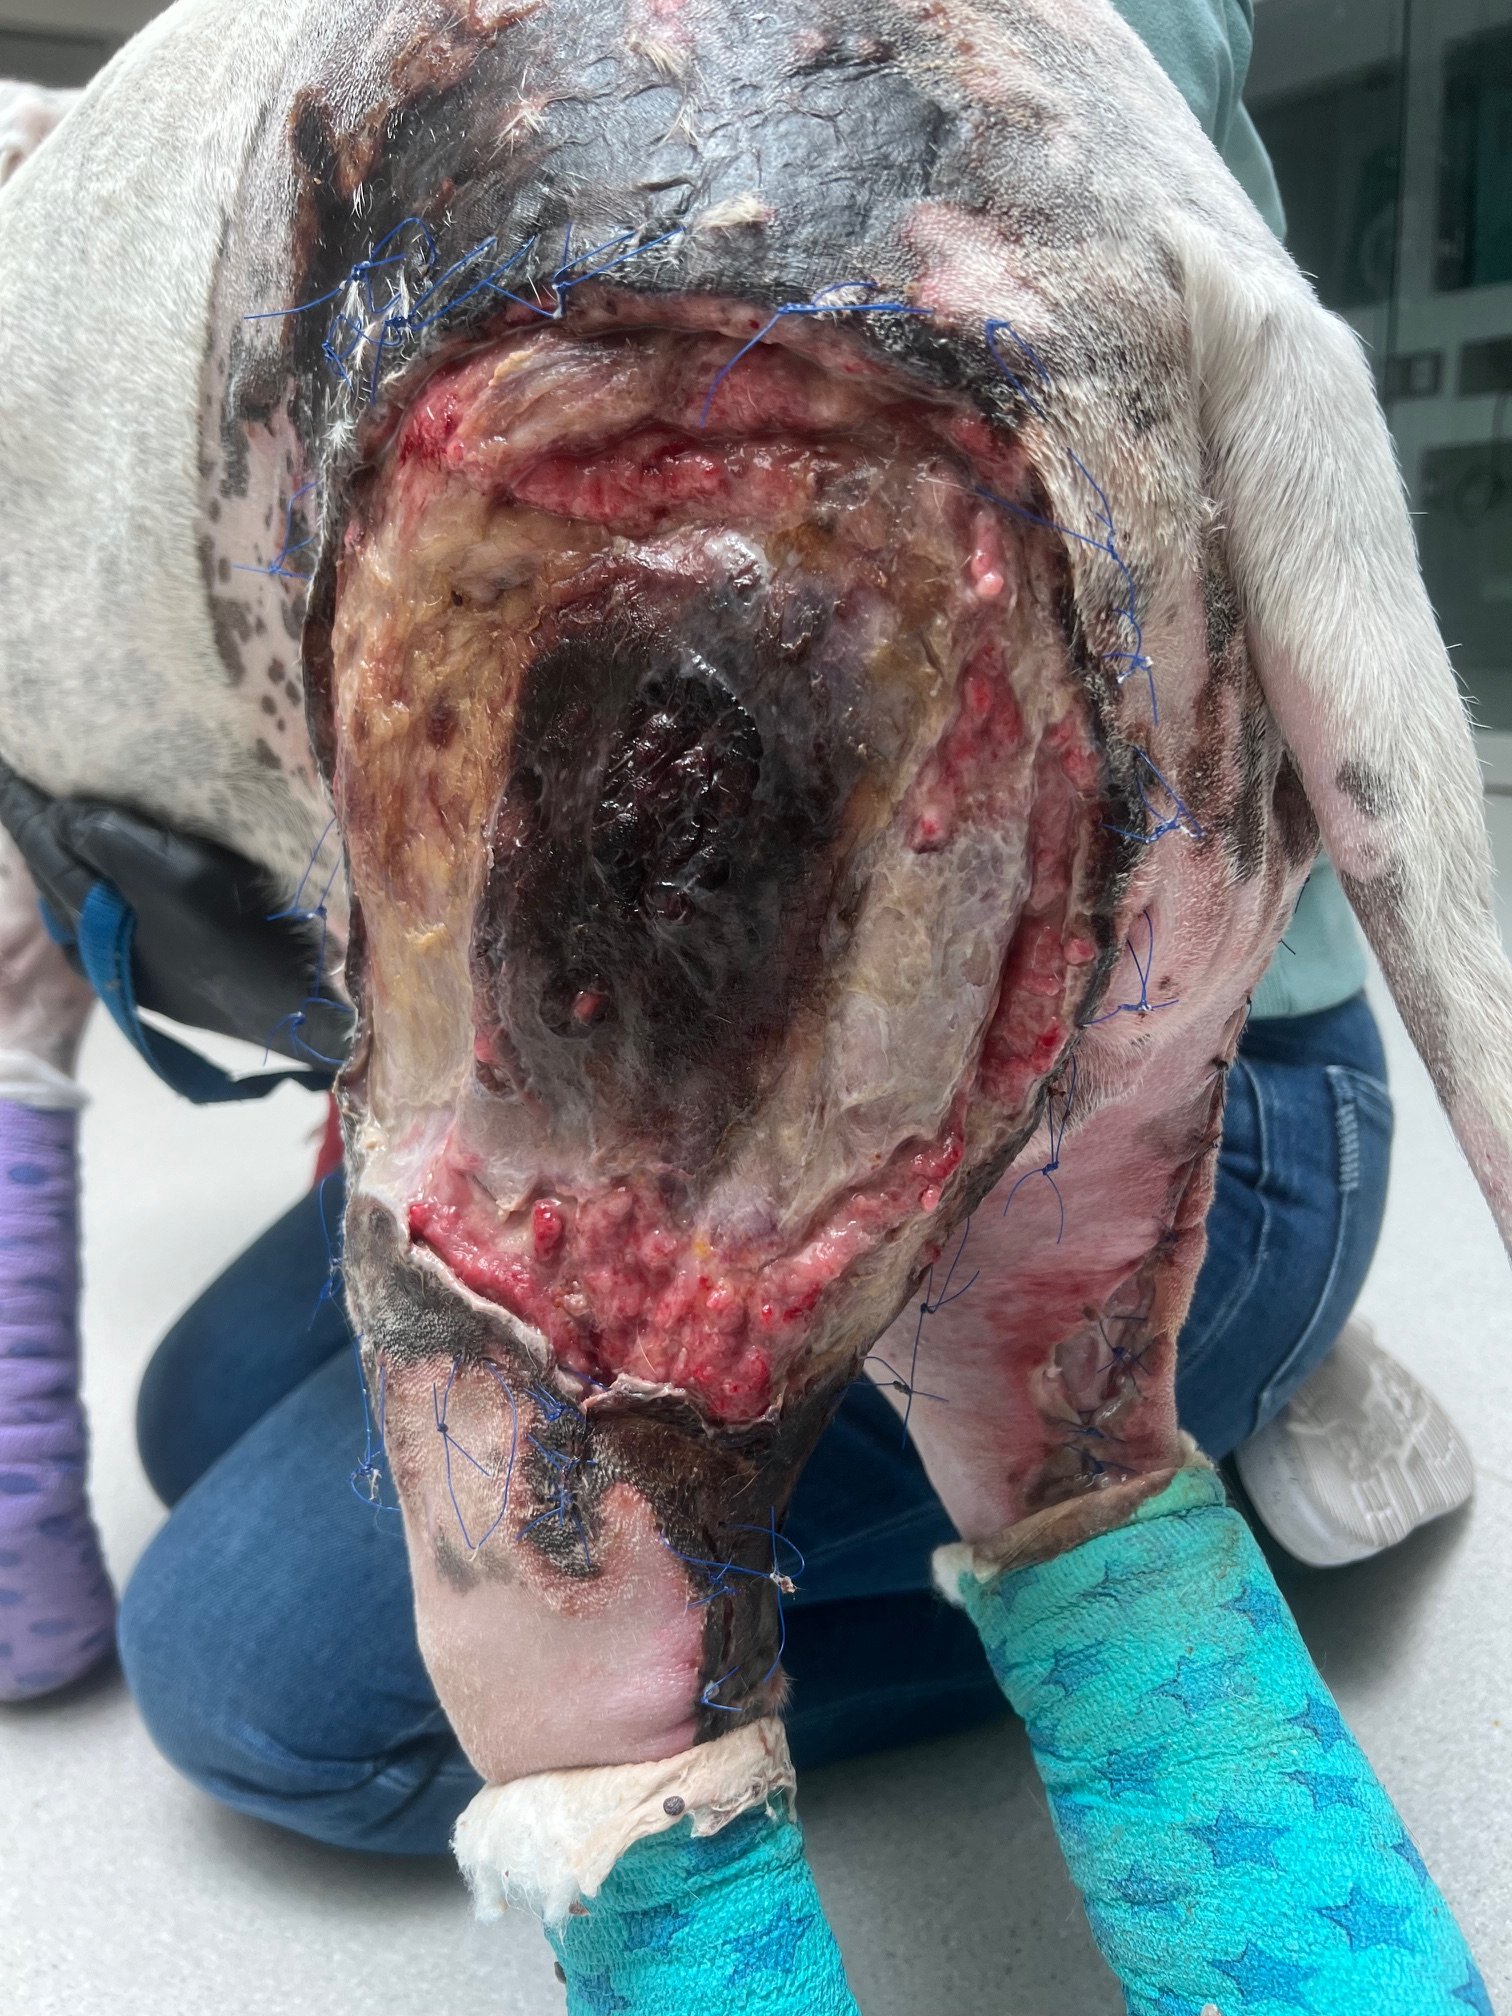
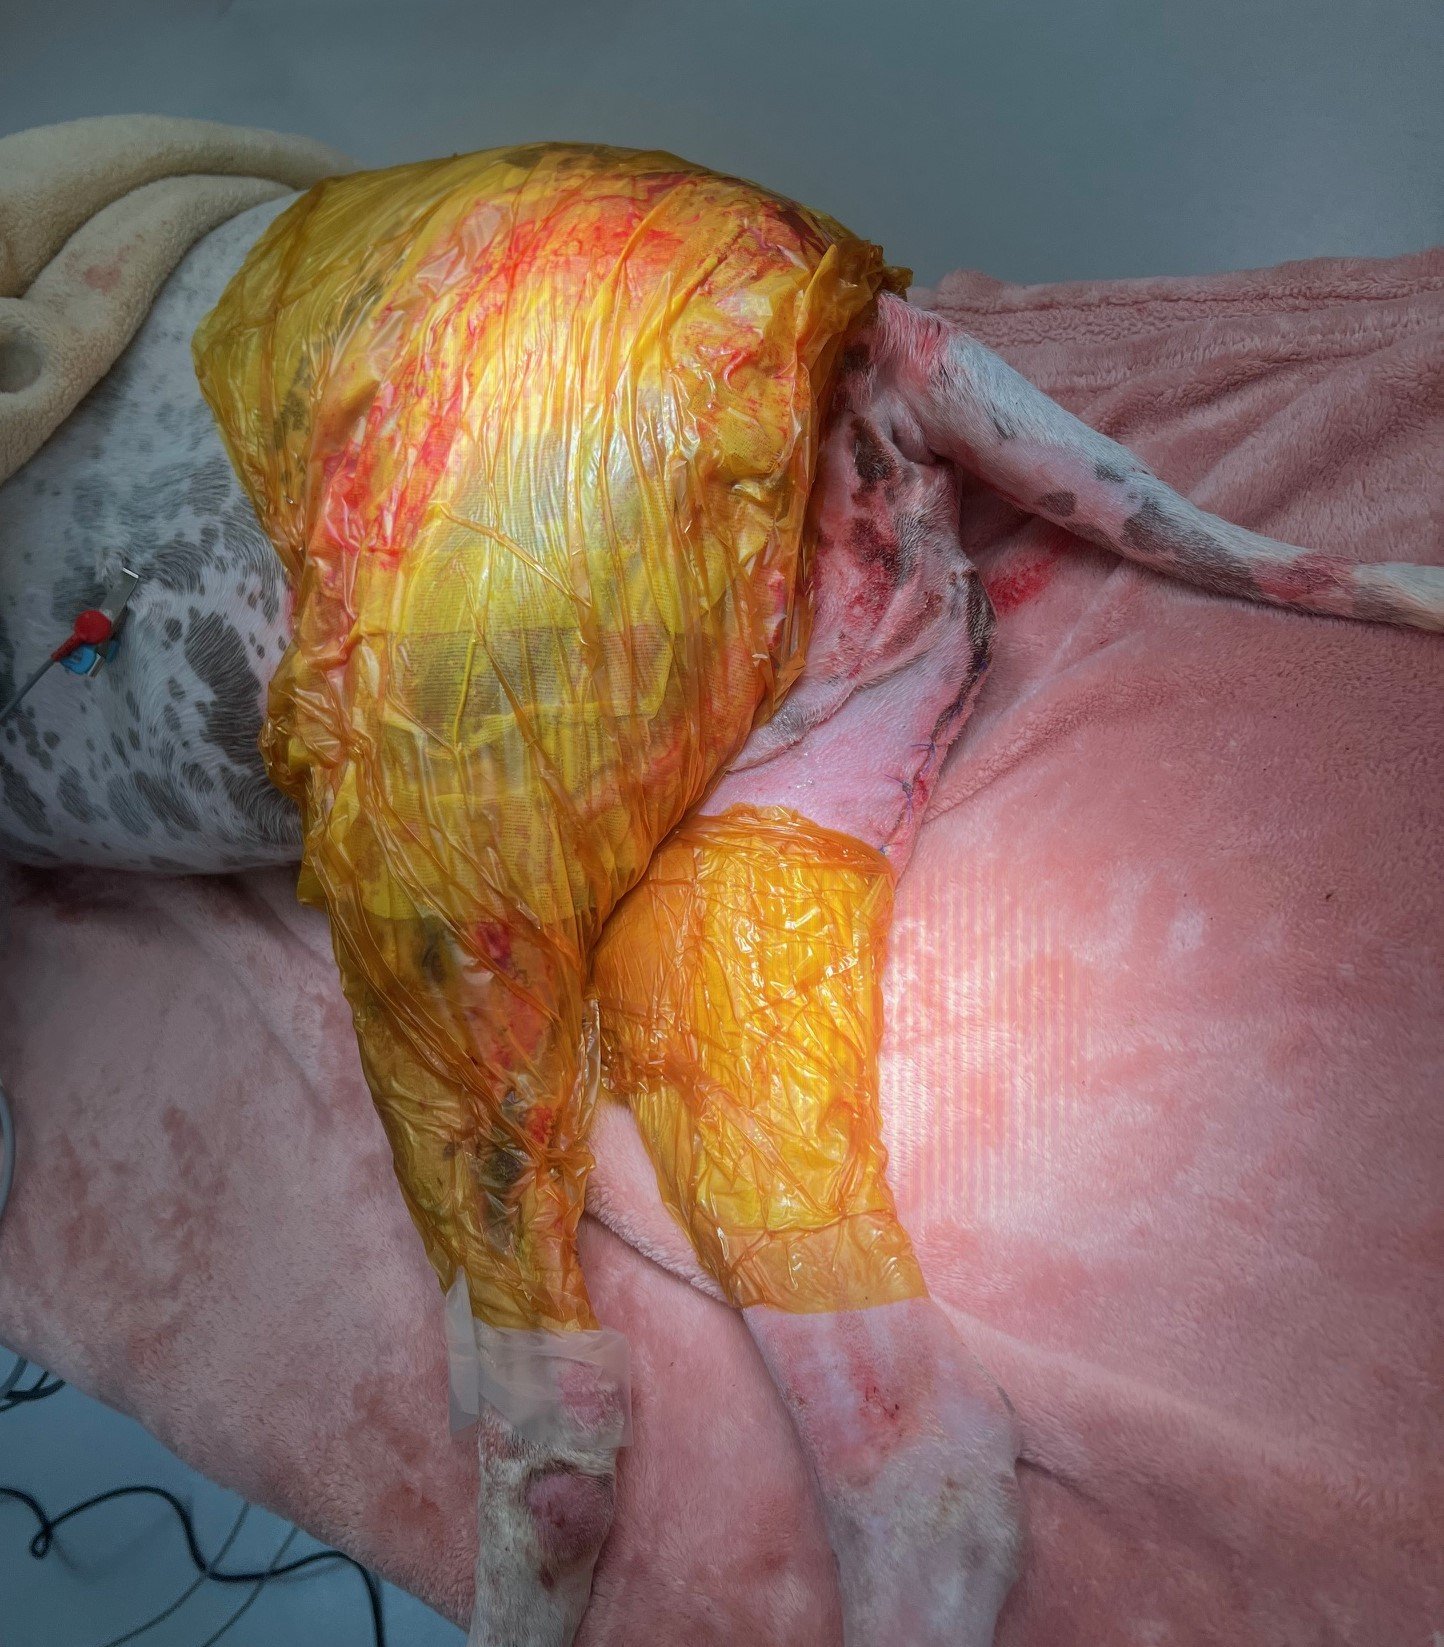
Wound Vacuum
A wound vac was ordered from 'The Wound Vac Company' to improve the wound environment and promote the development of a healthy wound bed for skin grafting.
Wound vacuum bandages need to be changed every 1-7 days. Bandage changes start more frequently at first and decreasing with time as there is less drainage from the wound.
We were never able to maintain suction with the wound vacuum for greater than 12 hours due to the extensive nature of the wound, there was notable difficulty obtaining a lasting seal around the caudal aspect of the wound near to the tail and anus. Despite this set back. The wounds responded really well to the wound vacuum and developed beautiful granulation beds over a period of 7-10 days.
Day 10
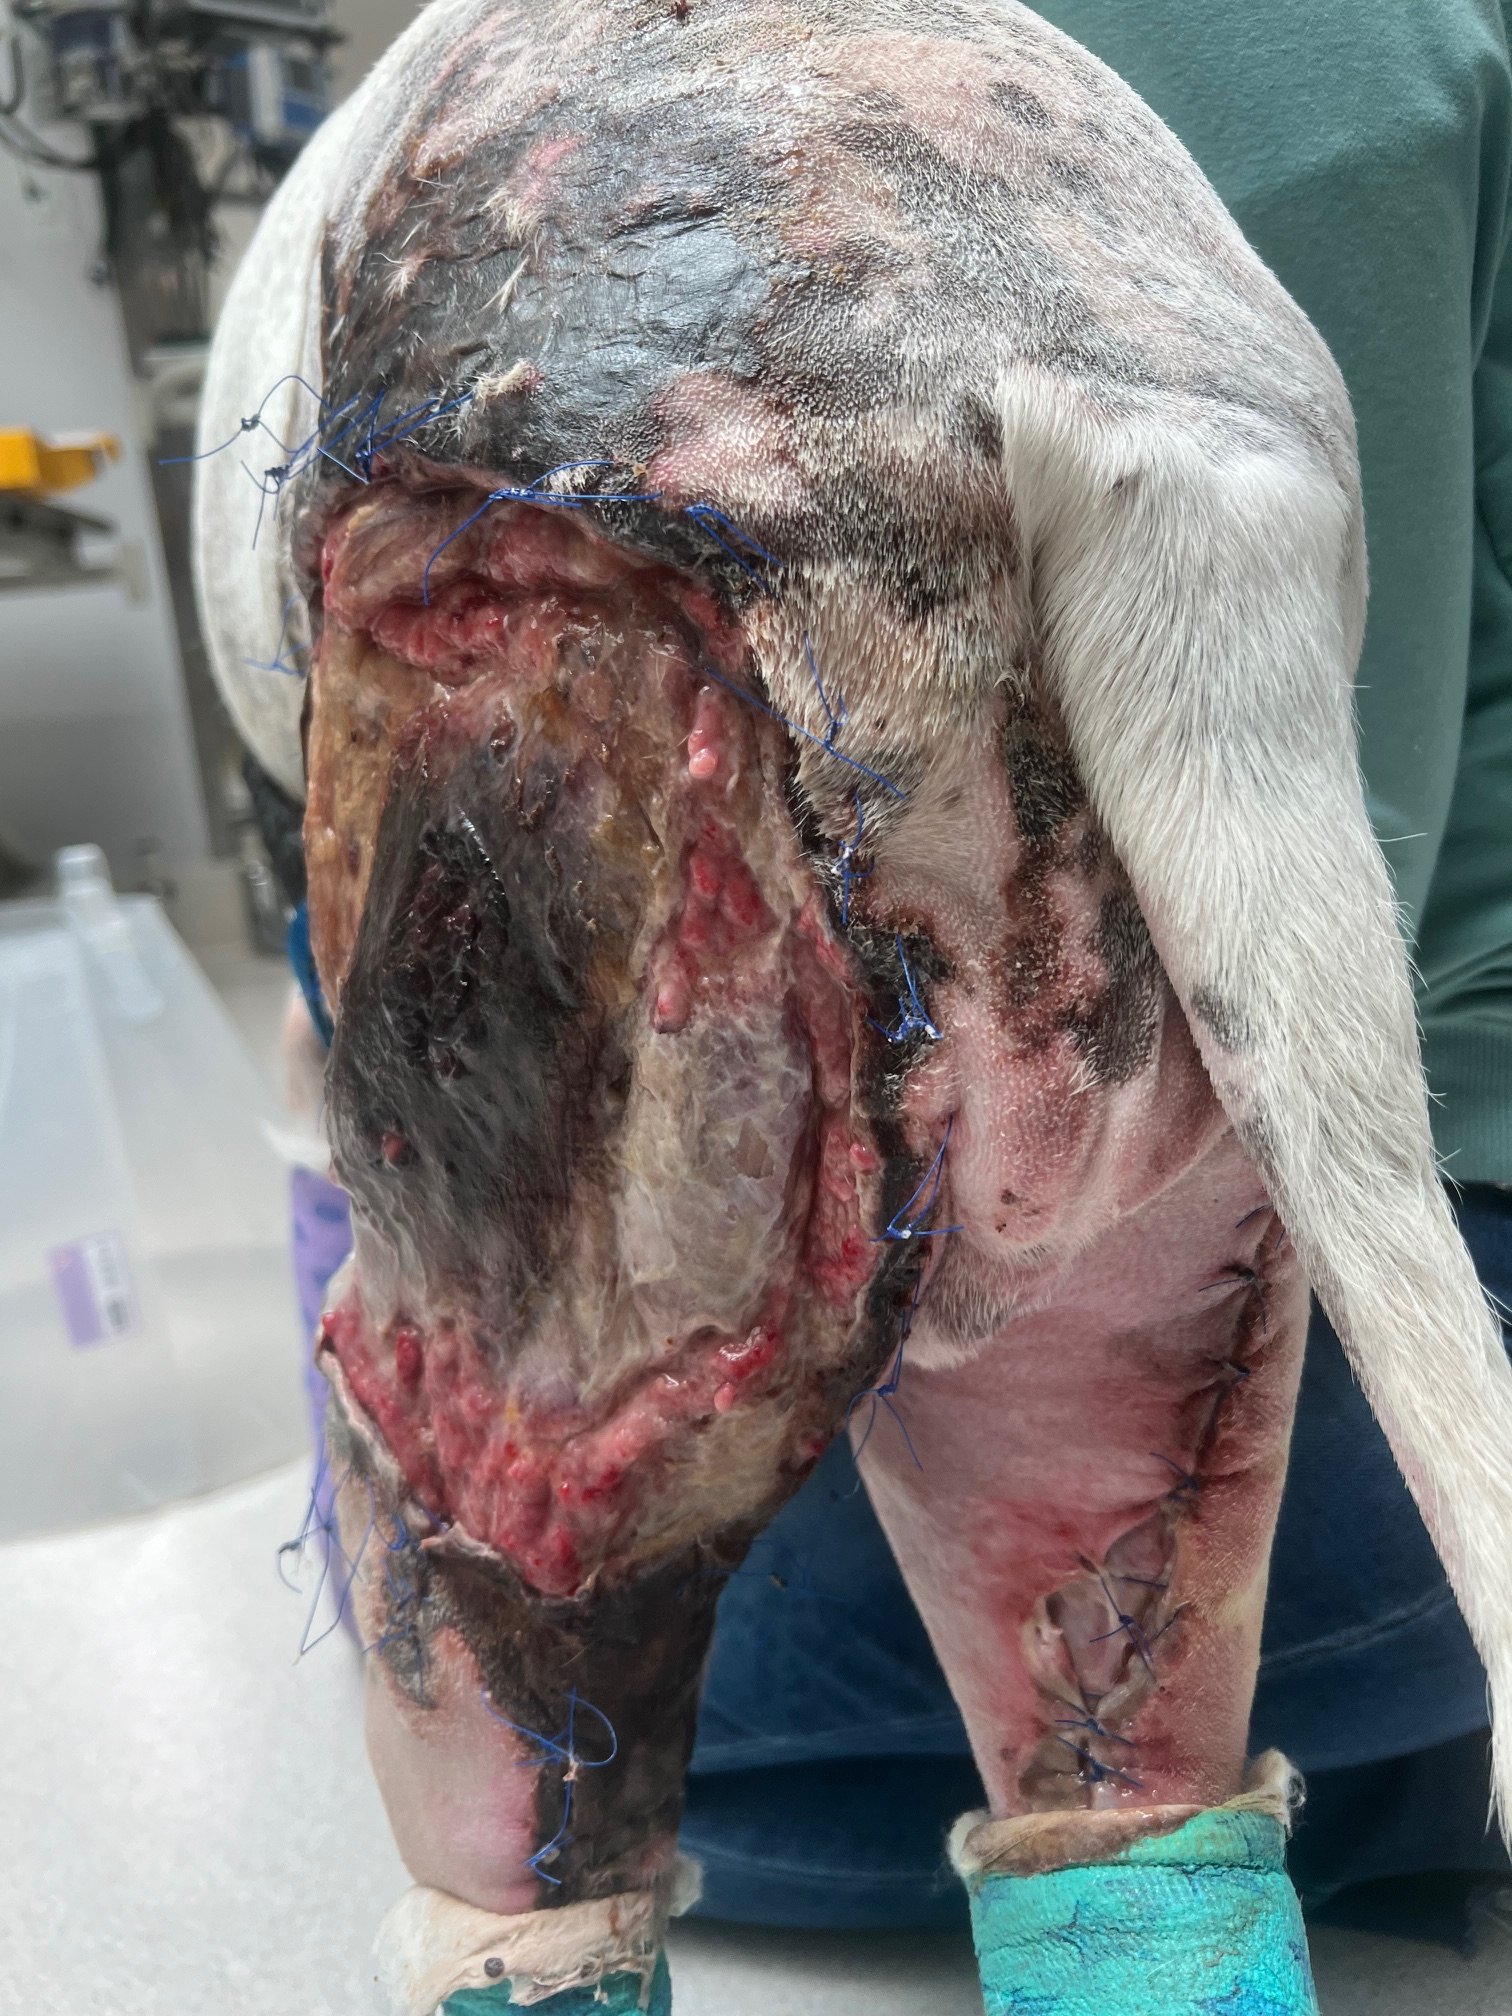
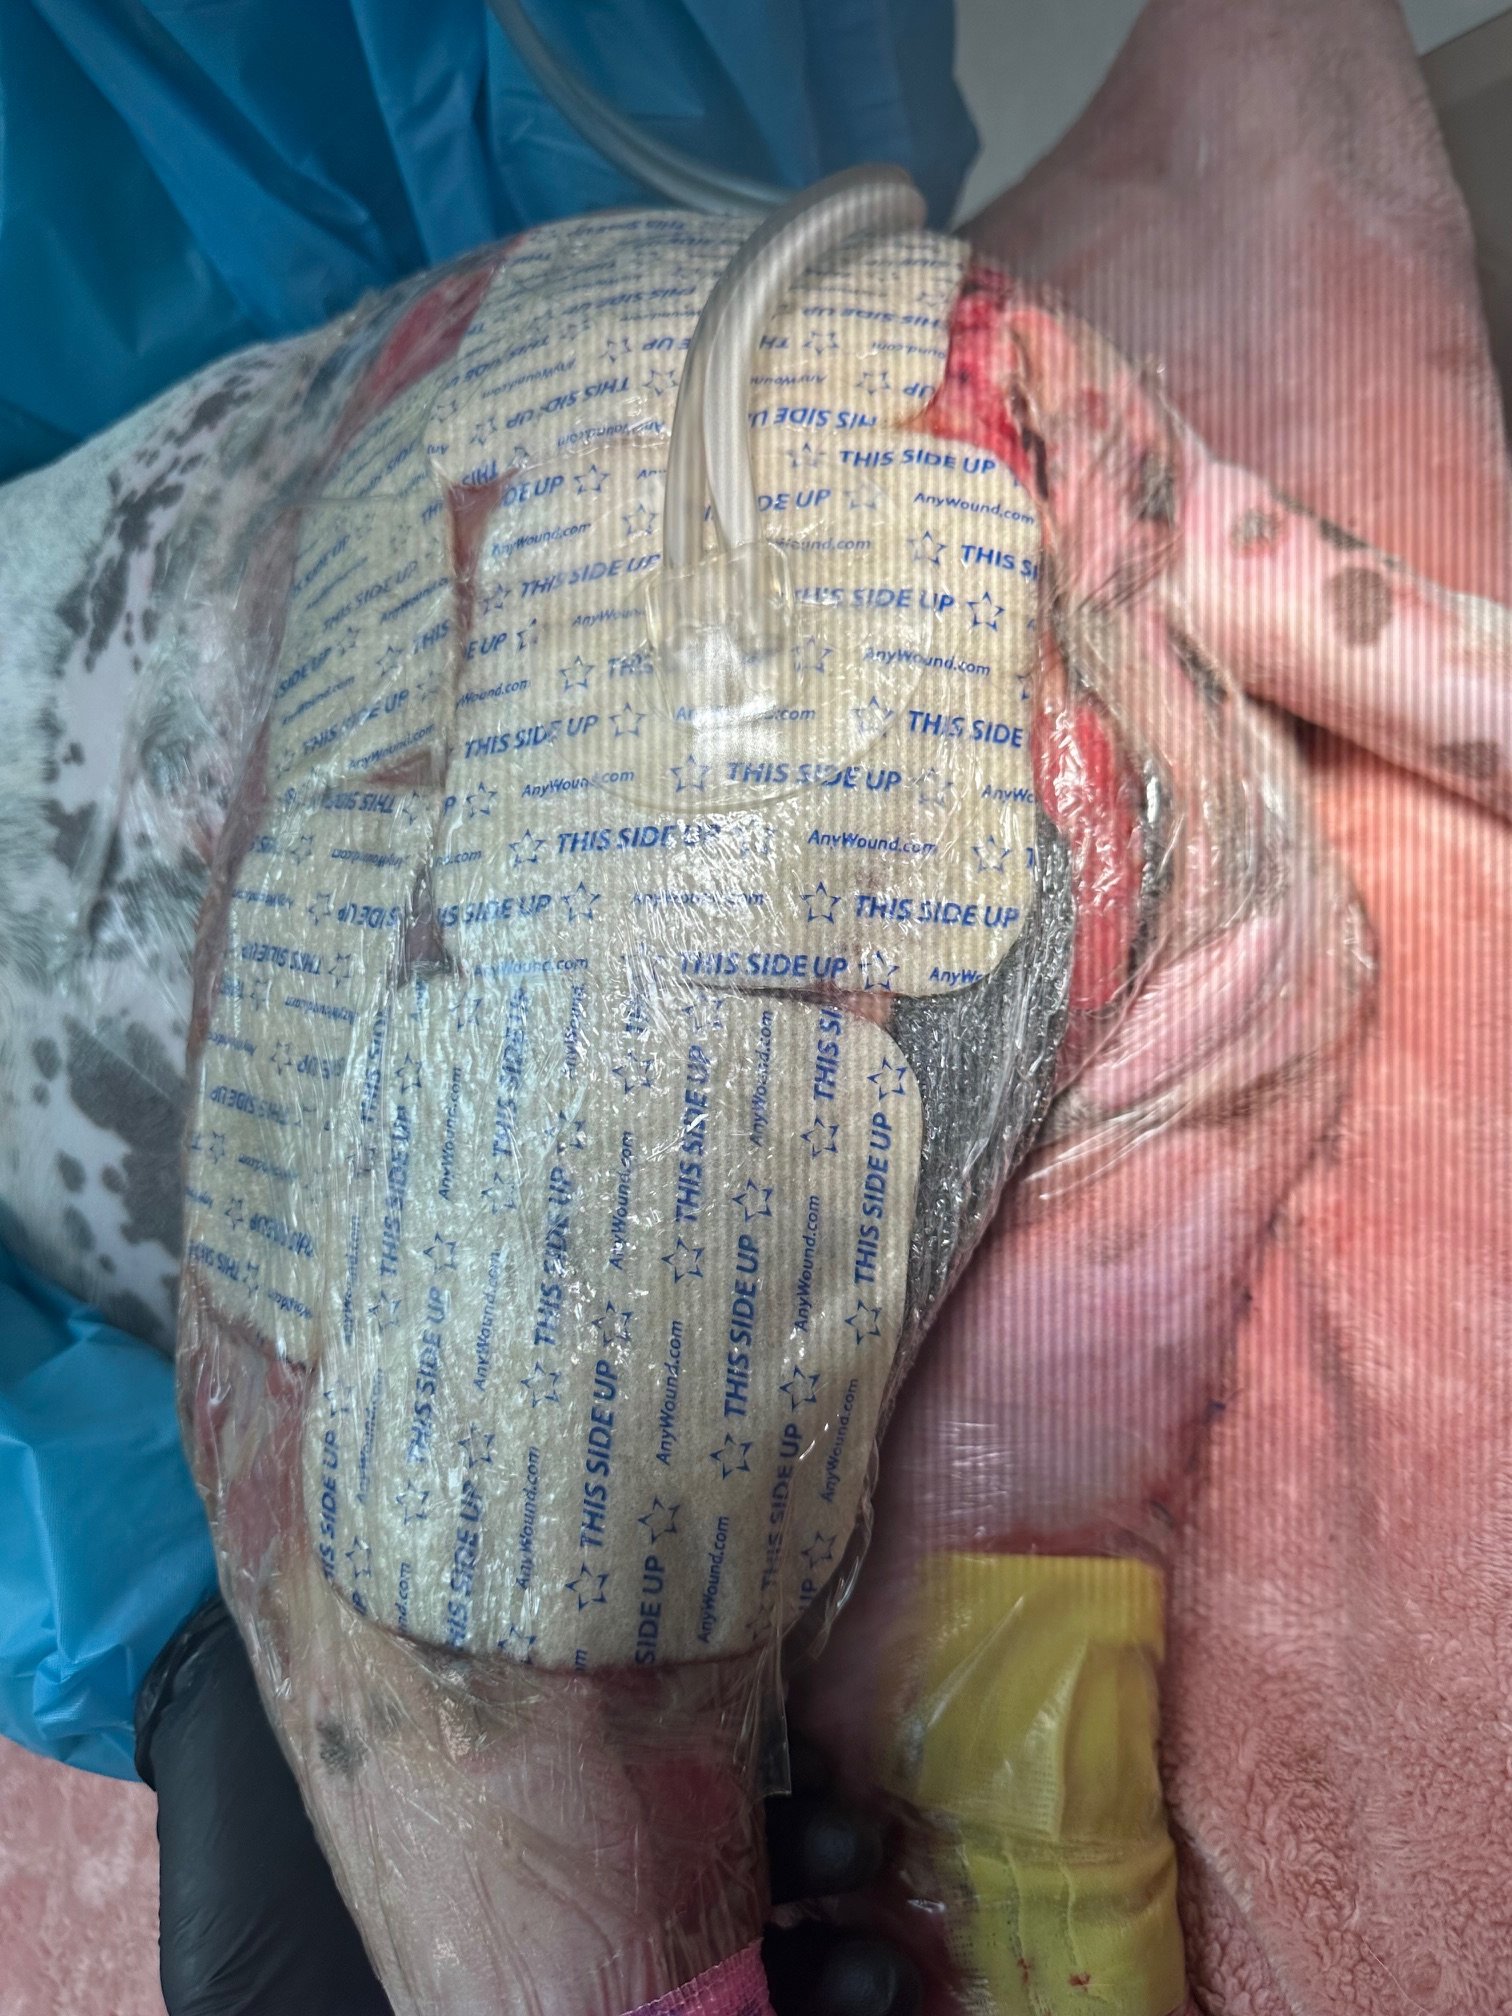
A culture was obtained to check on bacterial flora. Charlie was prophylactically placed on simplicef pending culture results. After culture and sensitivity results confirmed sensitivity of the enterobacter to simplicef, the course of antibiotics was extended.
Day 11
Day 13
Day 17
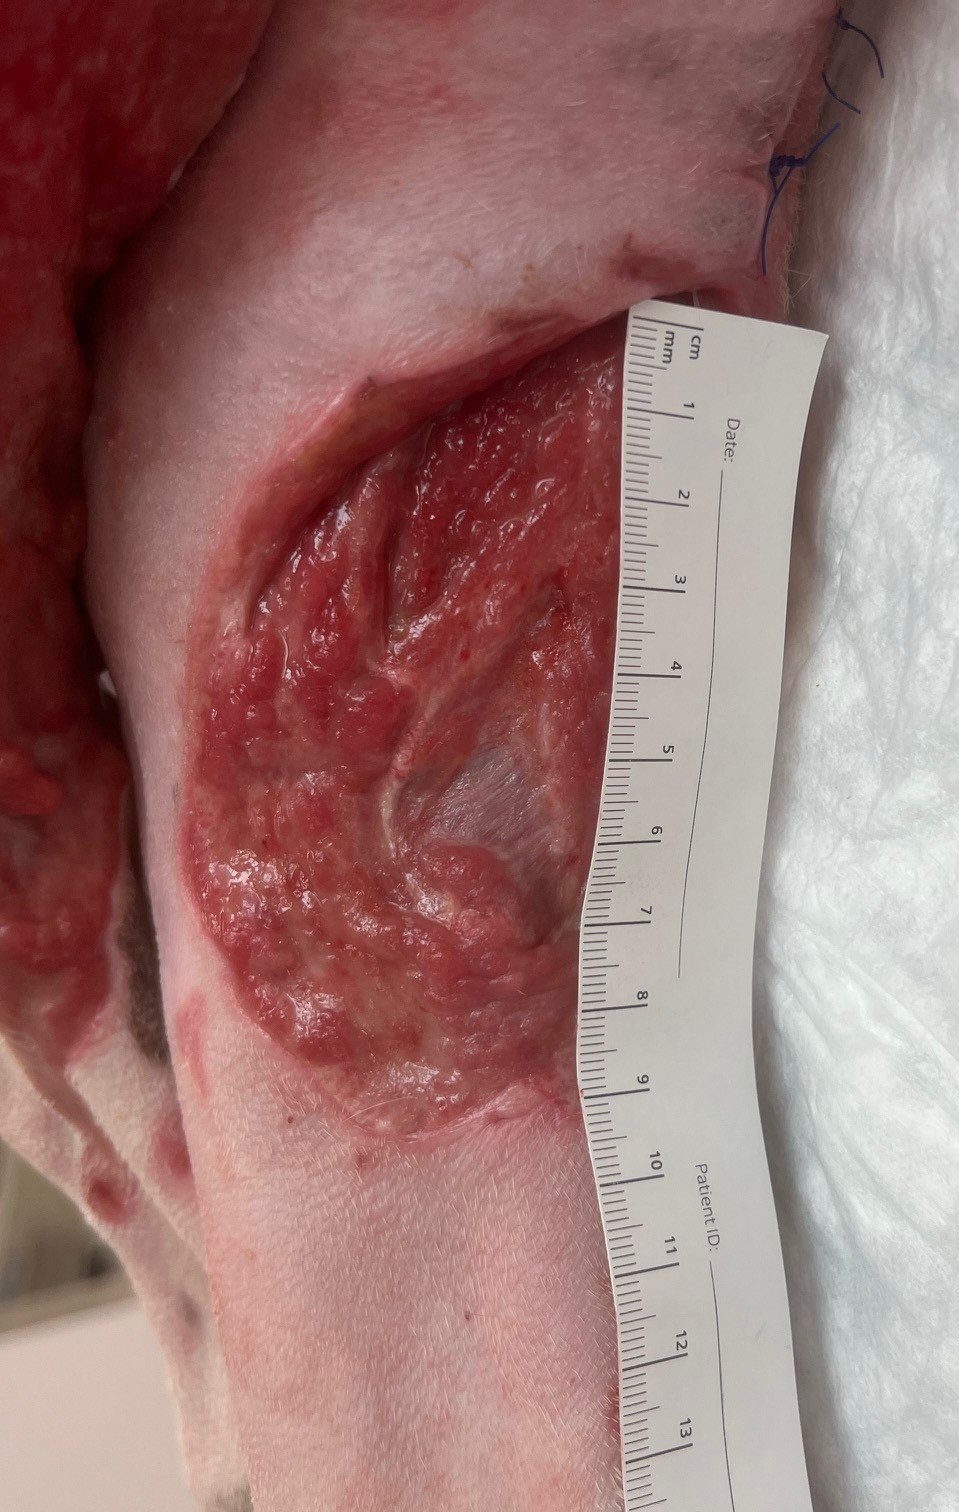
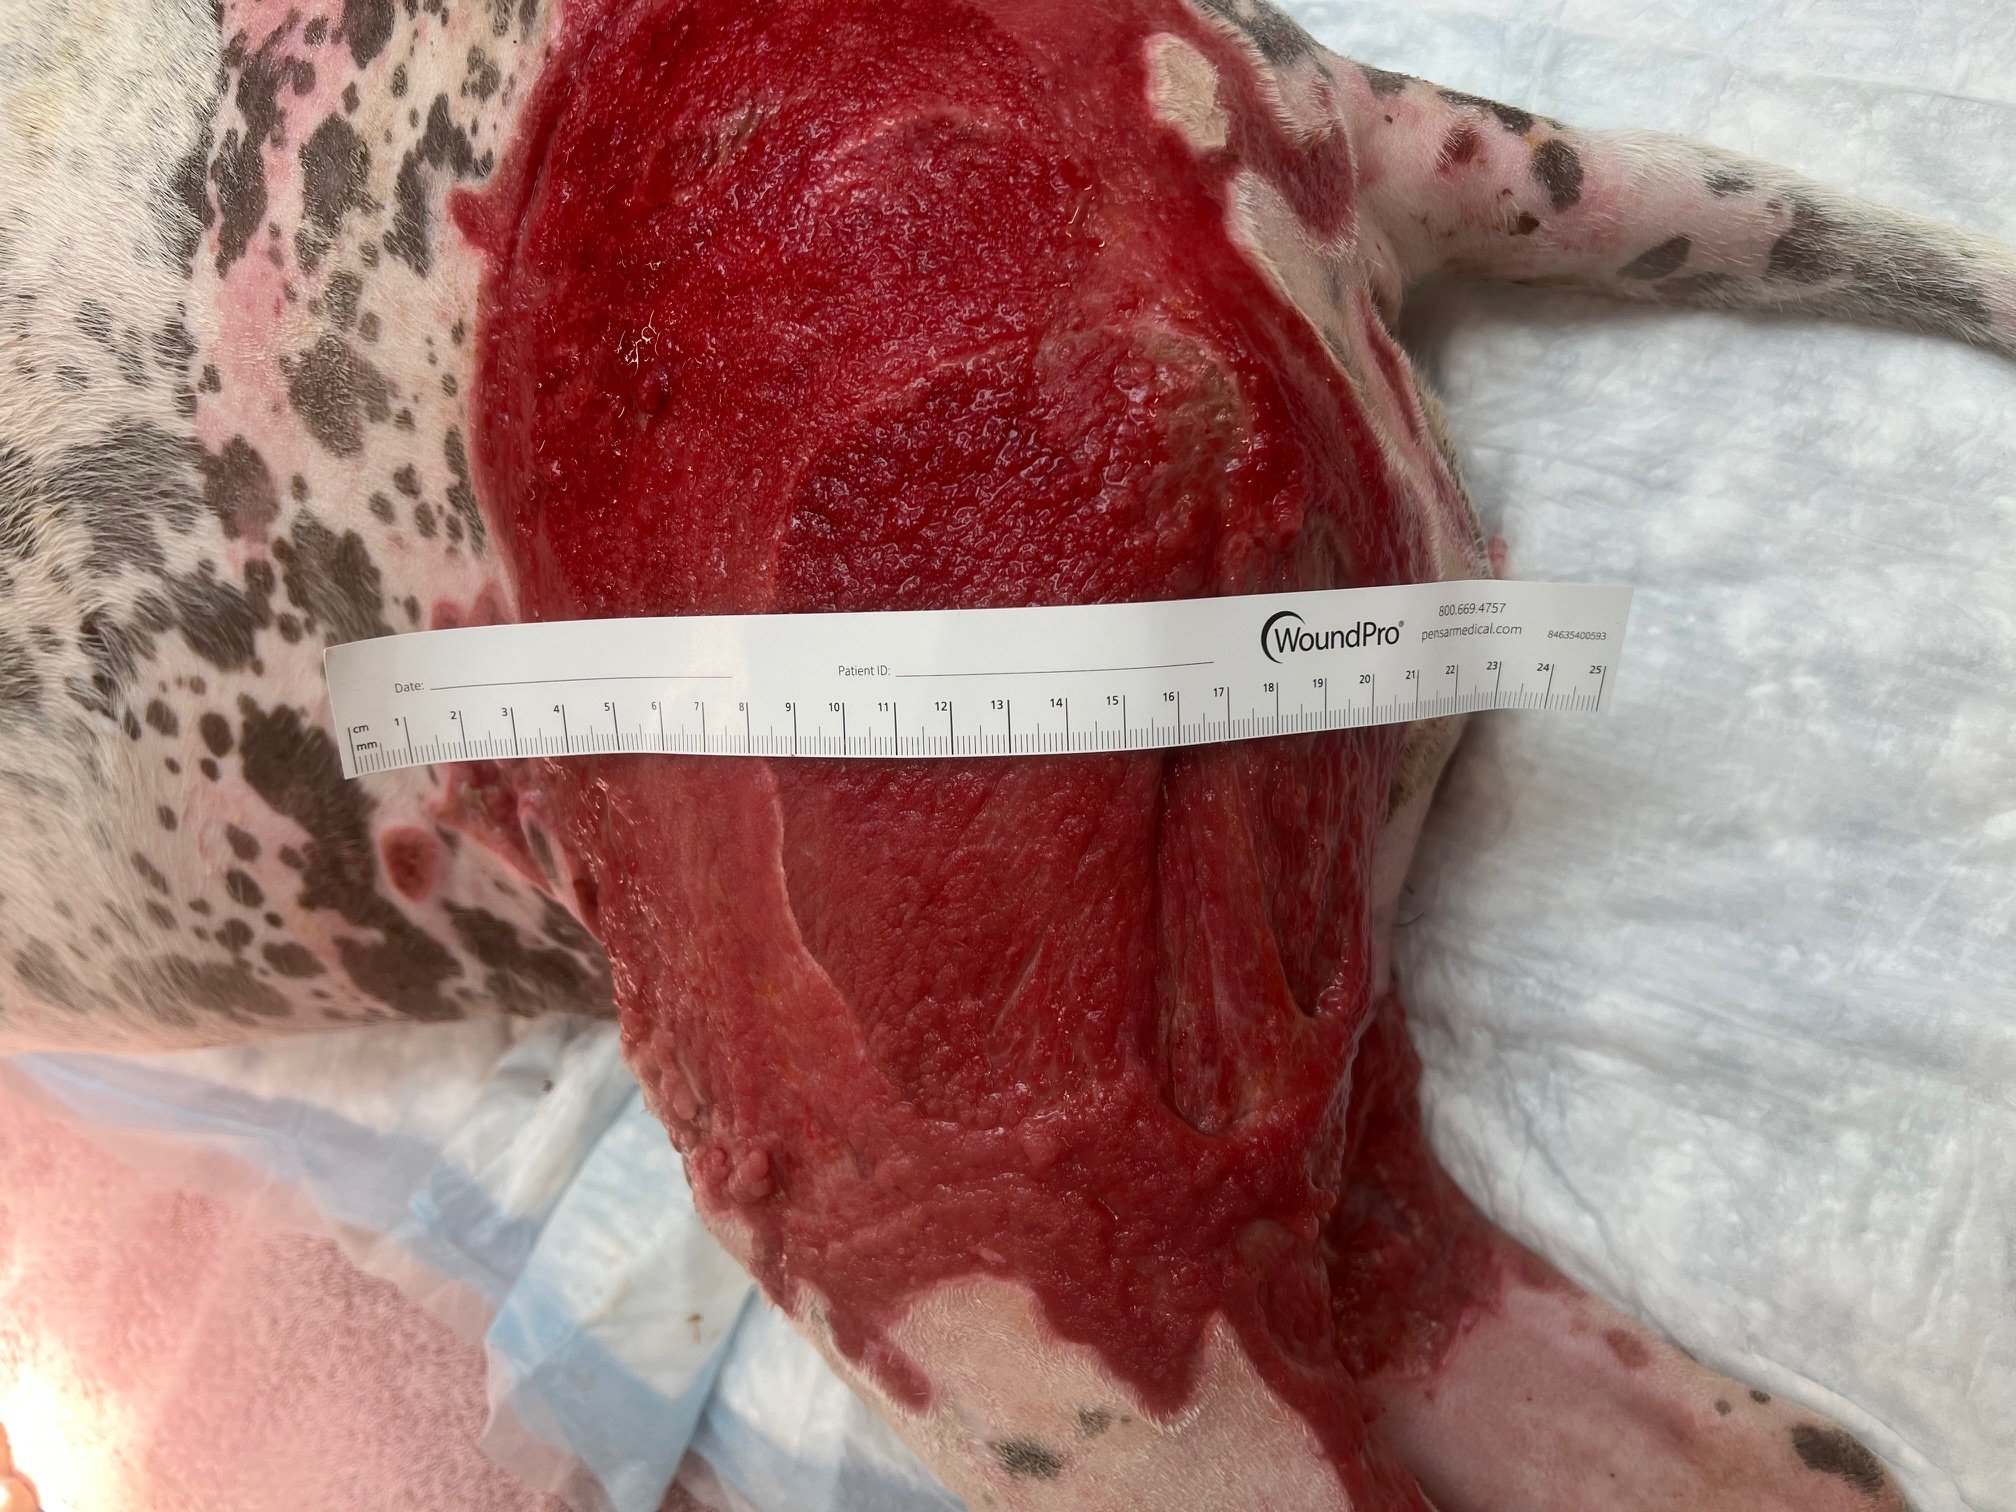
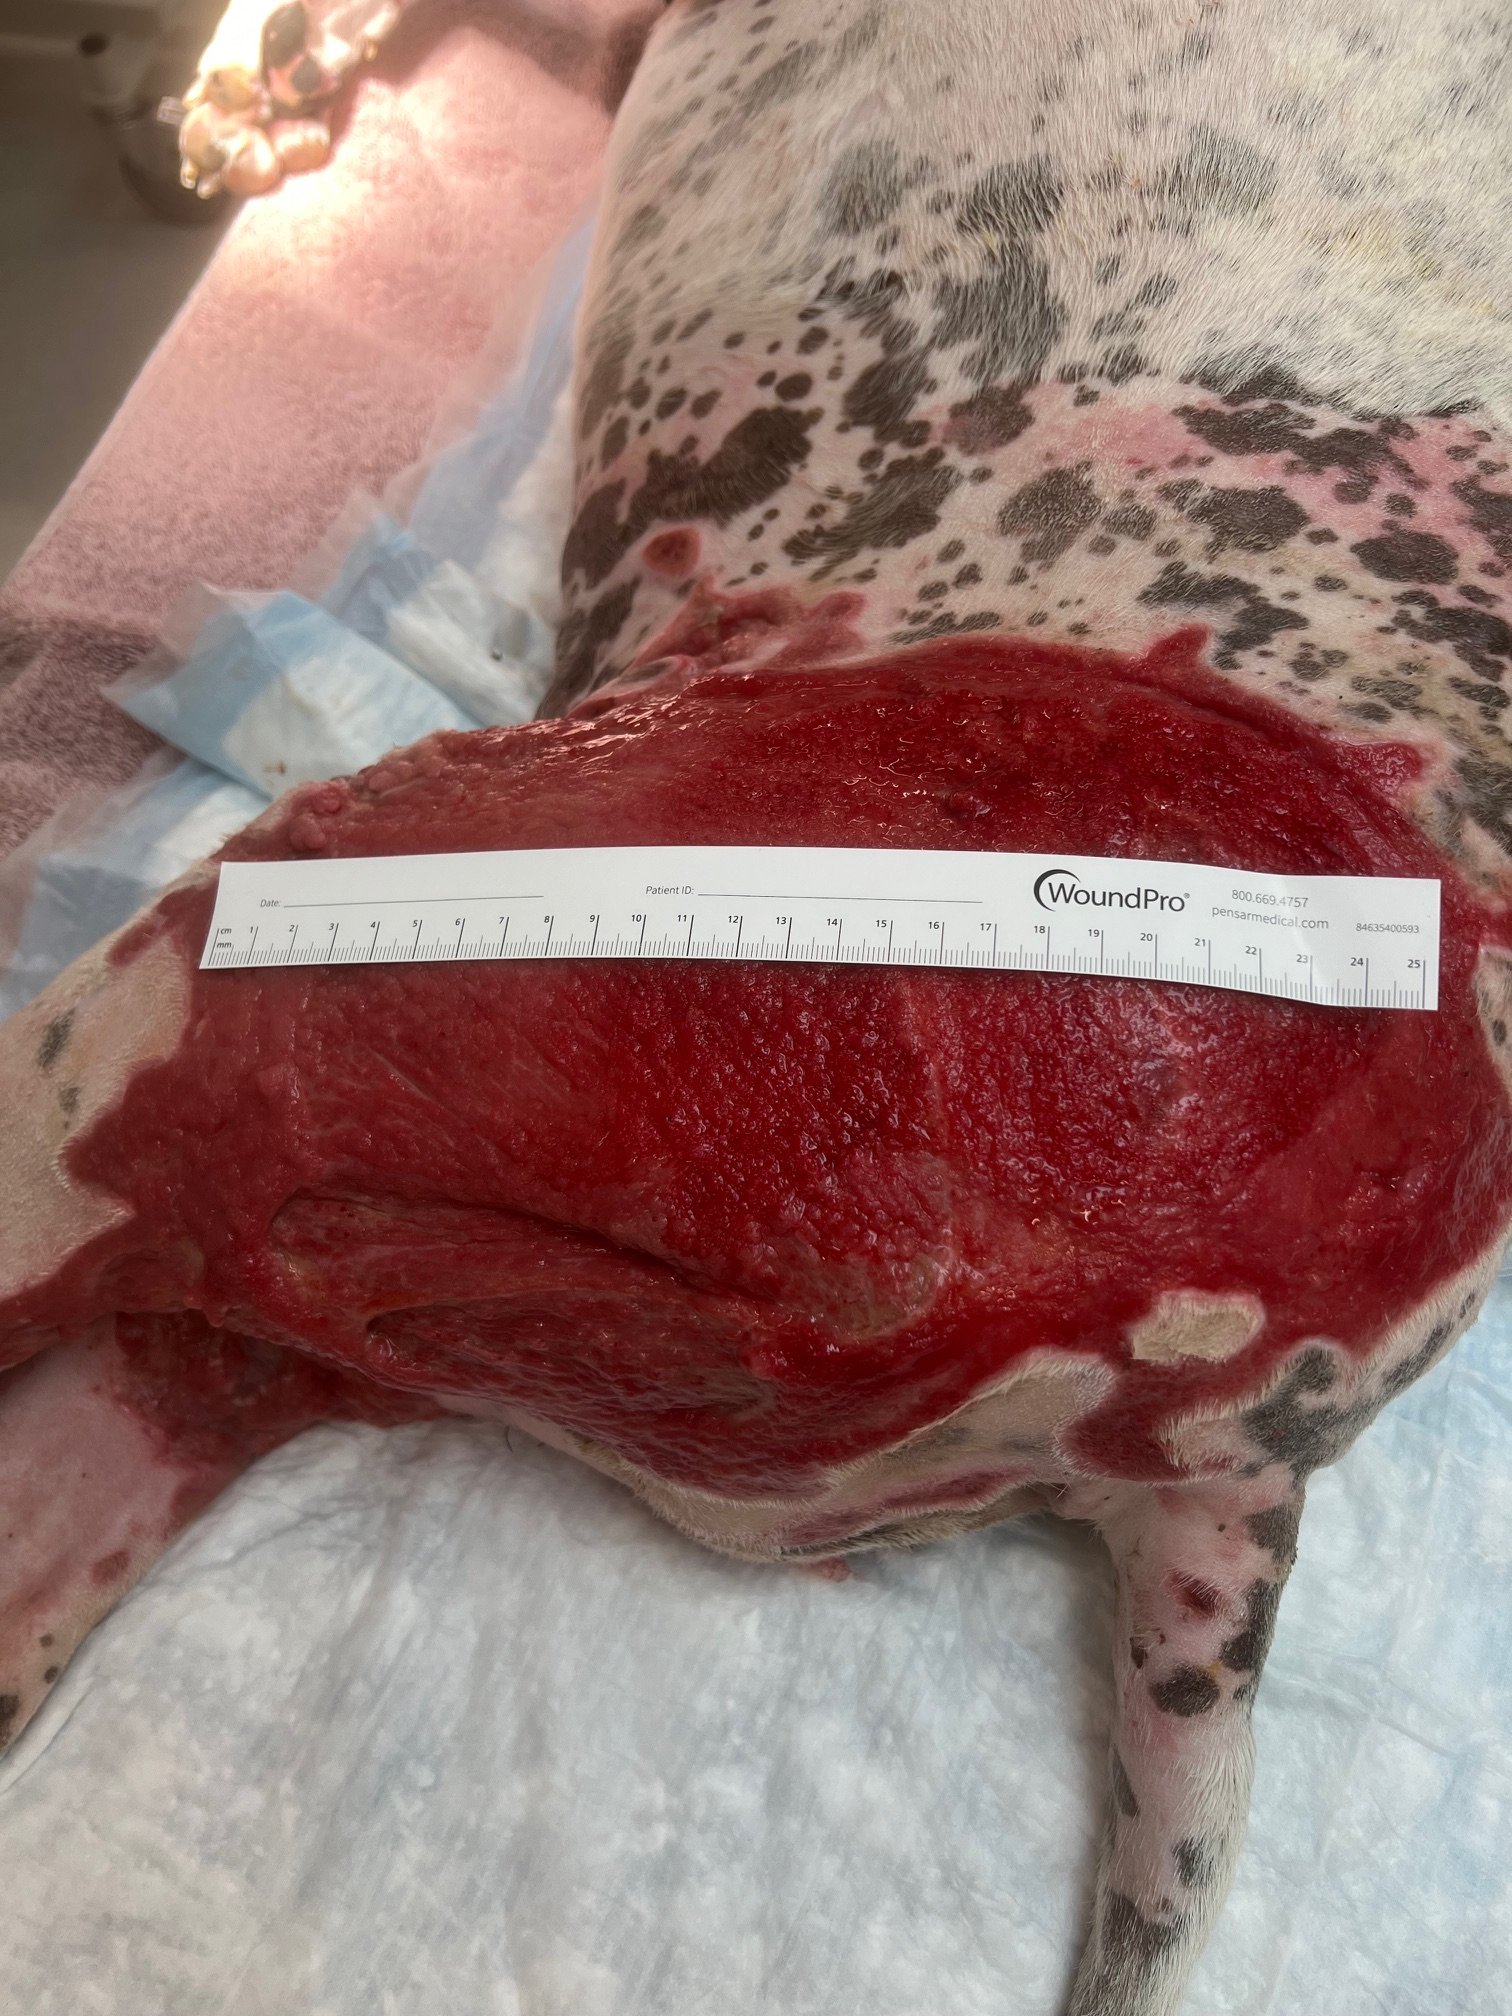
After 18 days of surgical debridement and wound care to debride necrotic tissue and develop healthy granulation beds. We planned to treat with Cod fish skin (Kerecis) as an alternative to skin grafting. In preparation for the grafting, for two days prior to the skin application, SSD cream was applied to the granulation tissue to decrease the bacterial load present at the granulation beds.
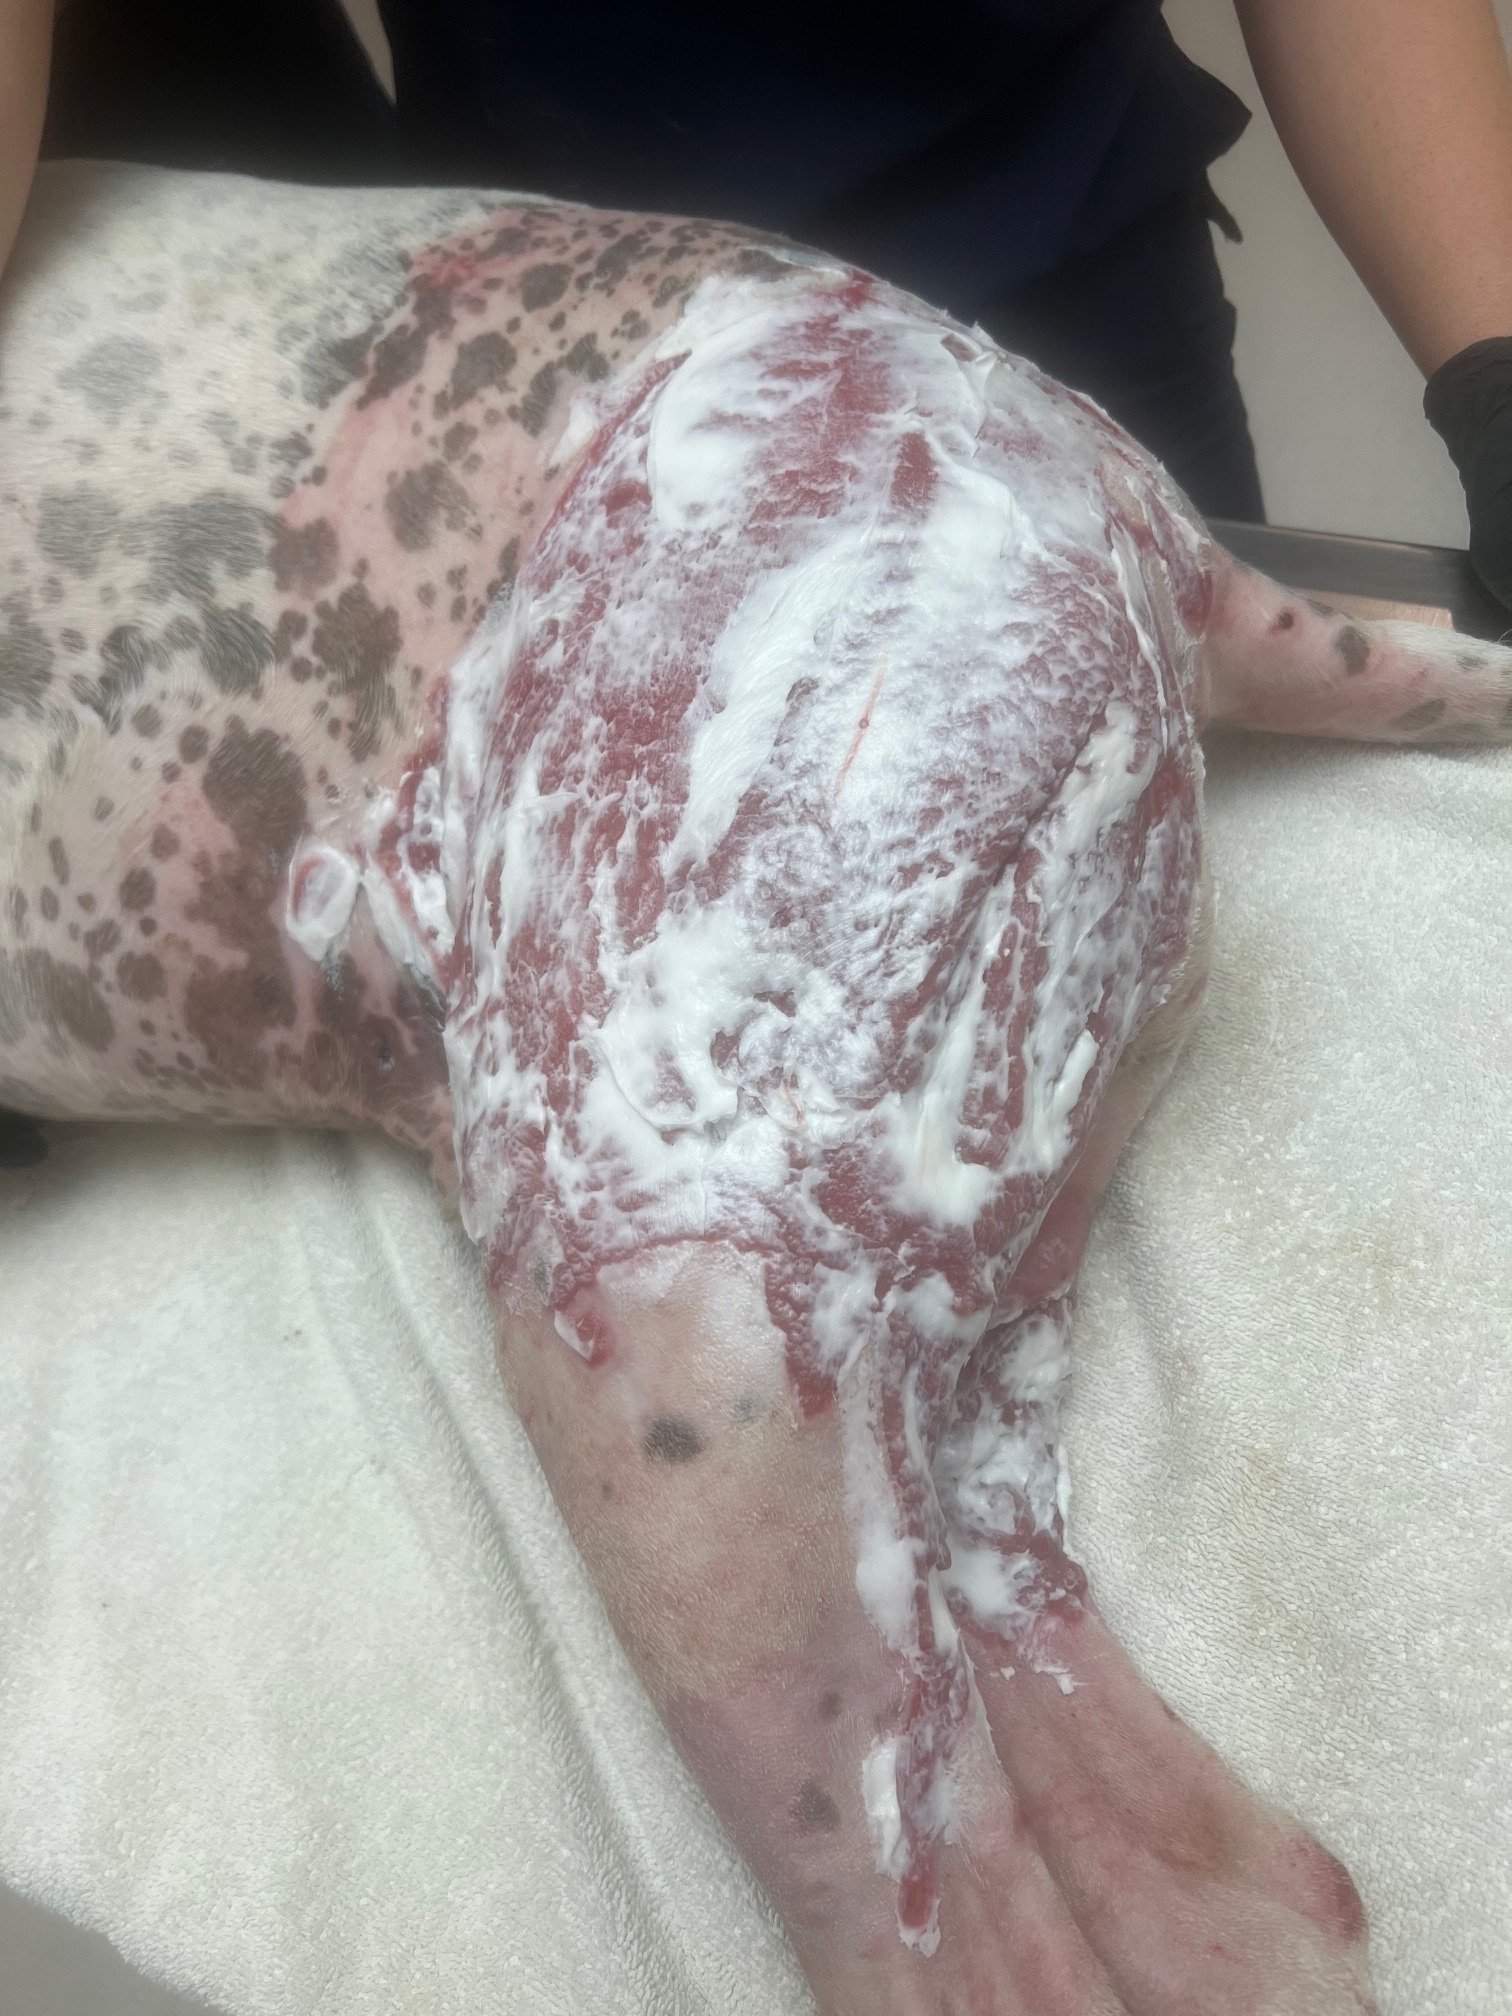
A caudal epigastric rotational skin flap was considered as a means to close the wound but was decided against due to Charlie being a deep chested boxer with little skin elasticity over his chest. Free skin grafts were also decided against as a primary option due to, leaving further wounds on his body. Partial thickness skin grafts were considered as a second line of treatment if the initial fish skin grafting ended up being unsuccessful.
Fish Skin Grafting
Prior to grafting the cod fish skin (Kerecis) the wound was debrided by running a scalpel across the surface of the granulation tissue to insure the surface was vascular and freshly bleeding.
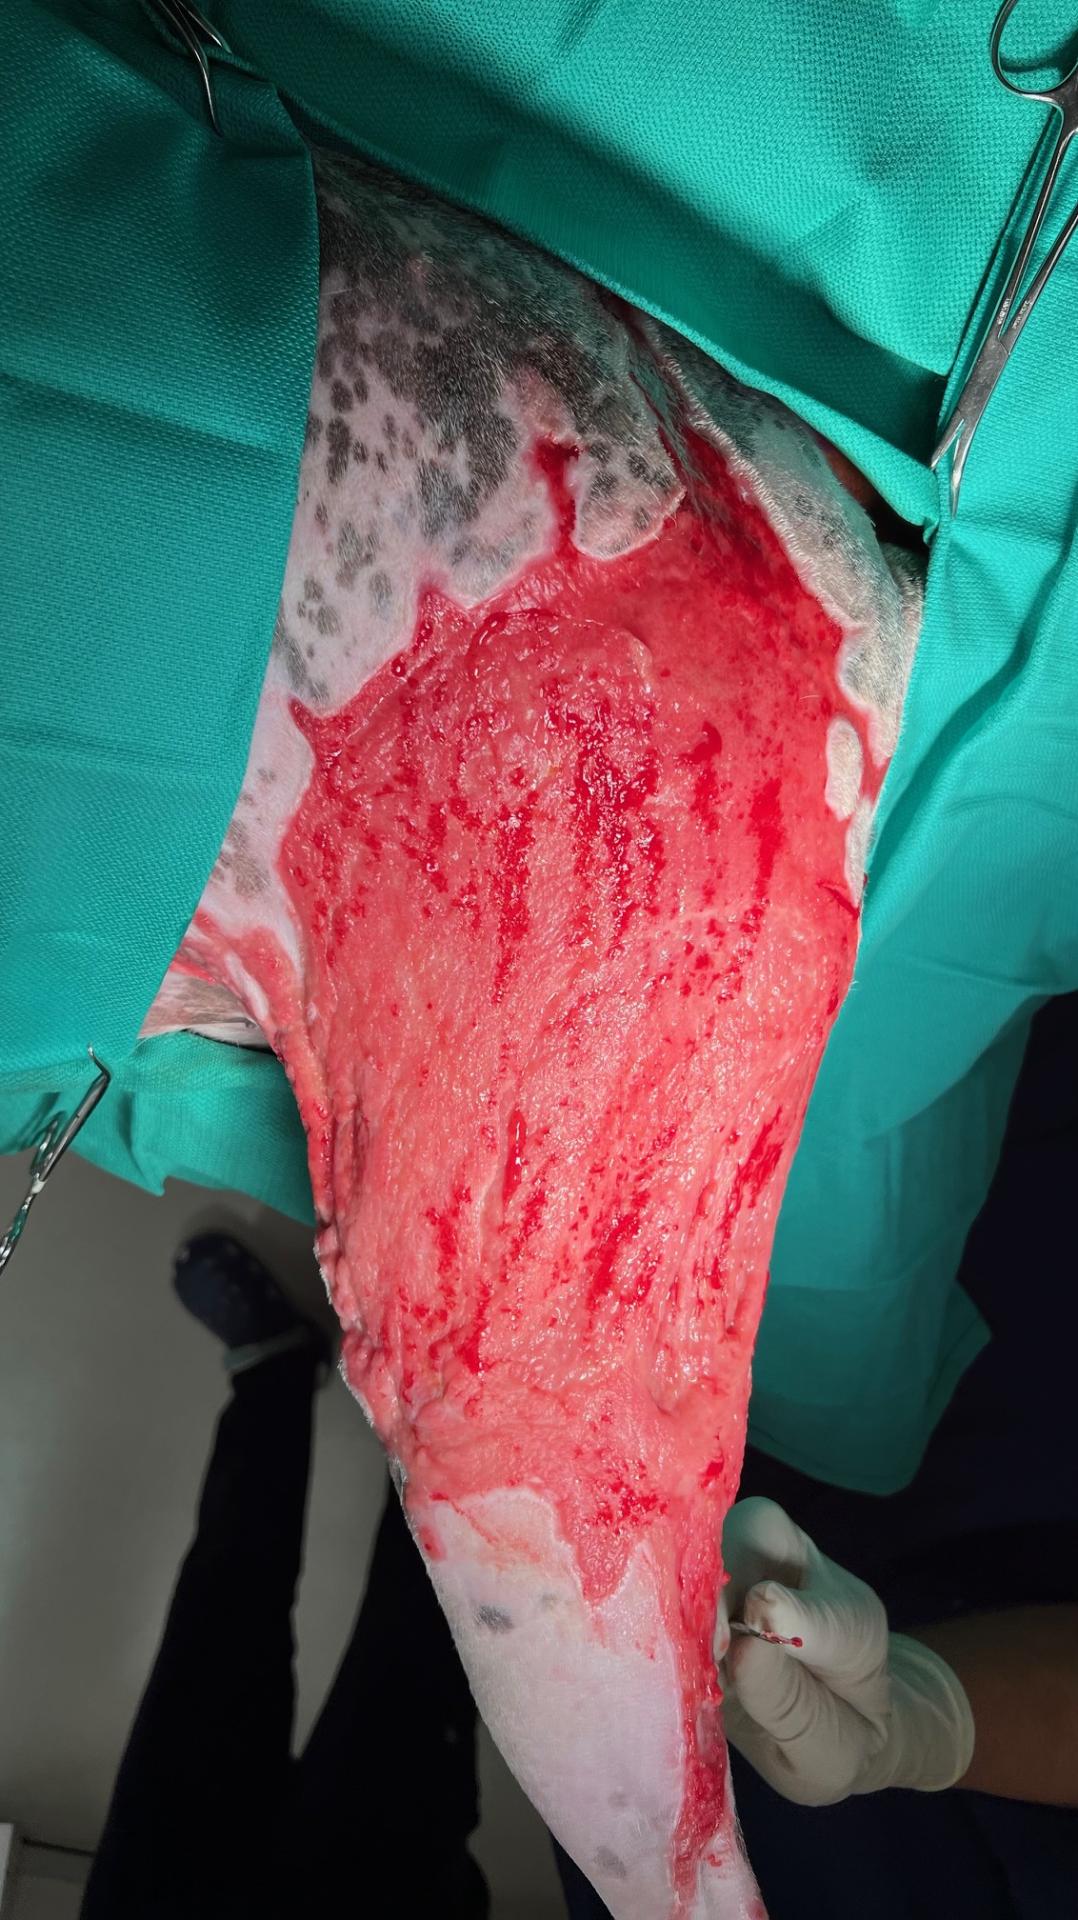
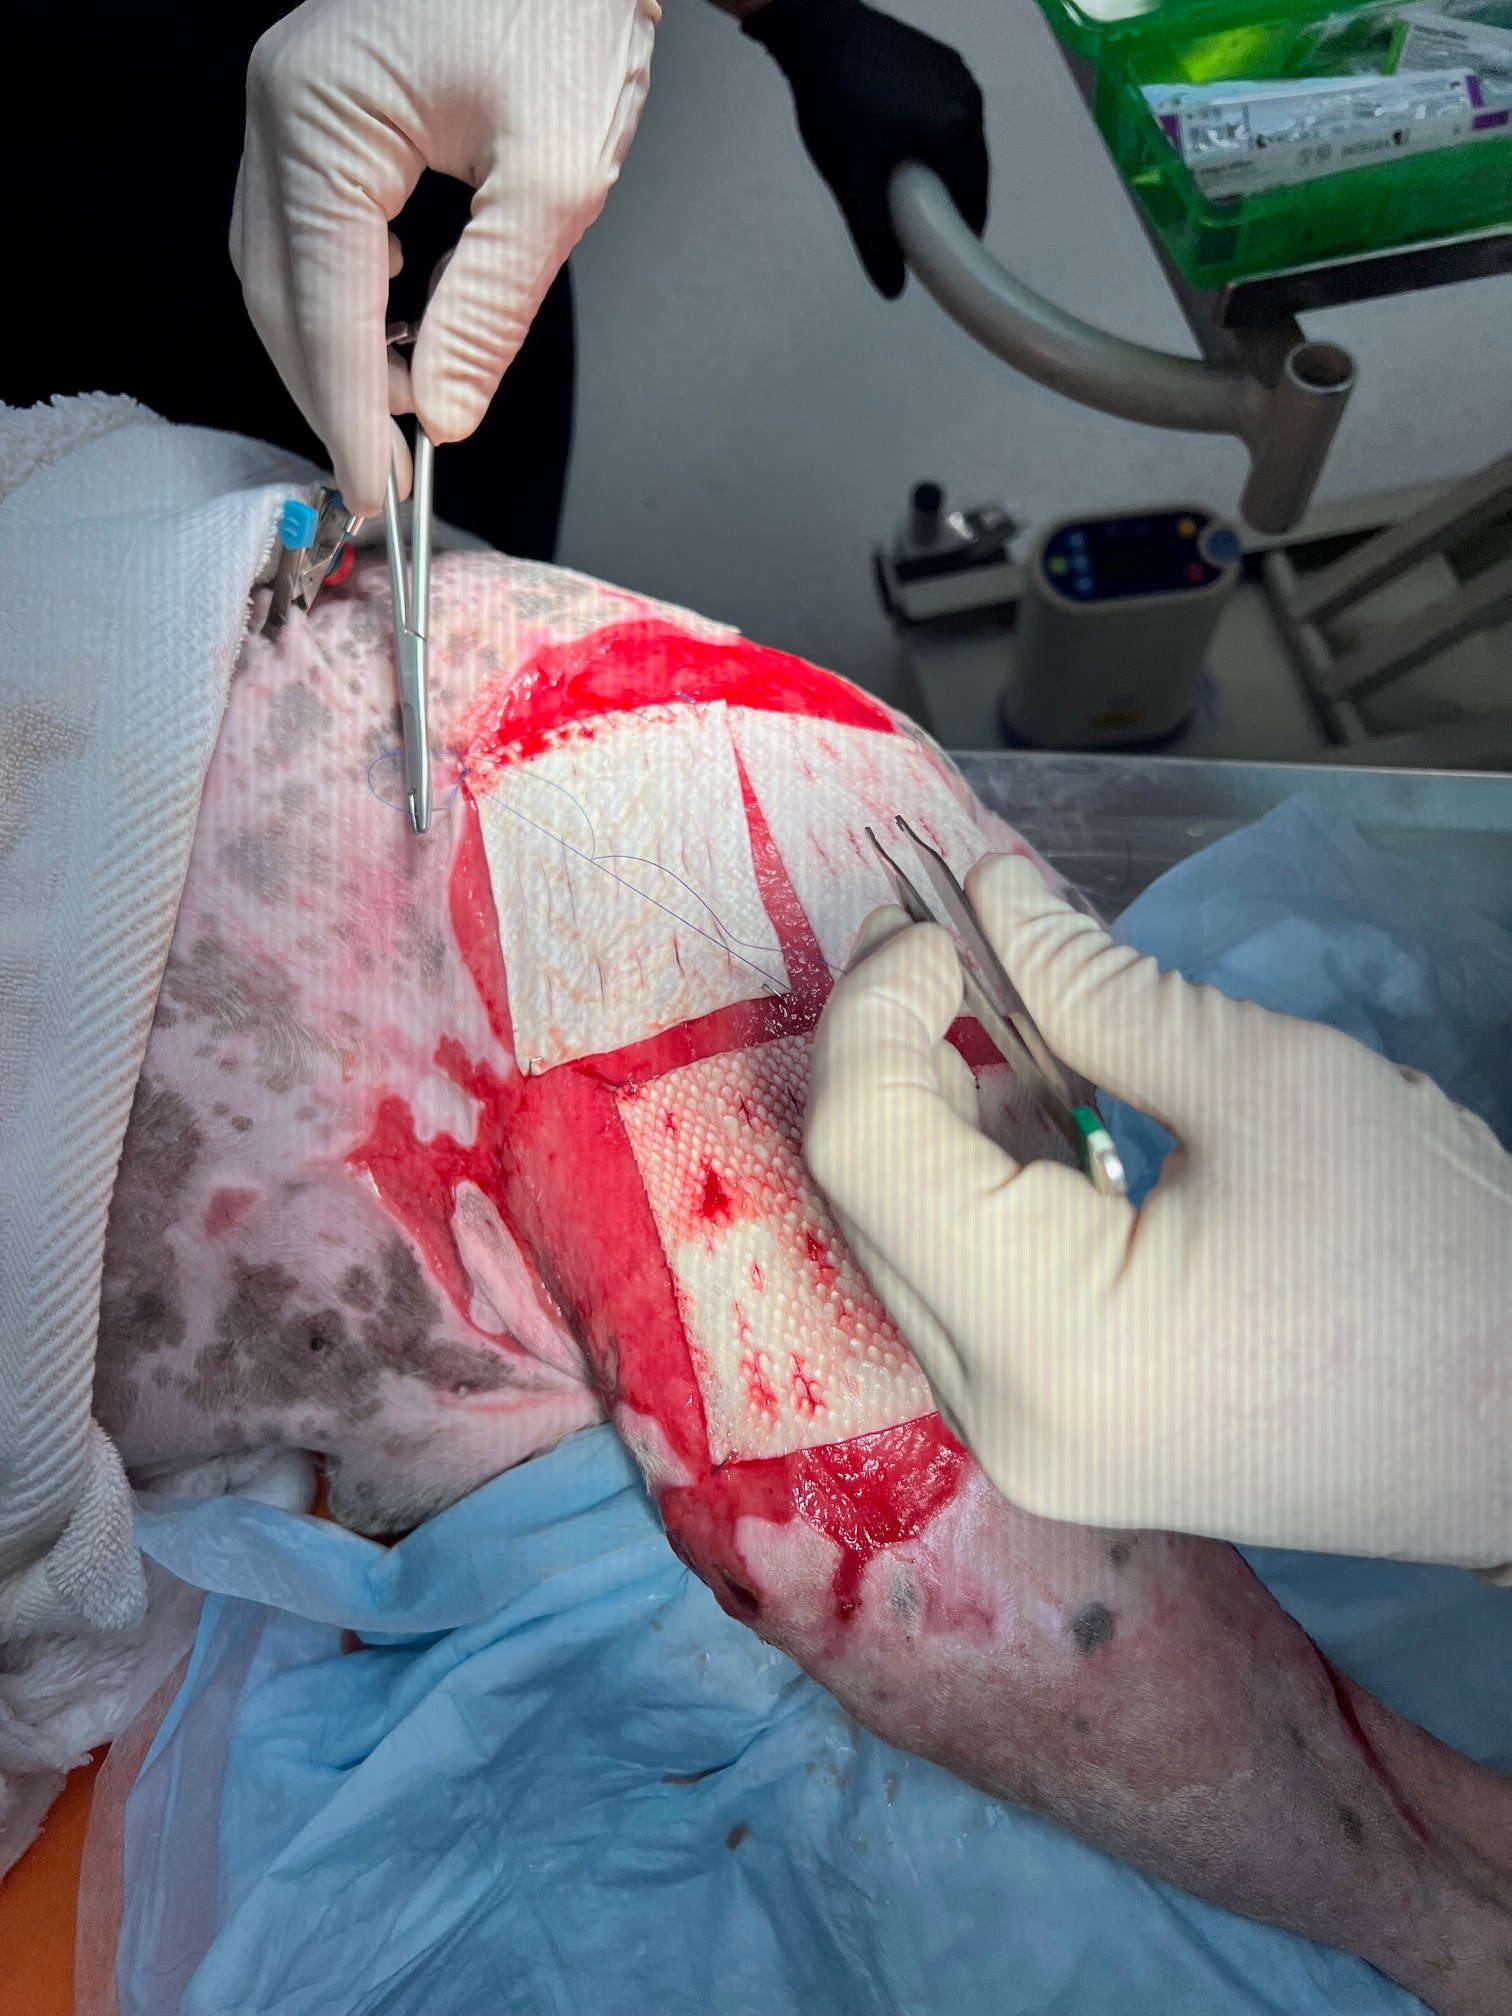
Fish skin was soaked in sterile saline for 30-60 seconds in a bowl to rehydrate the sheets. The Sheets were tacked at the corners to stretch them over the wound bed and then interrupted sutures were placed around the periphery and over any depressions in the middle of the graft to prevent tenting over the wound and ensure good contact between the graft and the granulation bed.
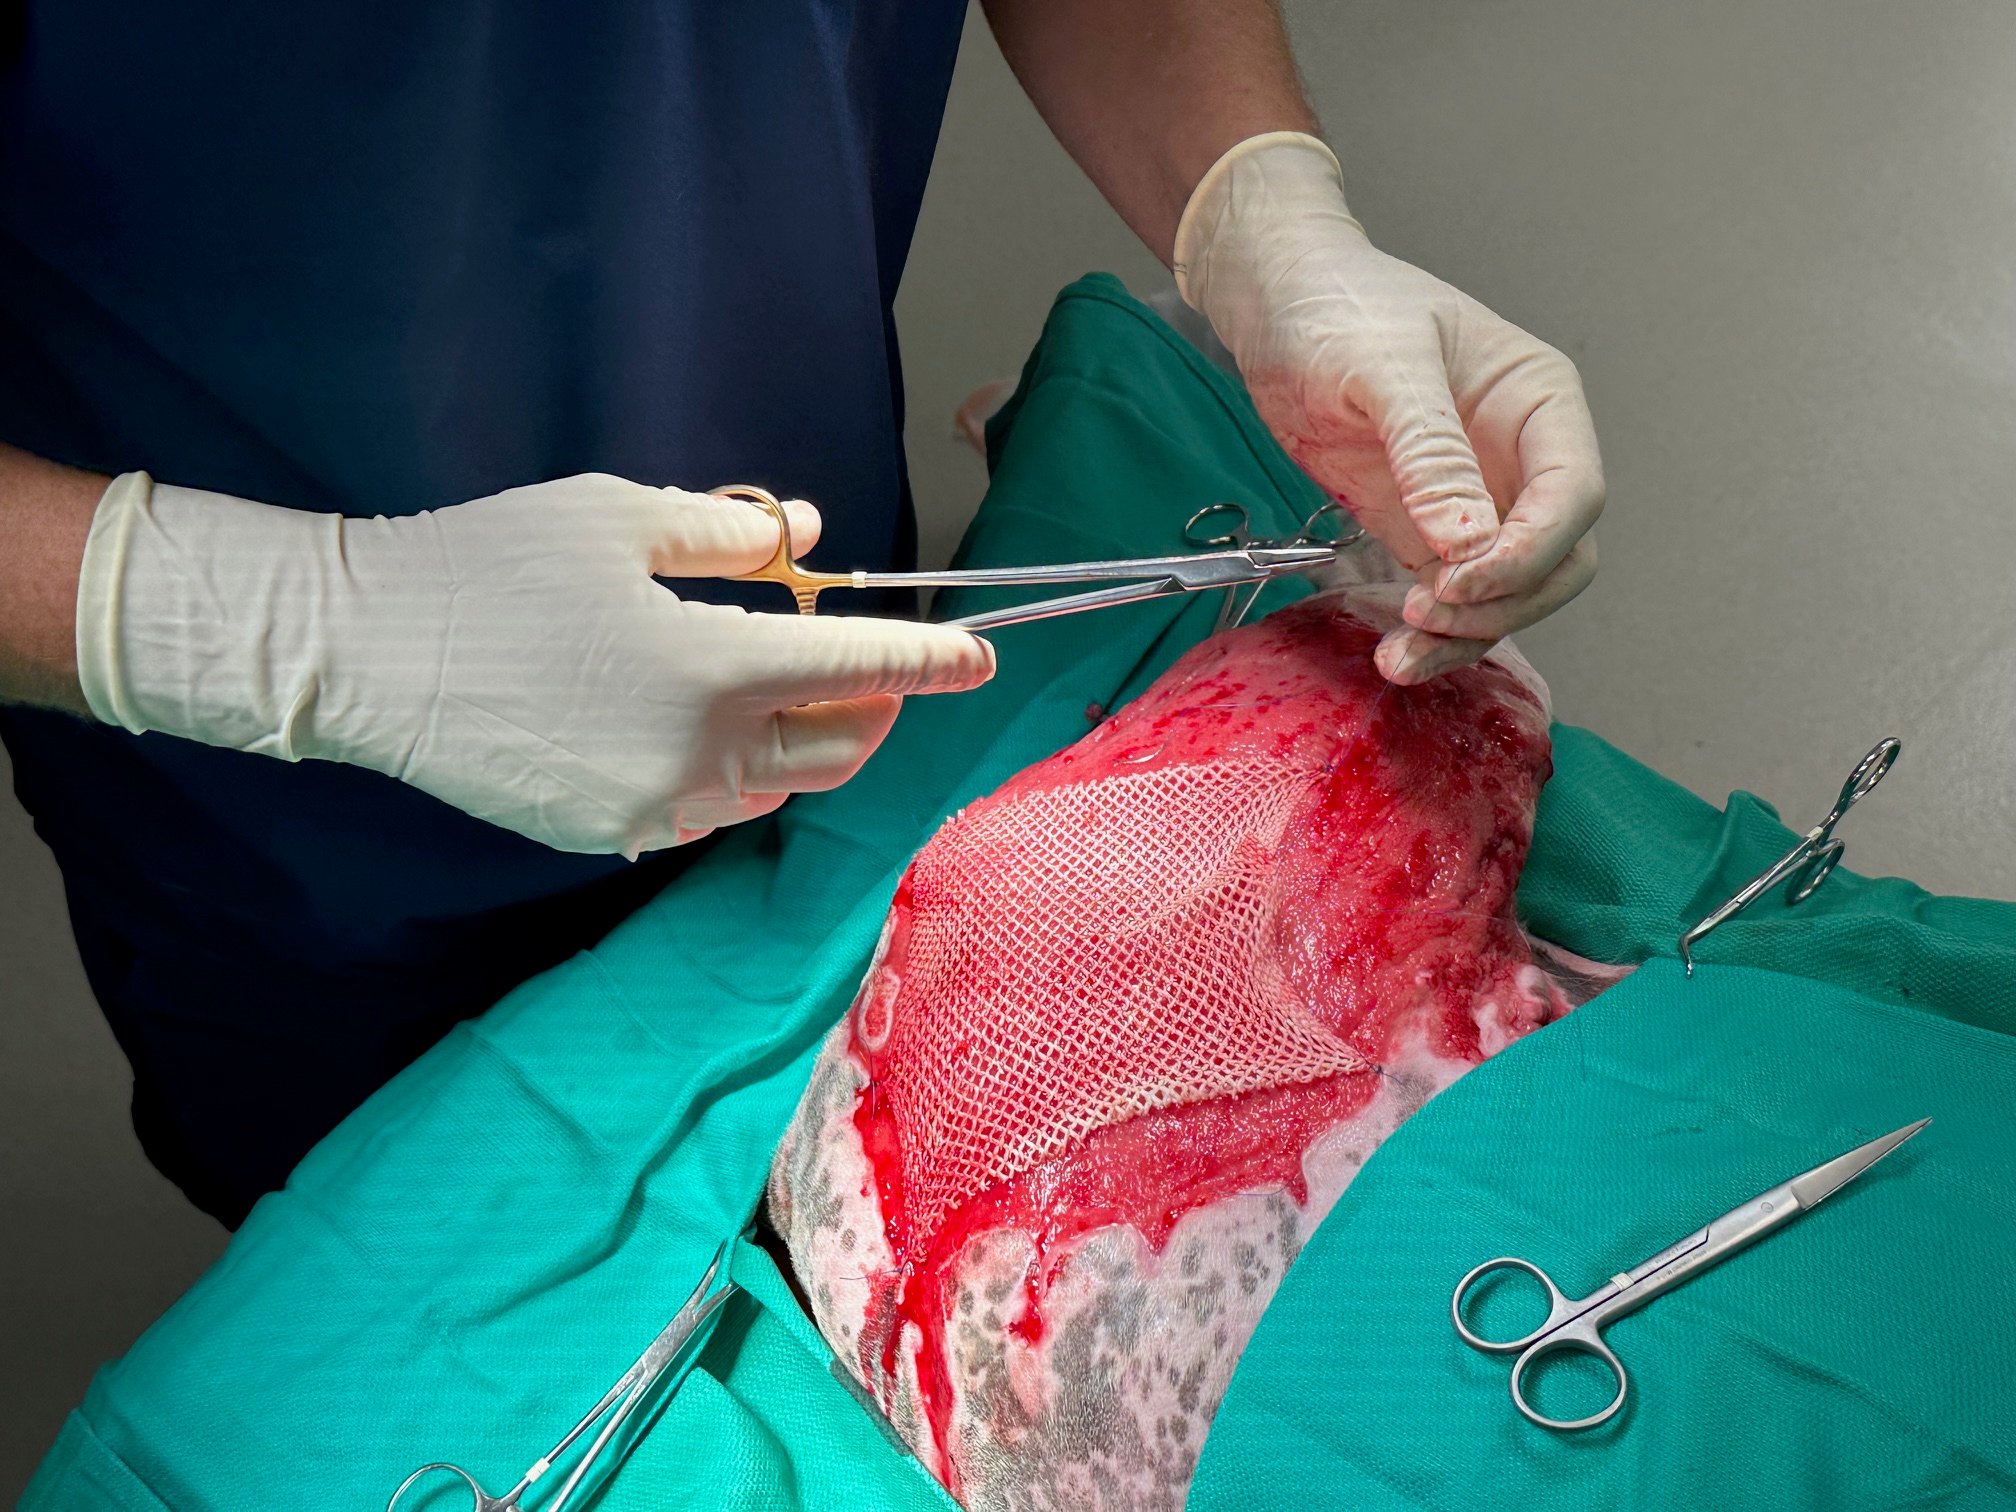
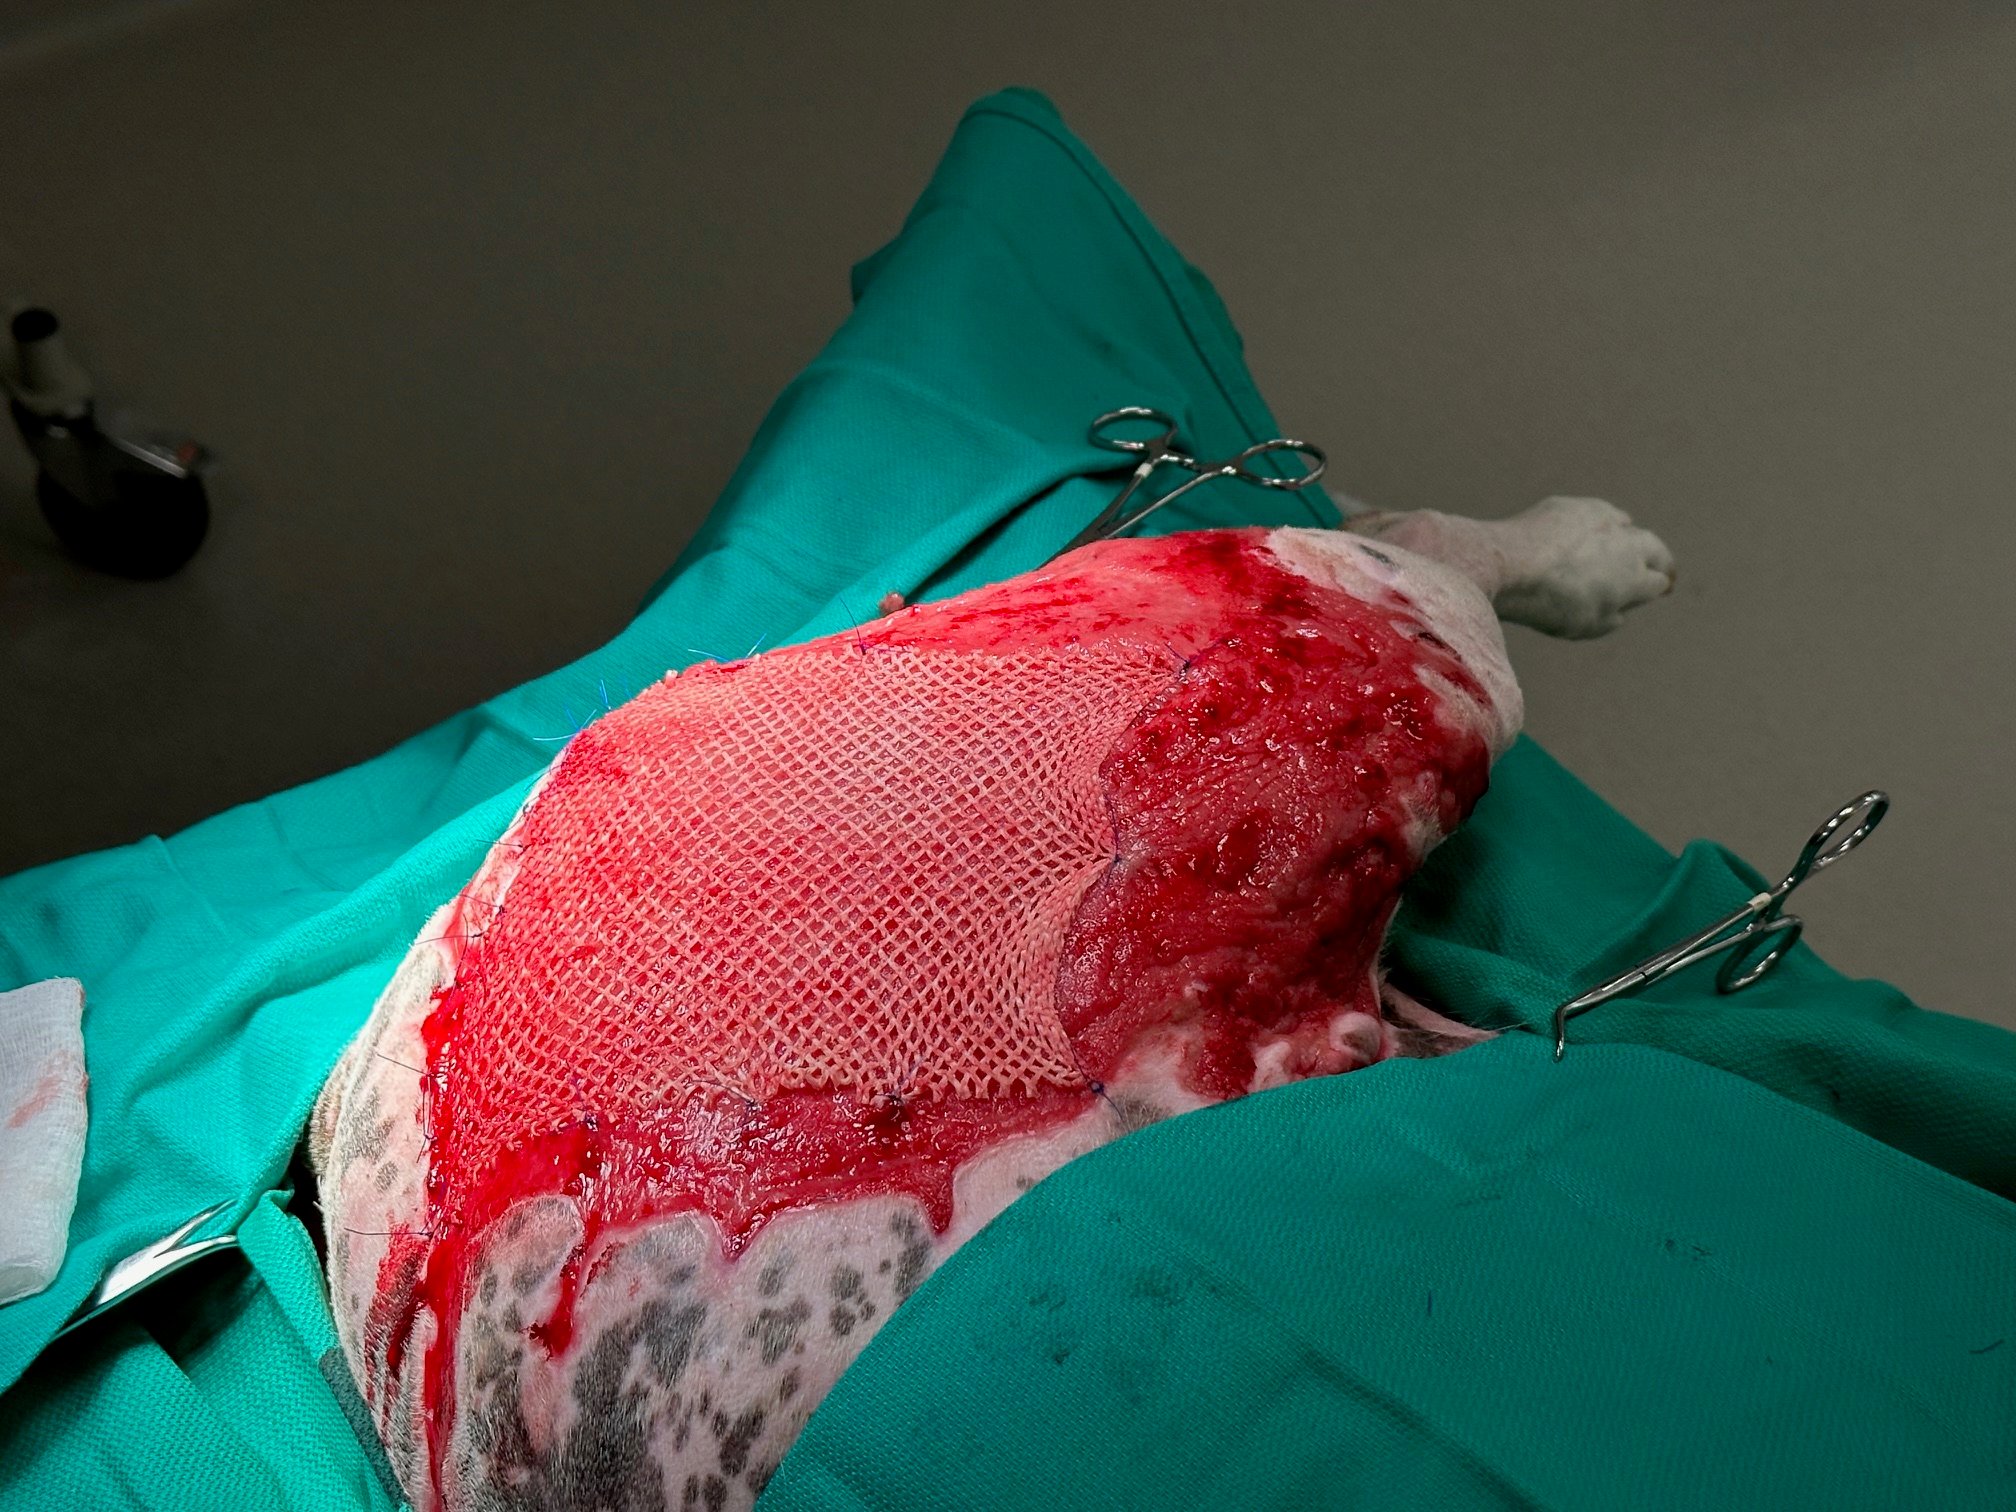
Solid pieces of fish skin were fenestrated to ensure that fluid did not build up between the granulation tissue and the fish skin.
The Graft was covered with eluxtra wound pads and then secured in place with adhesive drape material and a negative pressure wound vacuum.
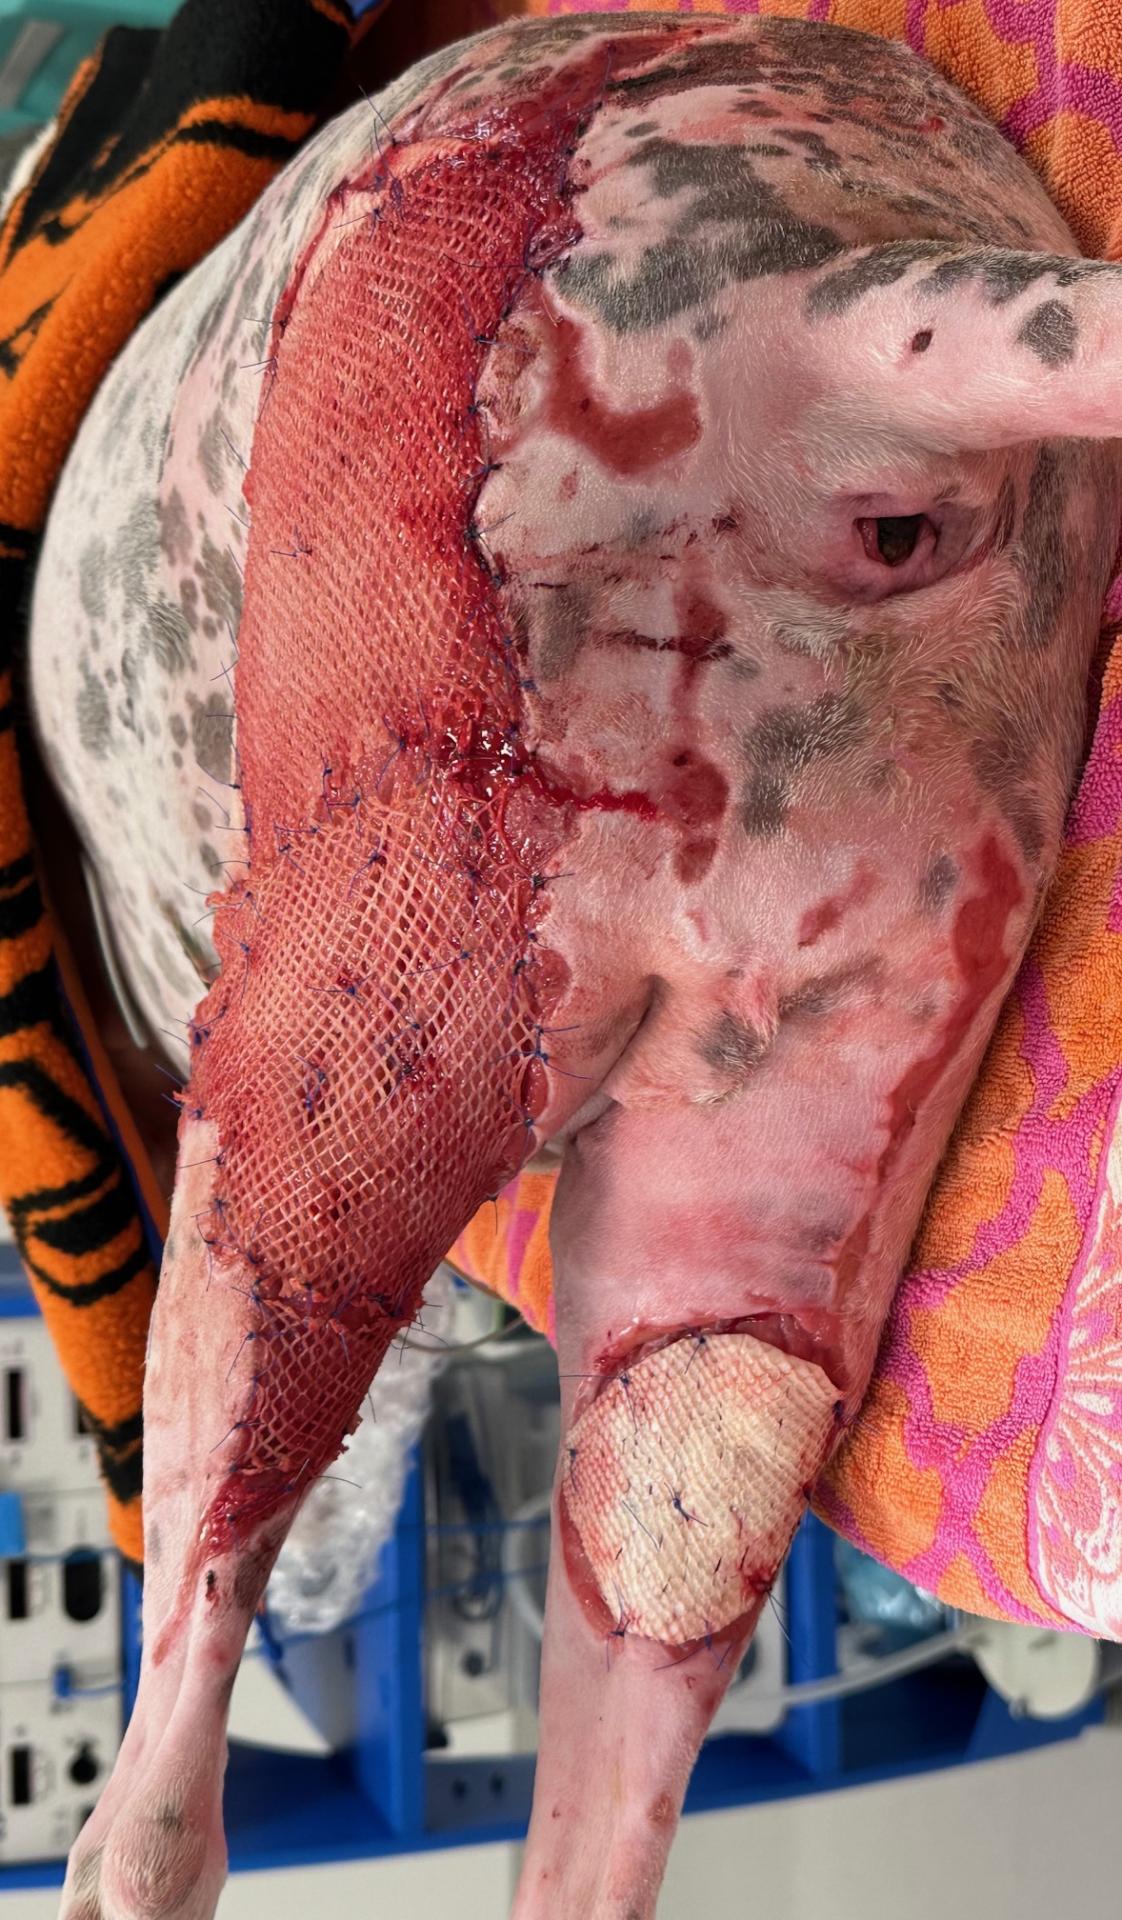
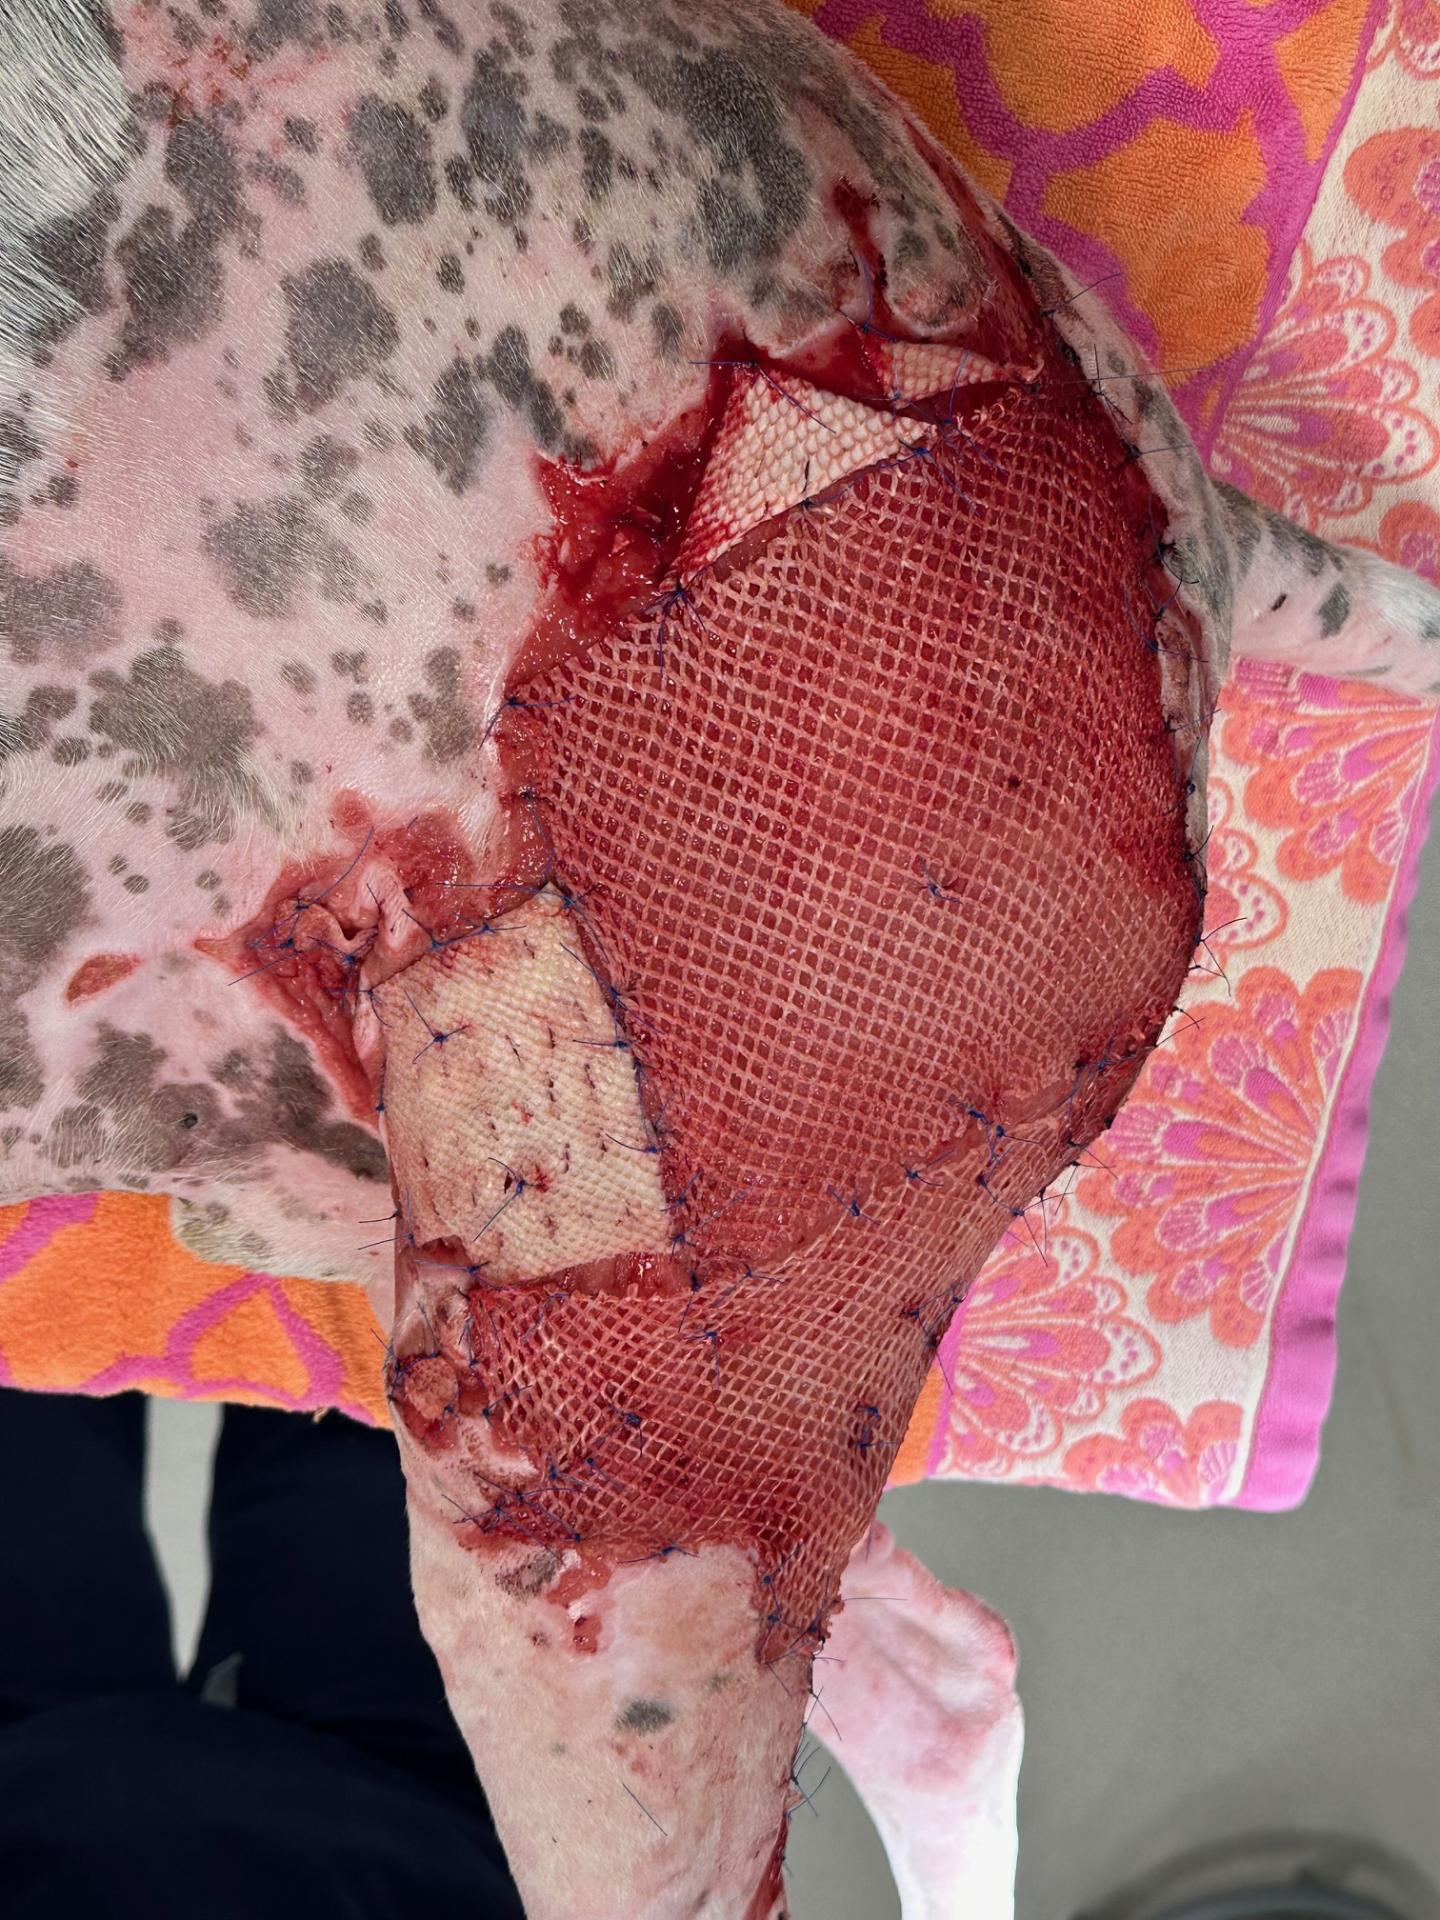

After two days, the dressing needed replacement. Unfortunately the skin graft had all become detached and was no longer sutured in place. An attempt to salvage the skin grafts was made and the grafts were stapled back in place. The following day the graft material was again detached and had not worked.
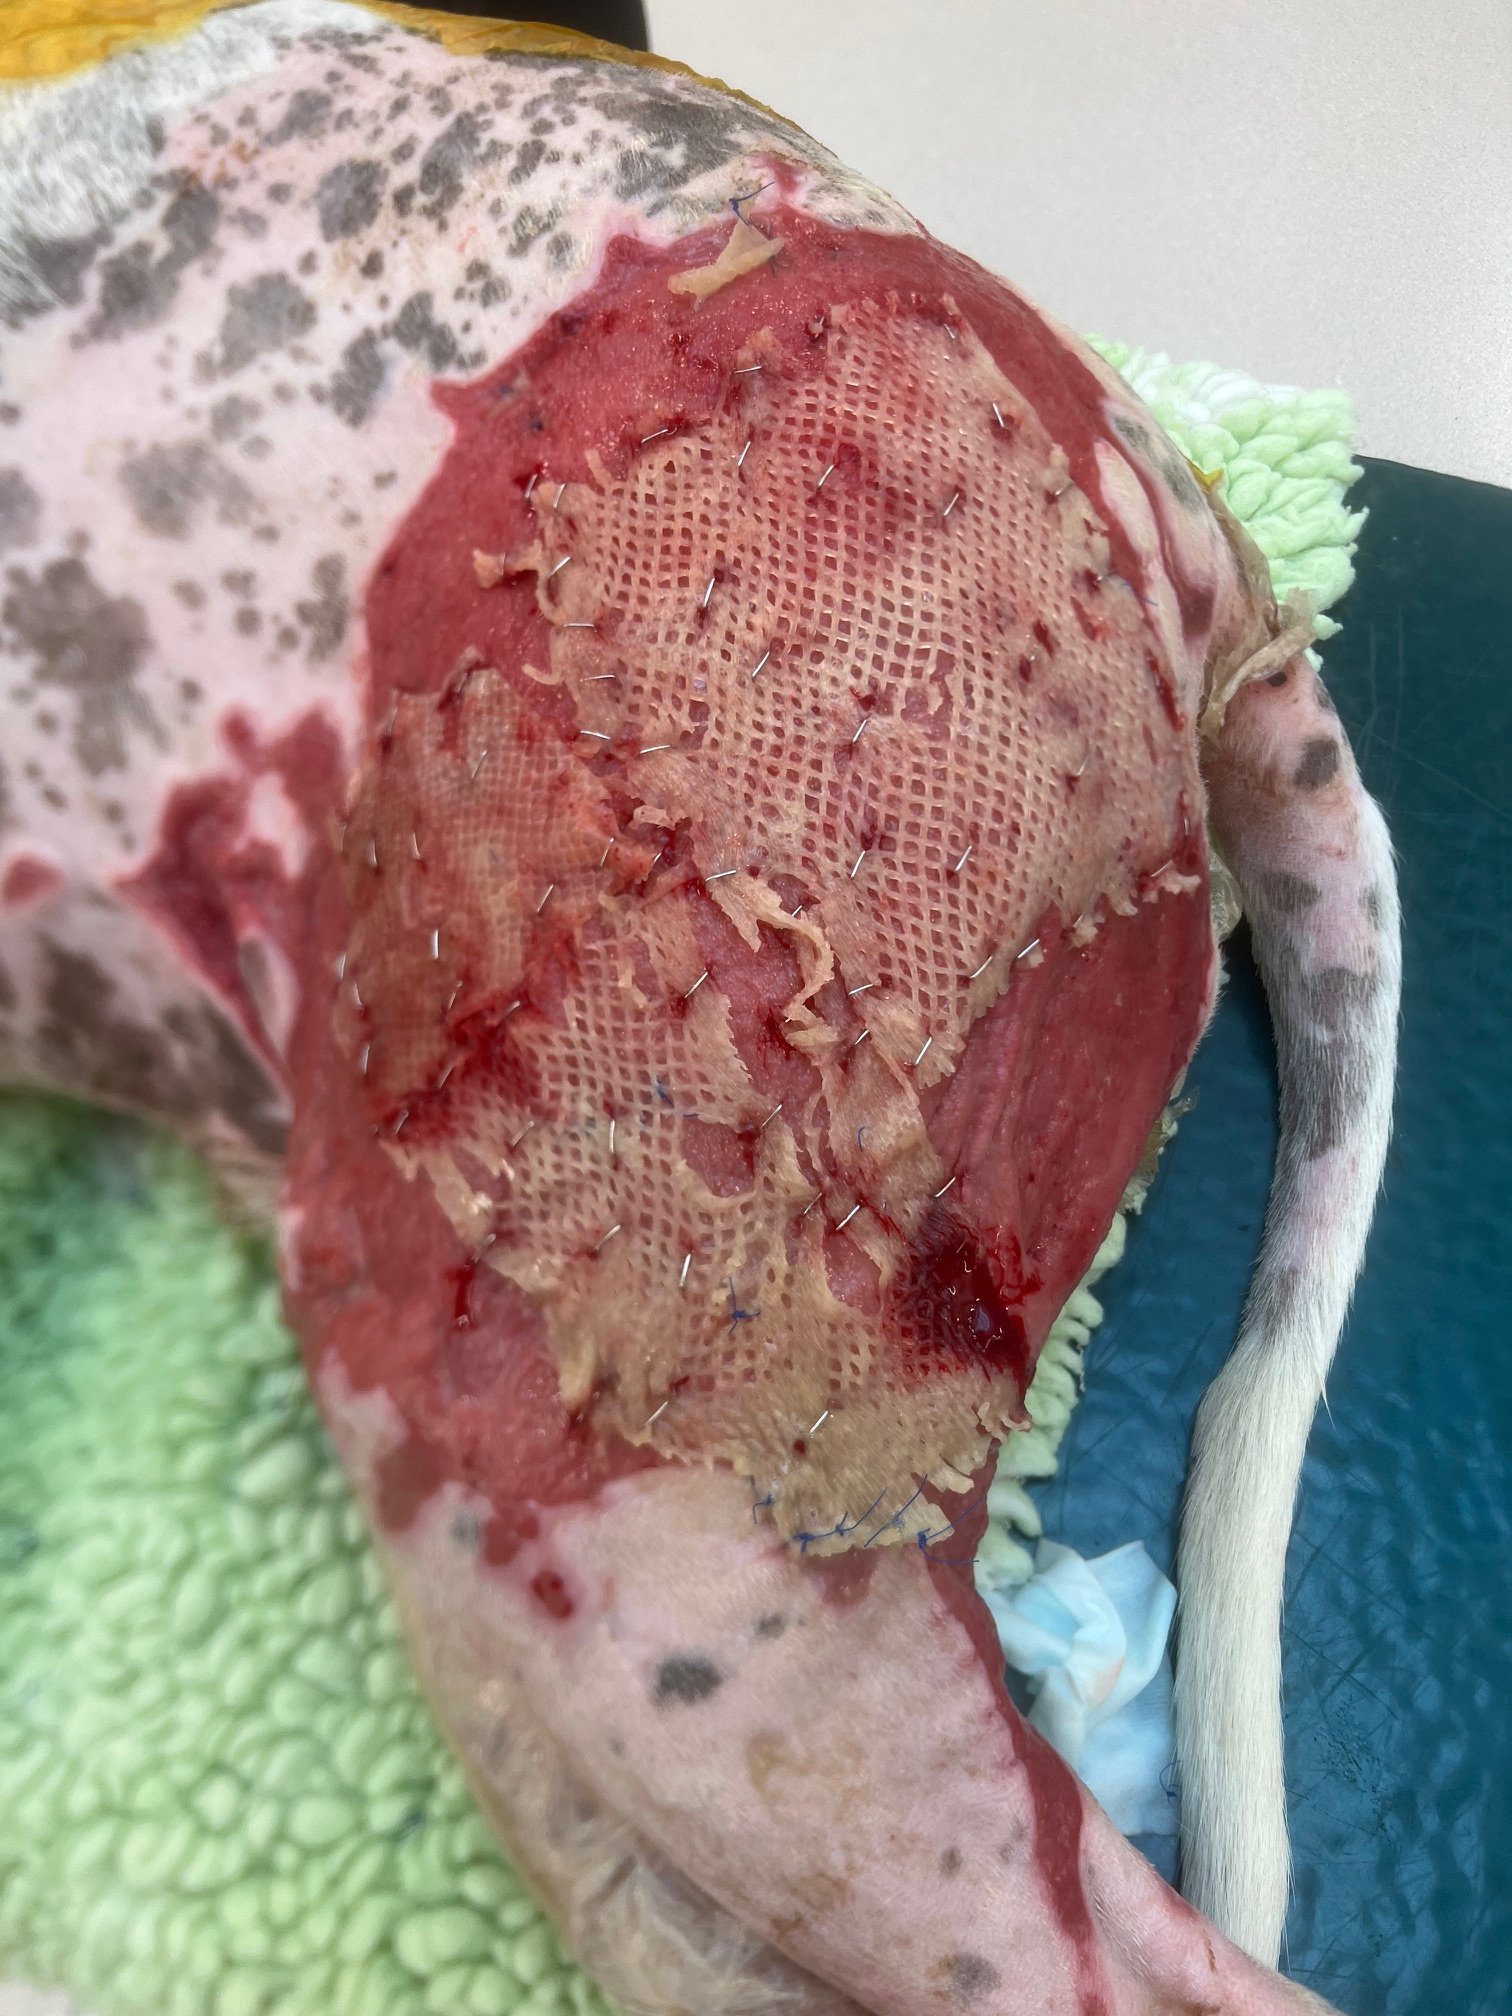
It was determined that the wound vacuum was not maintaining a seal and that bandage was rubbing against the graft. Charlie was feeling exuberant and was very bouncy in his kennel causing to much movement at the location of the grafting.
Charlies sedation levels were increased and a compressive bandage over both back legs was created to provide better stabilization of the graft. Initially the bandage only covered his pelvic limbs and it slipped backwards. The bandage was modified to cover his chest to prevent is lipping backwards. We eventually removed the bandage over his paws where he was stepping on the dressing and causing it to pull down.
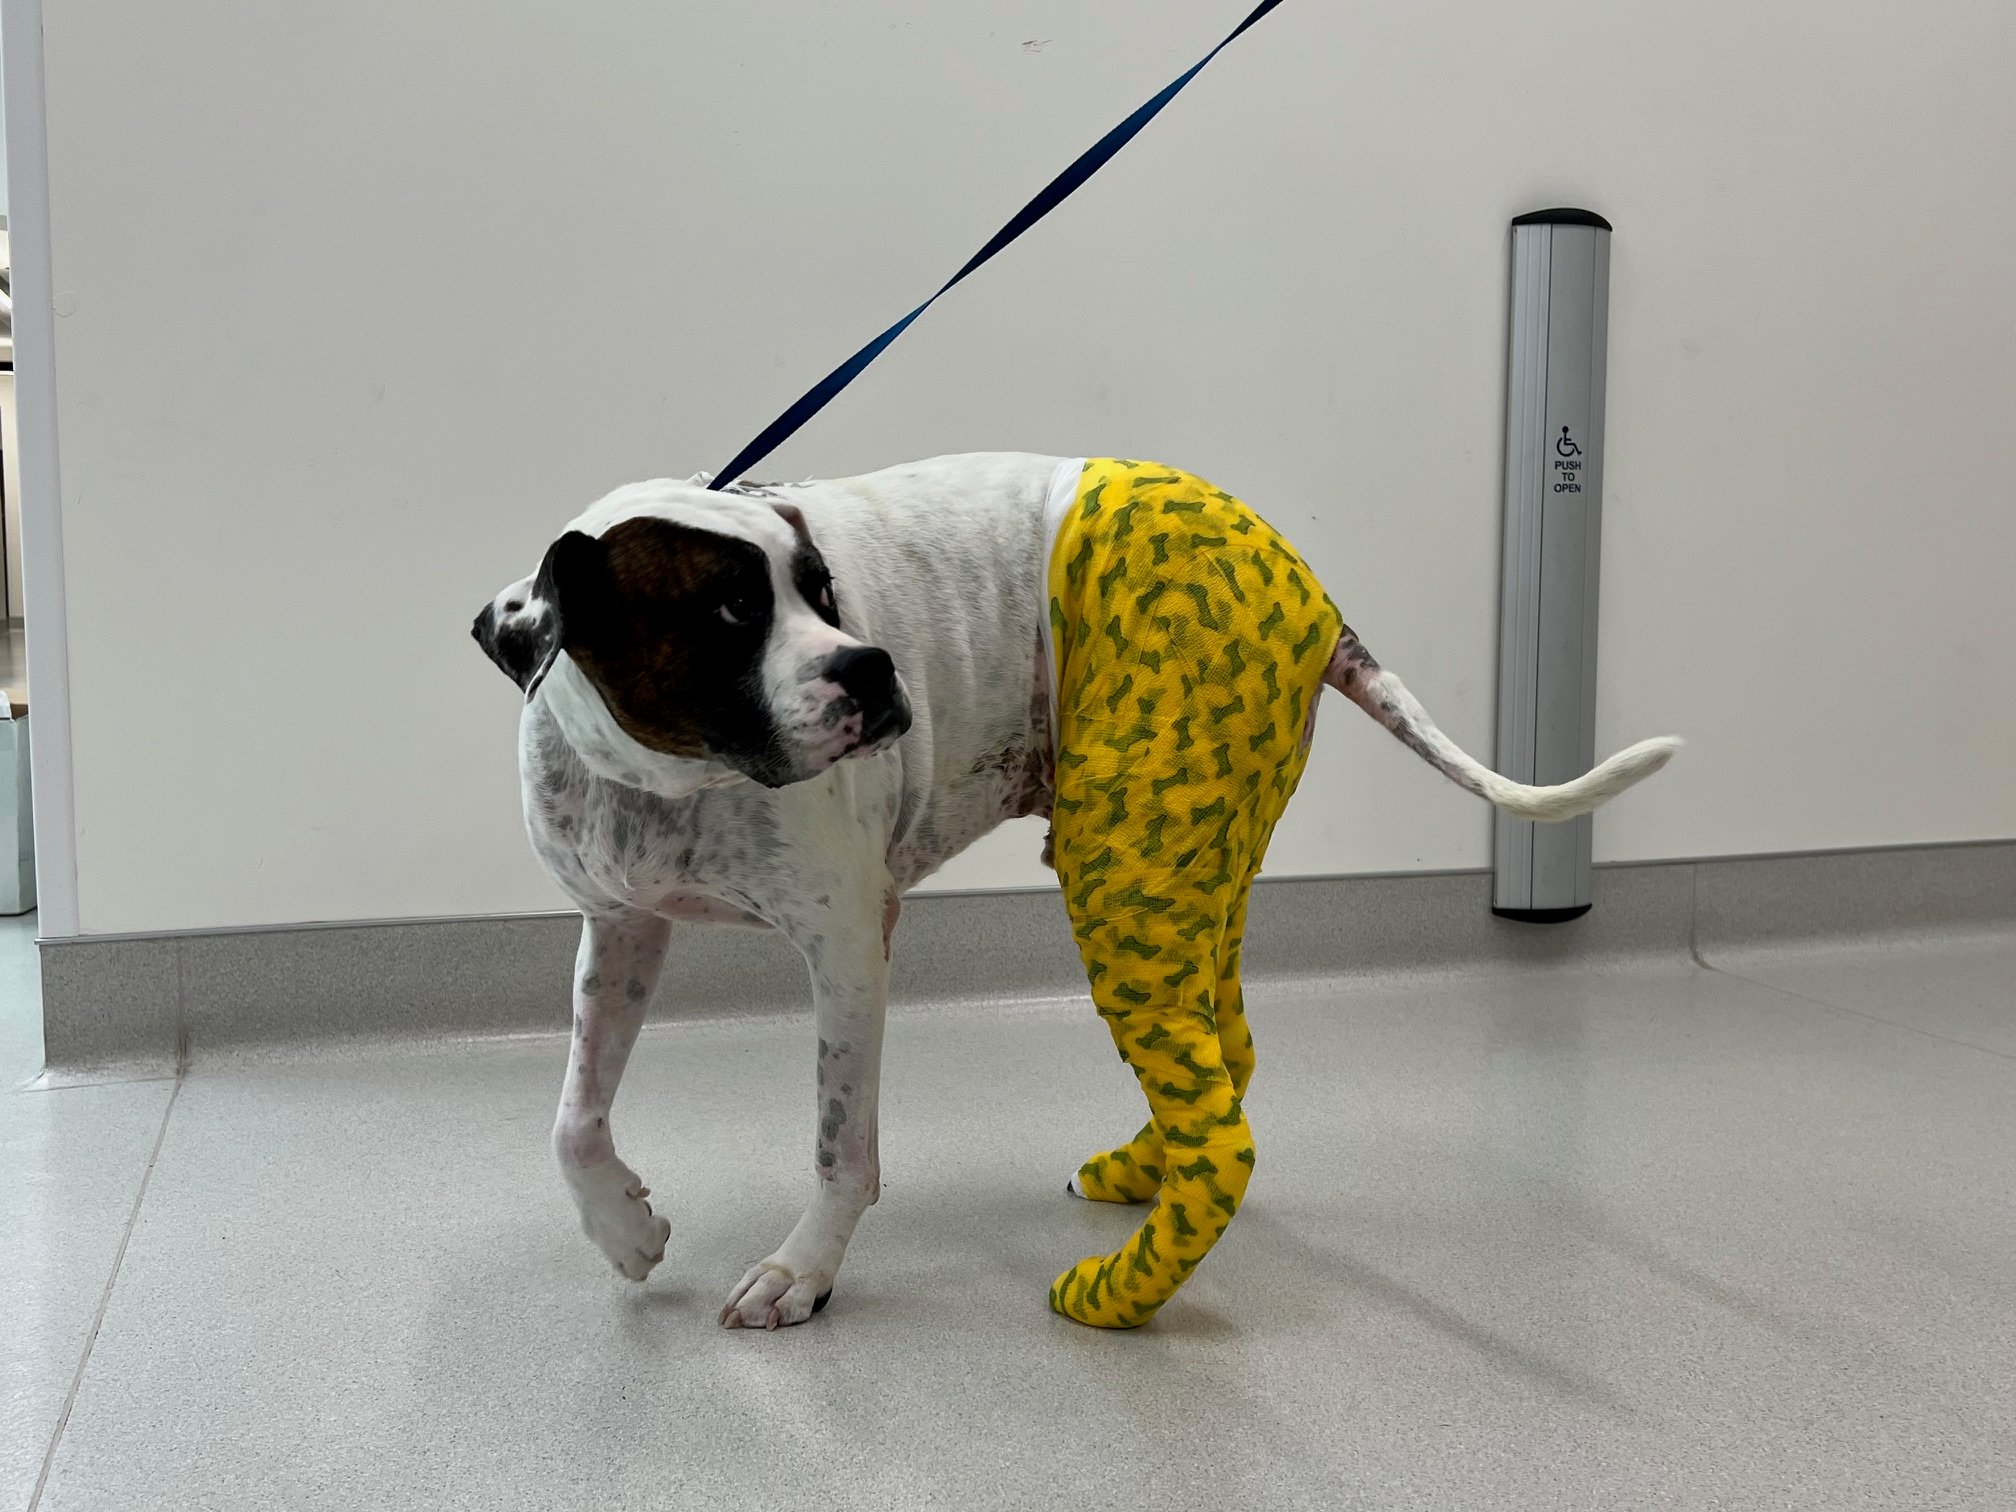
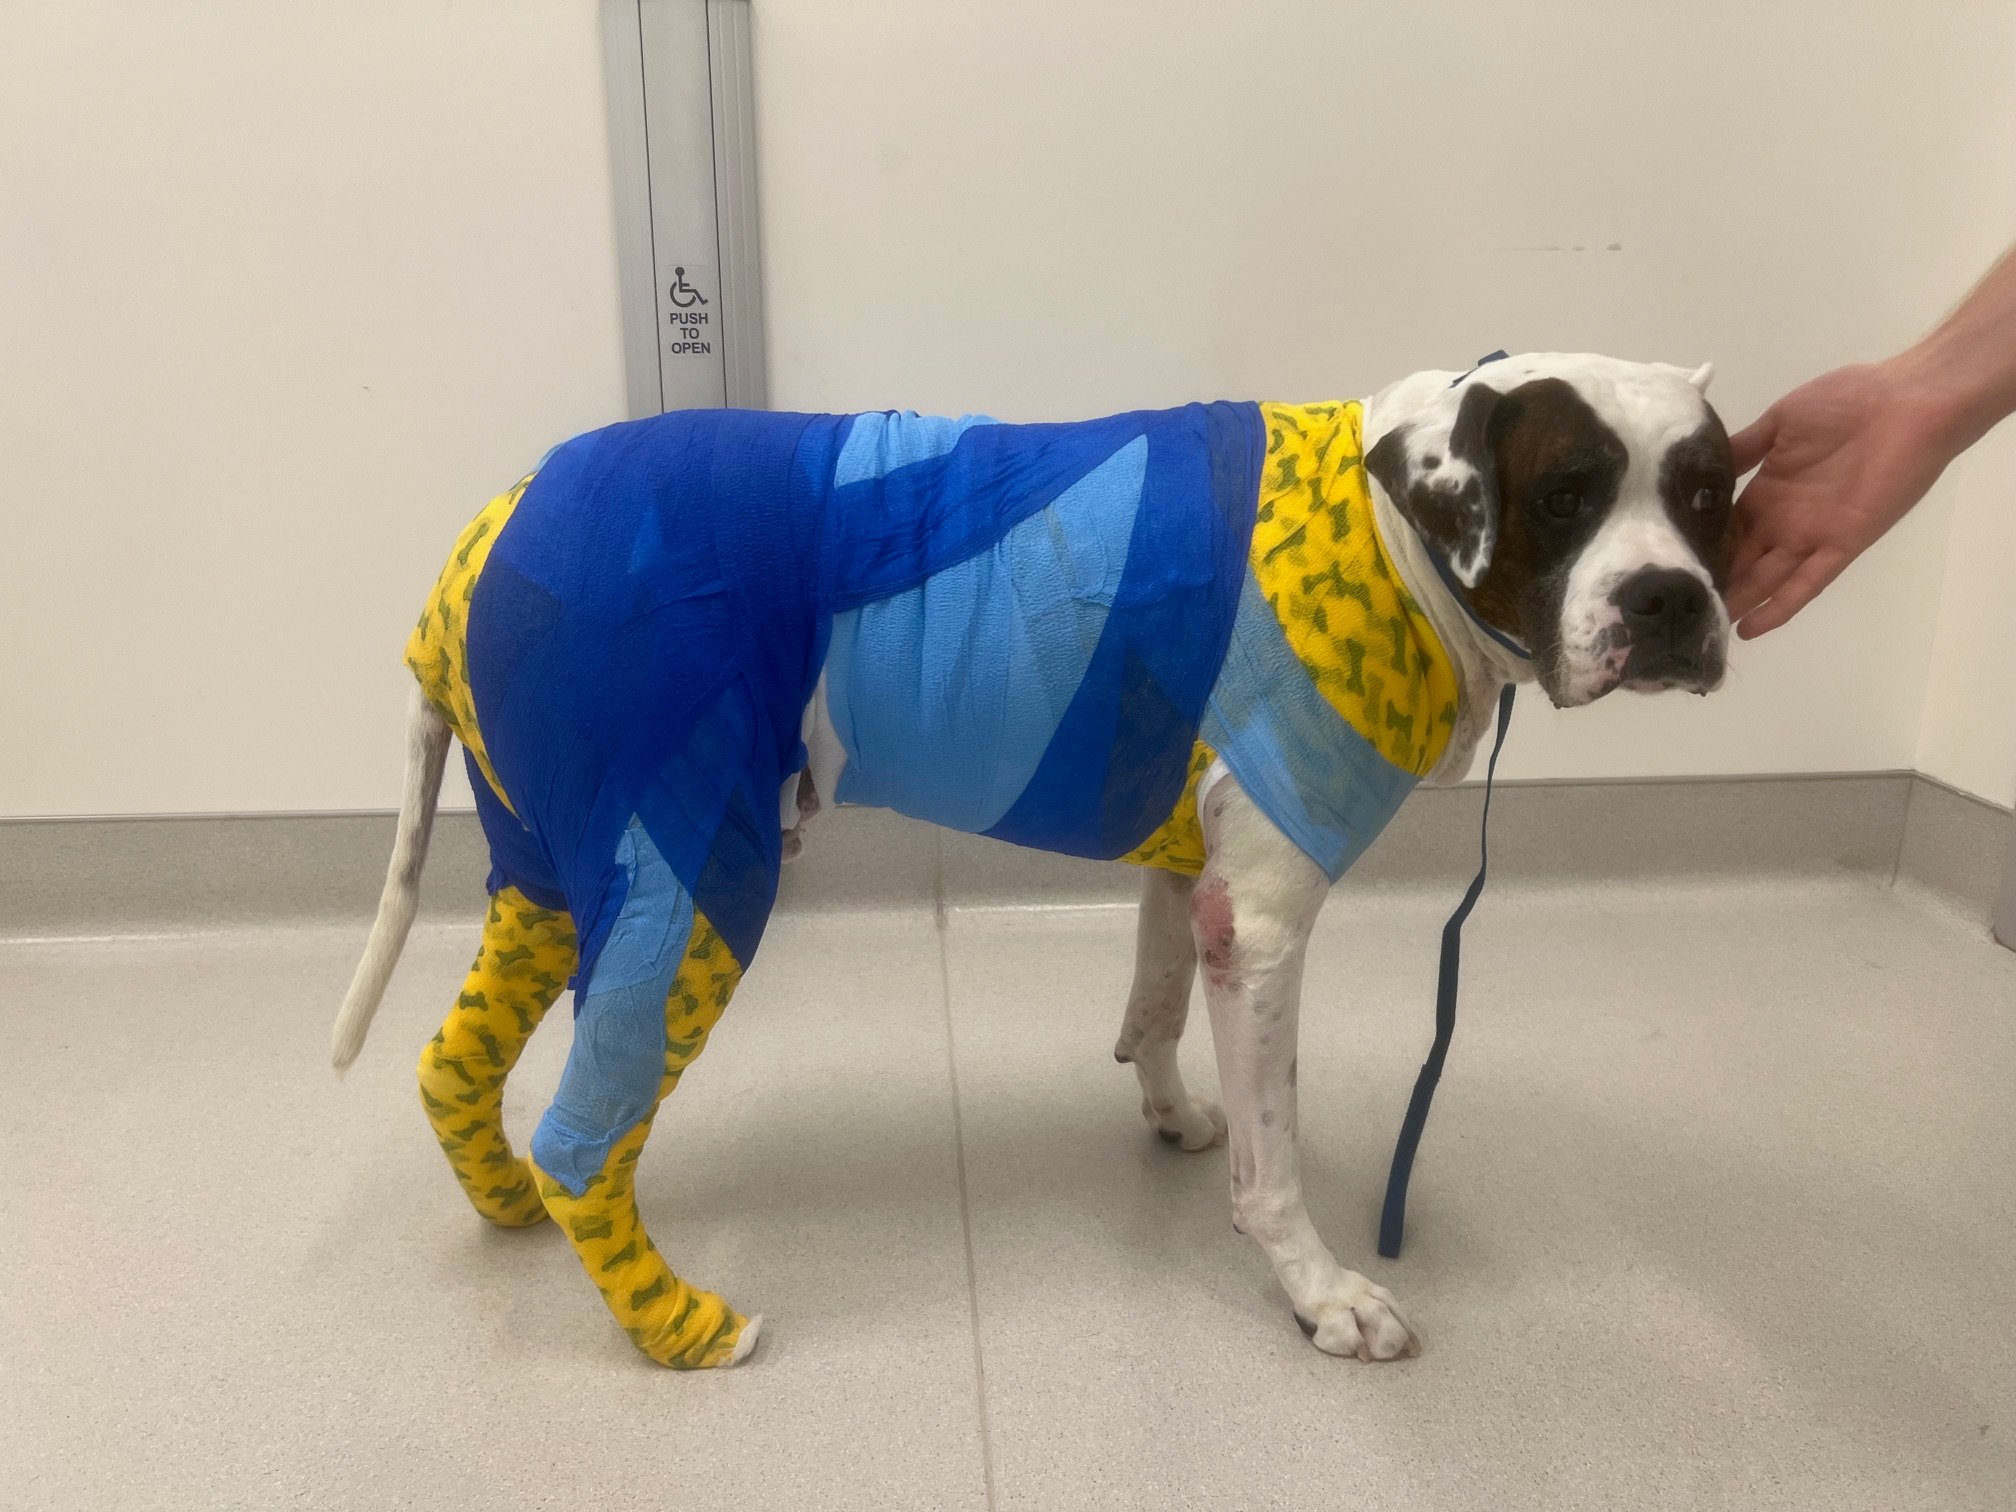
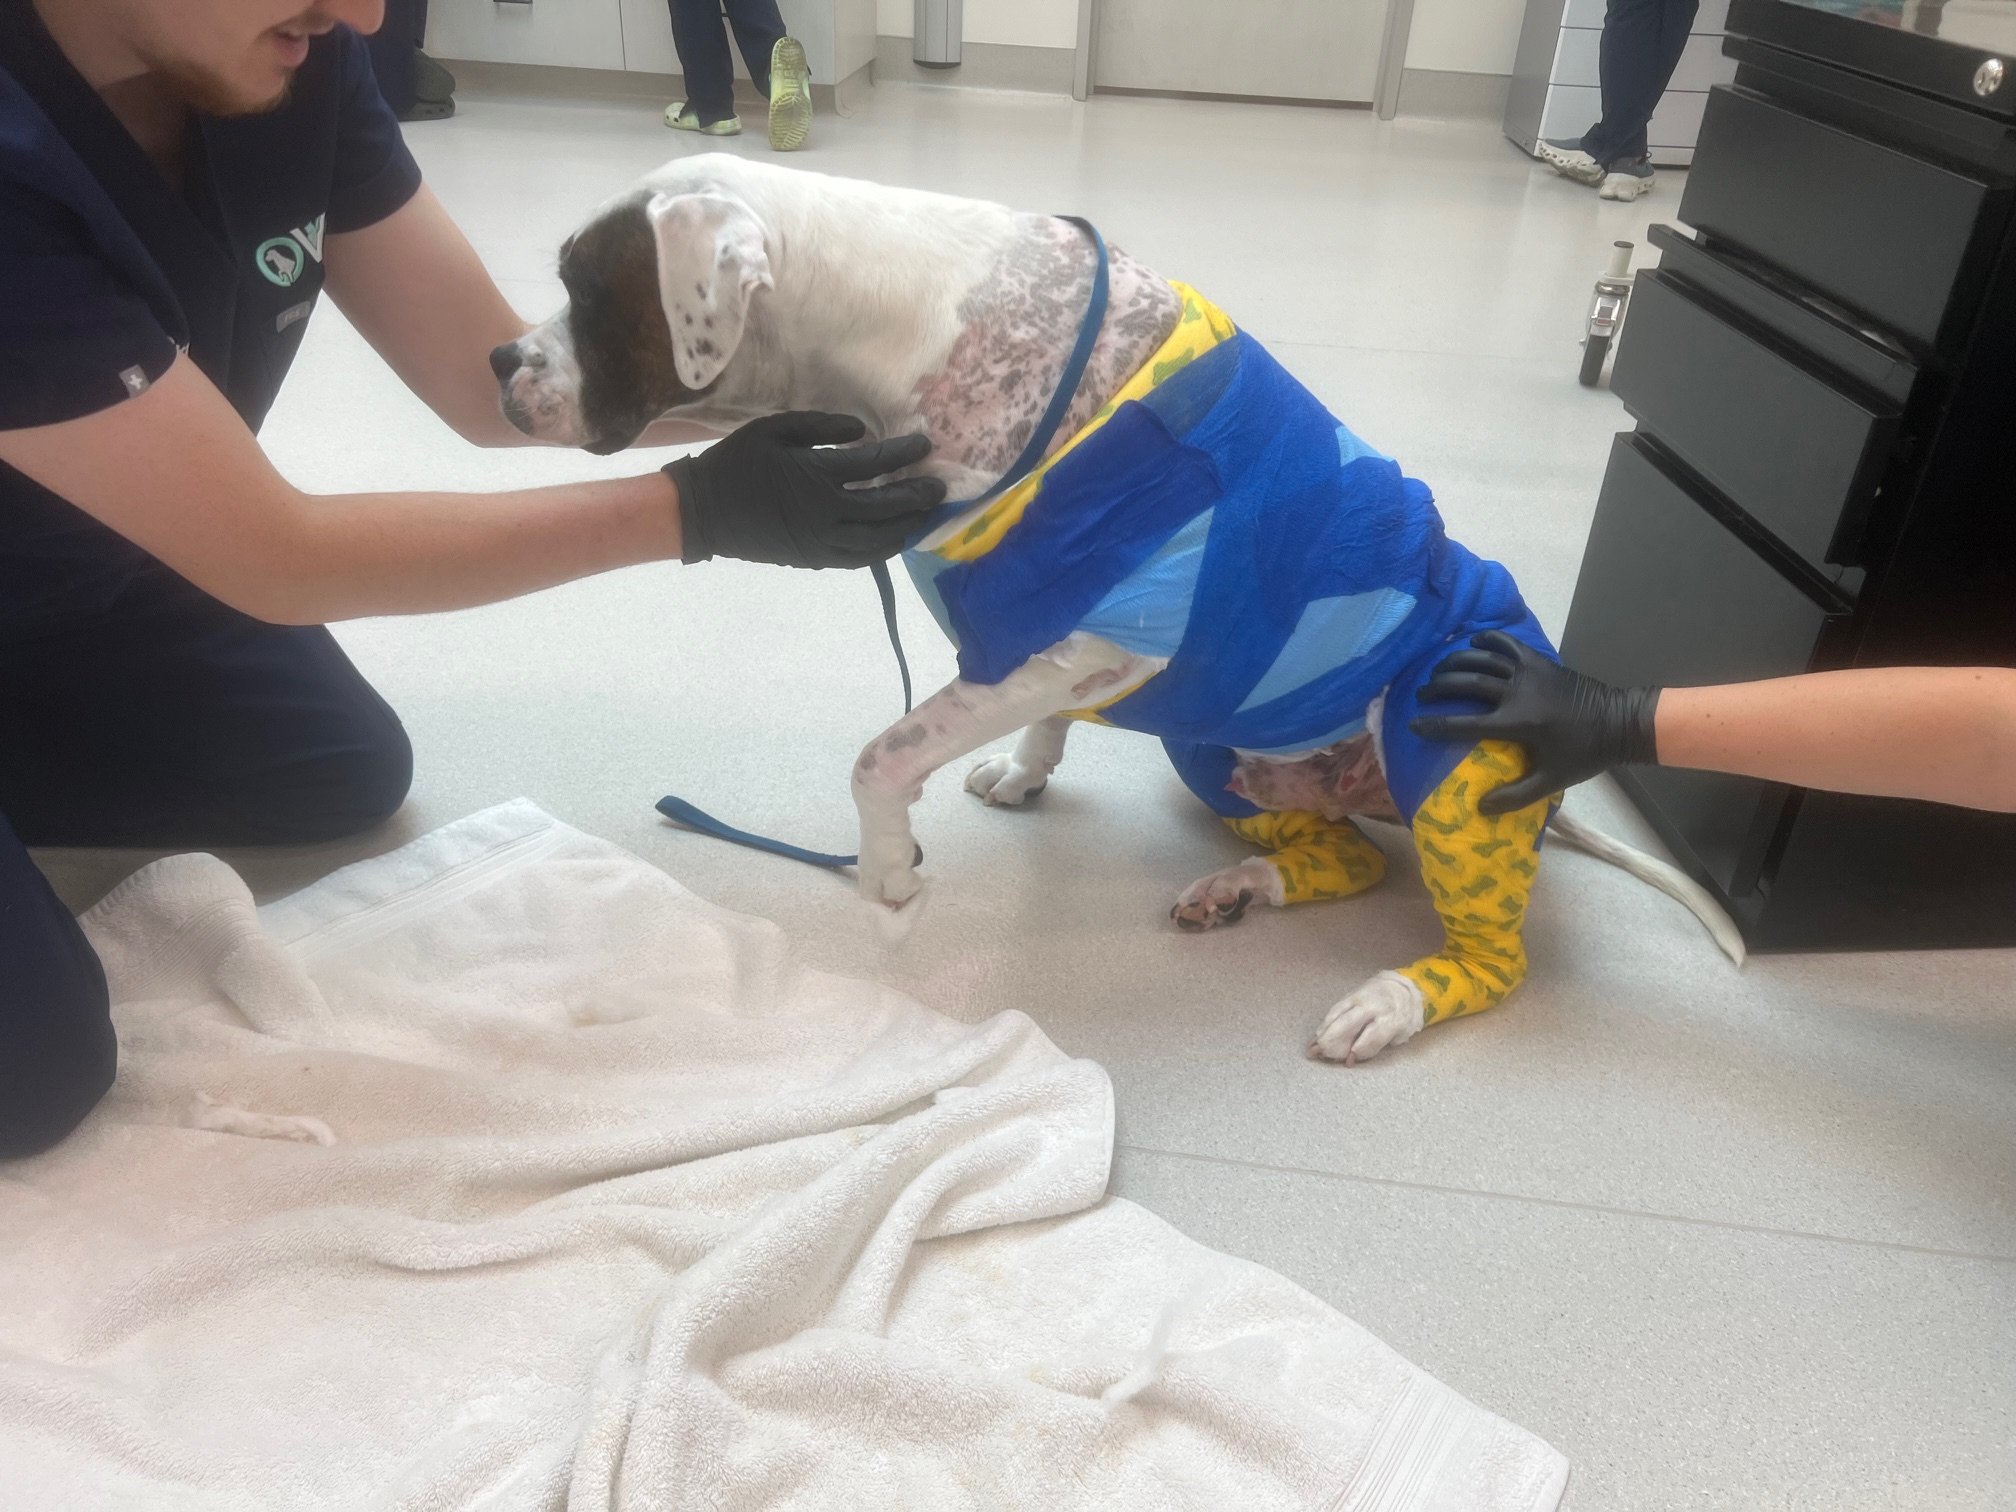
The bandage around his chest was becoming tight and uncomfortable, so we further modified his bandage to incorporate a thunder shirt to secure the bandage to. A pelvic limb bandage was created and stapled to the thunder shirt.
After perfecting the bandage we planned to repeat the grafting process.
Day 29
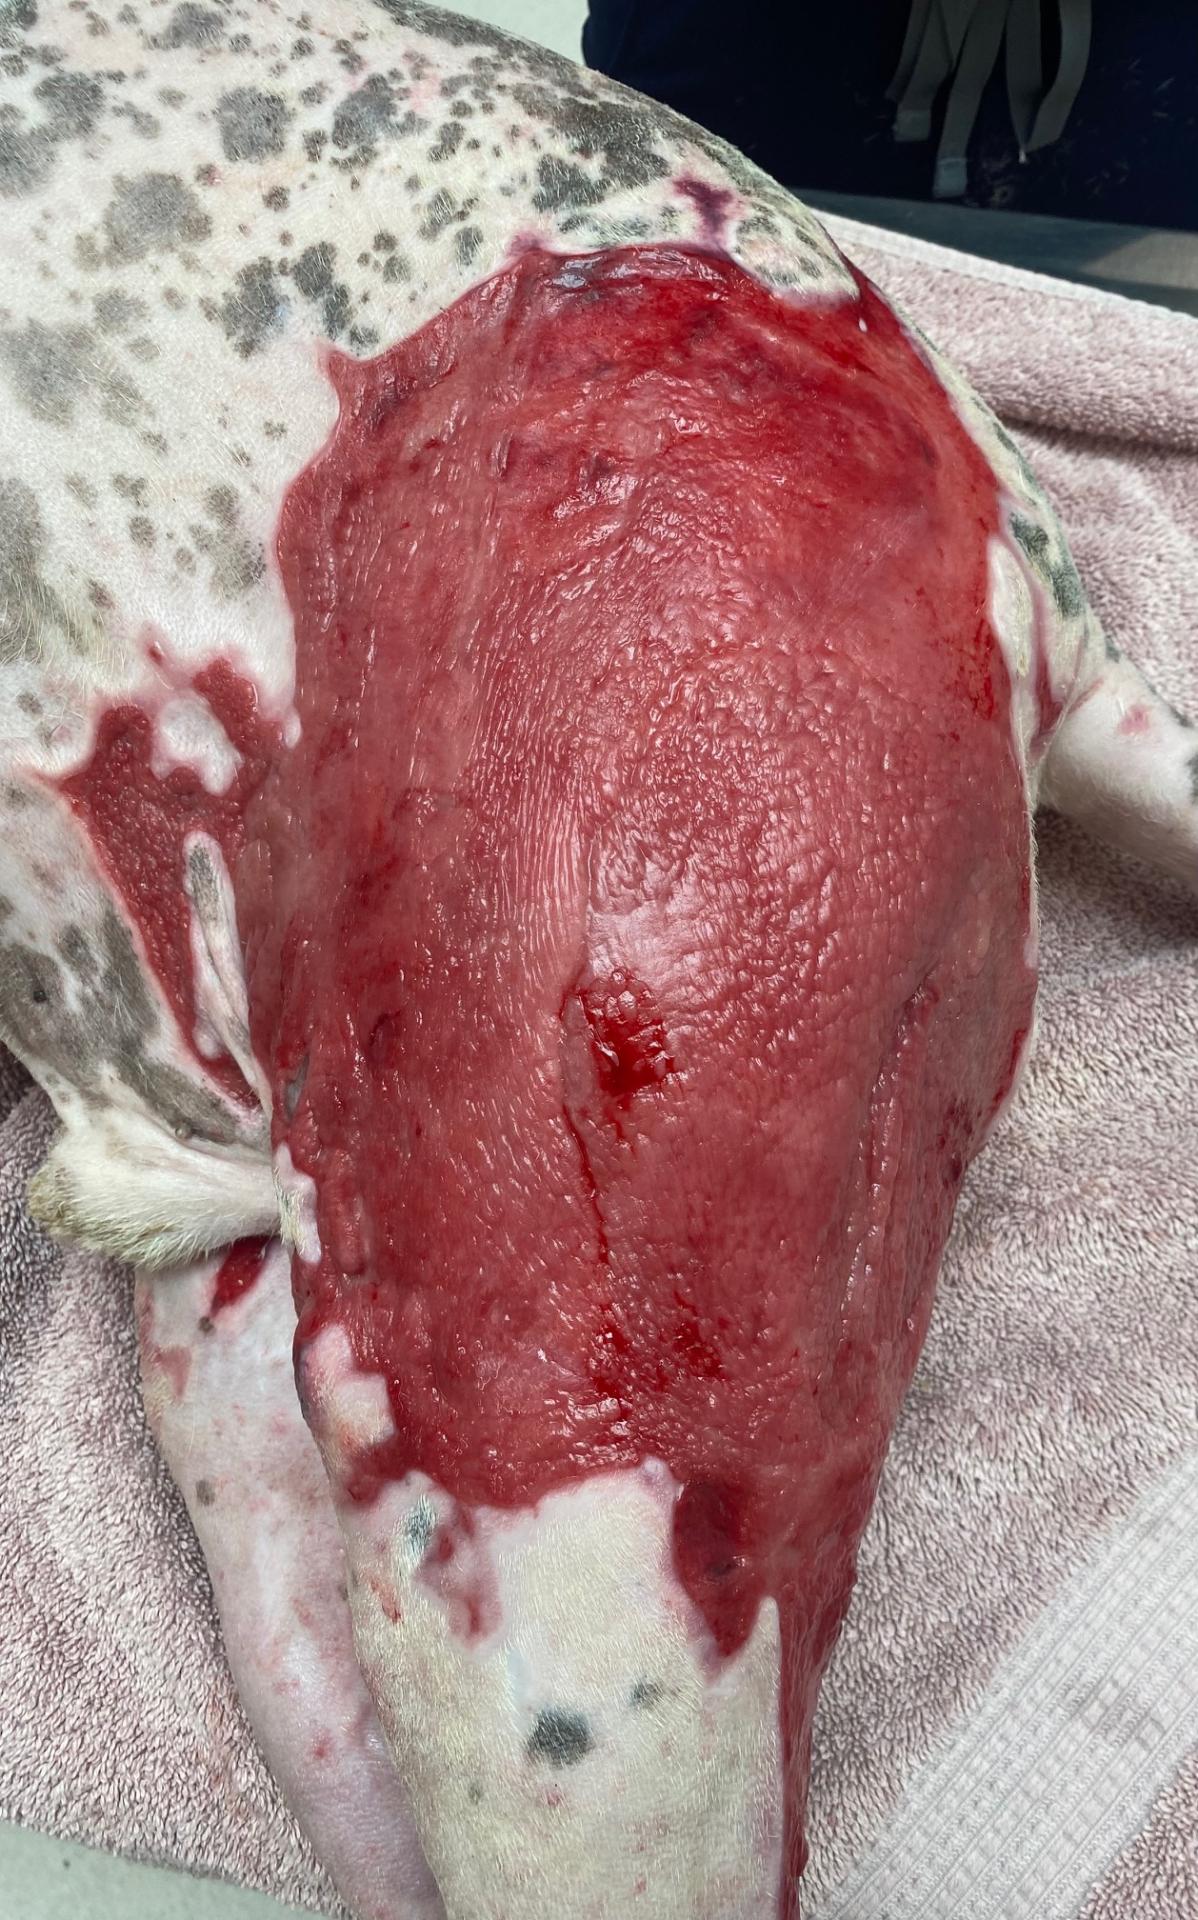
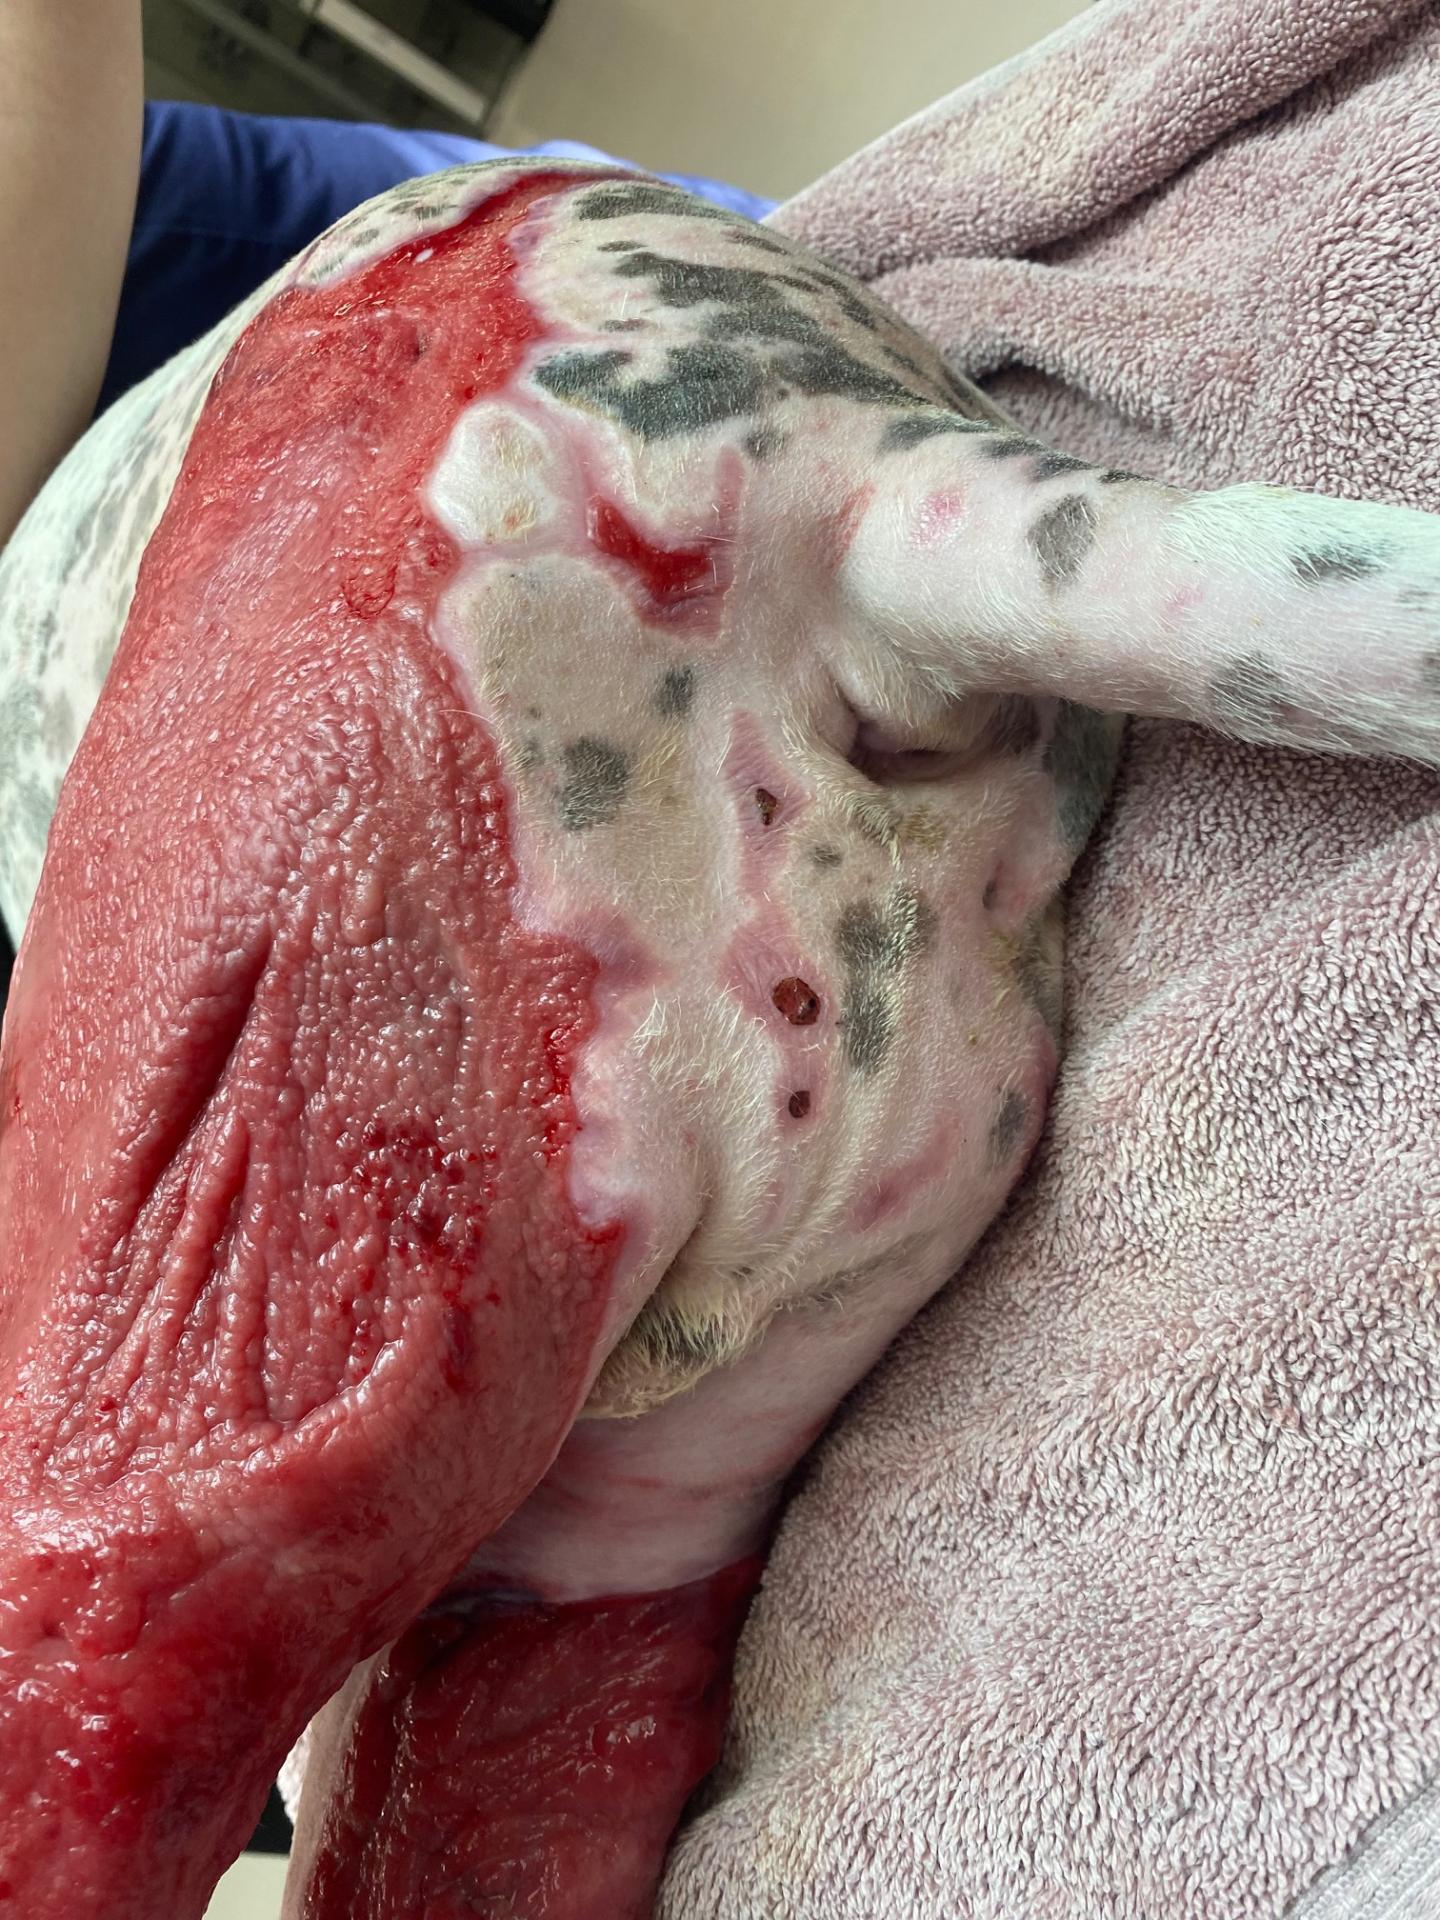
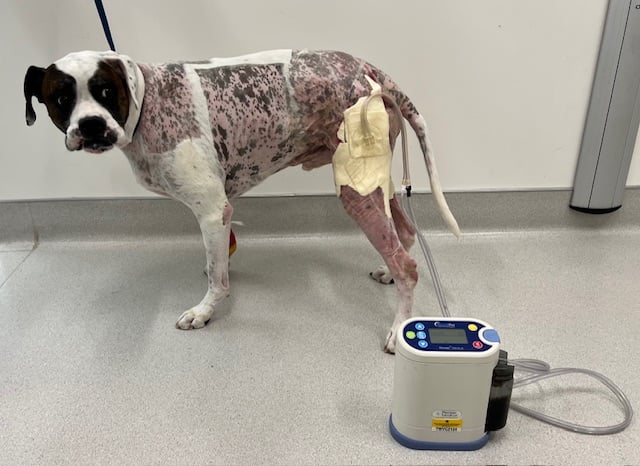
Modified bandage: an XL body suit was purchased to attached the bandage to. This minimized bandage material and also held up better then a full body wrap left on for 5-6 days. The suction tubing going to the wound vacuum is visible.
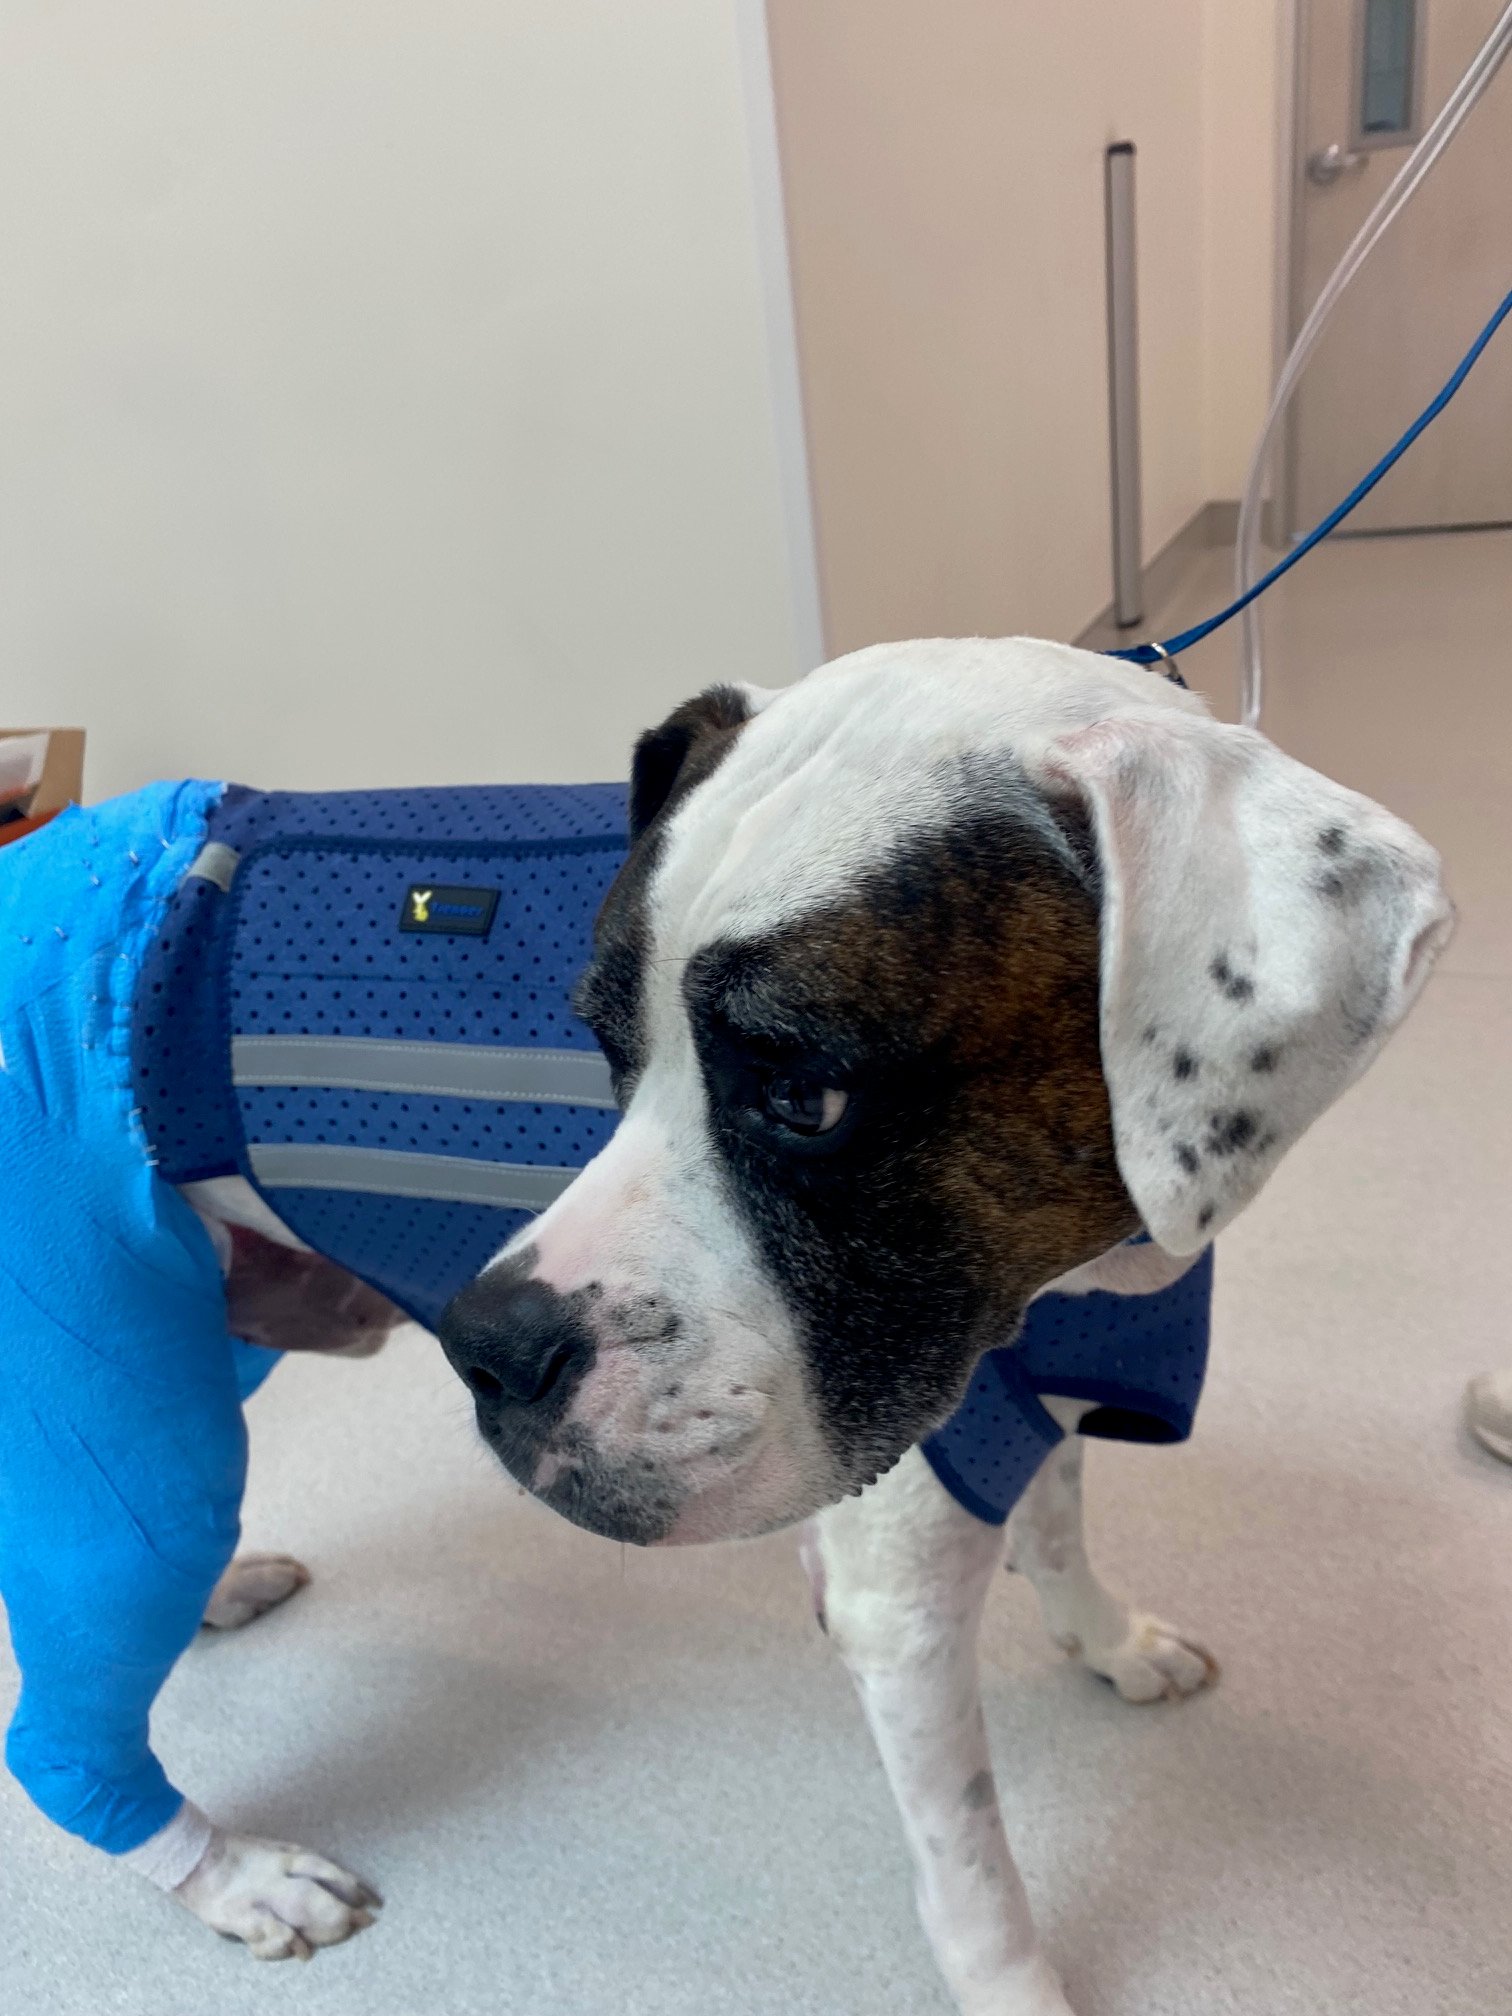
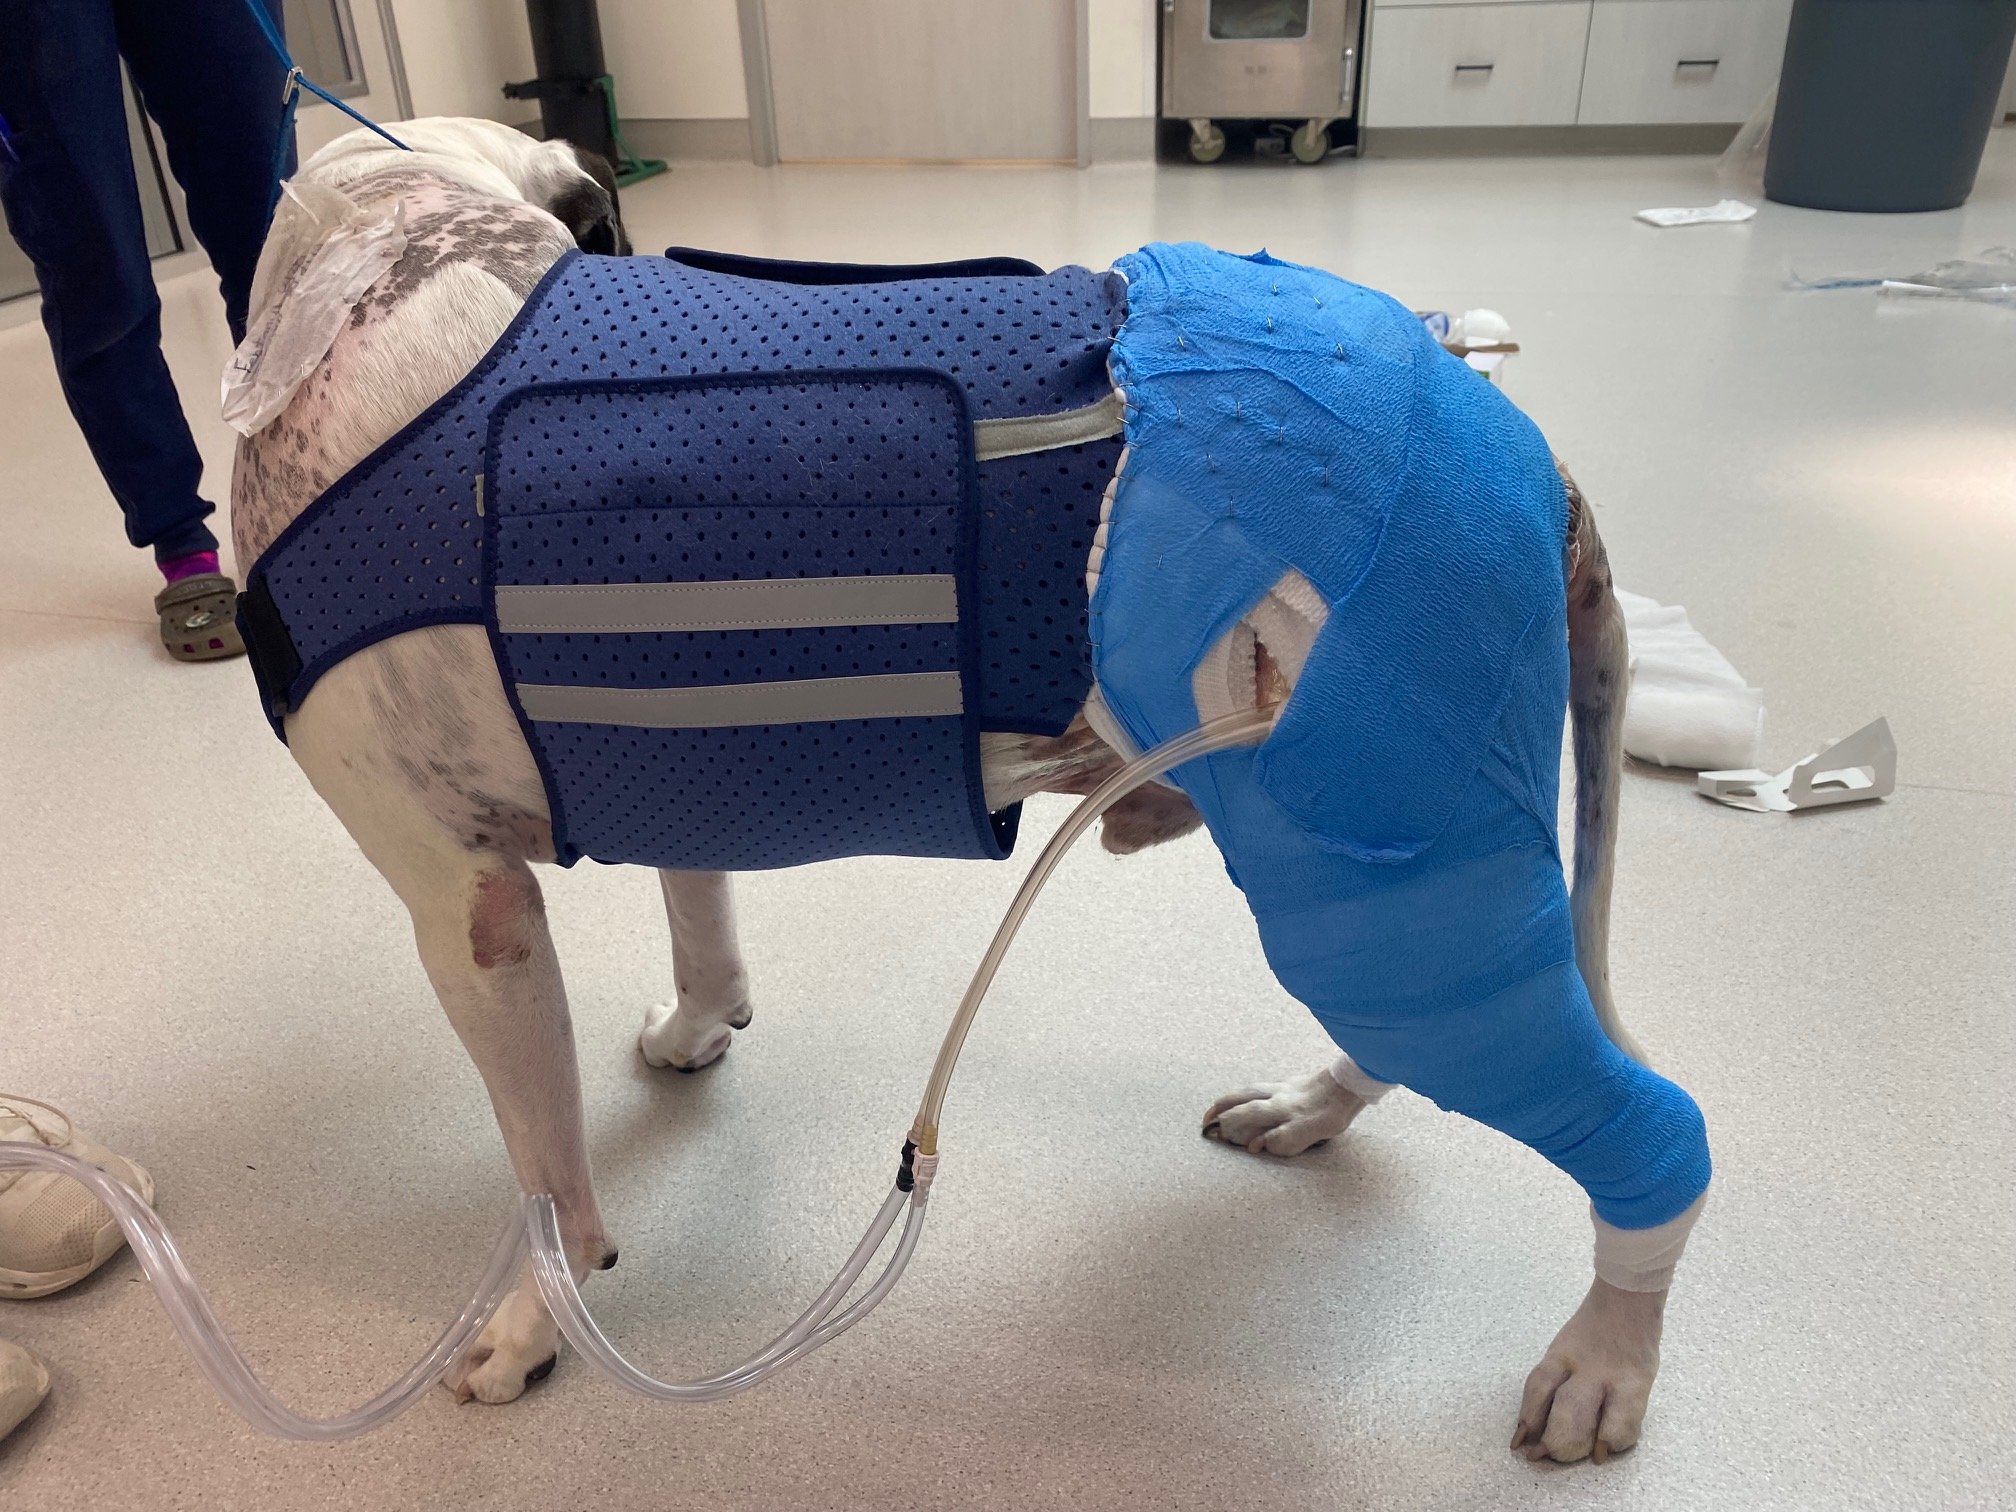
Day 32
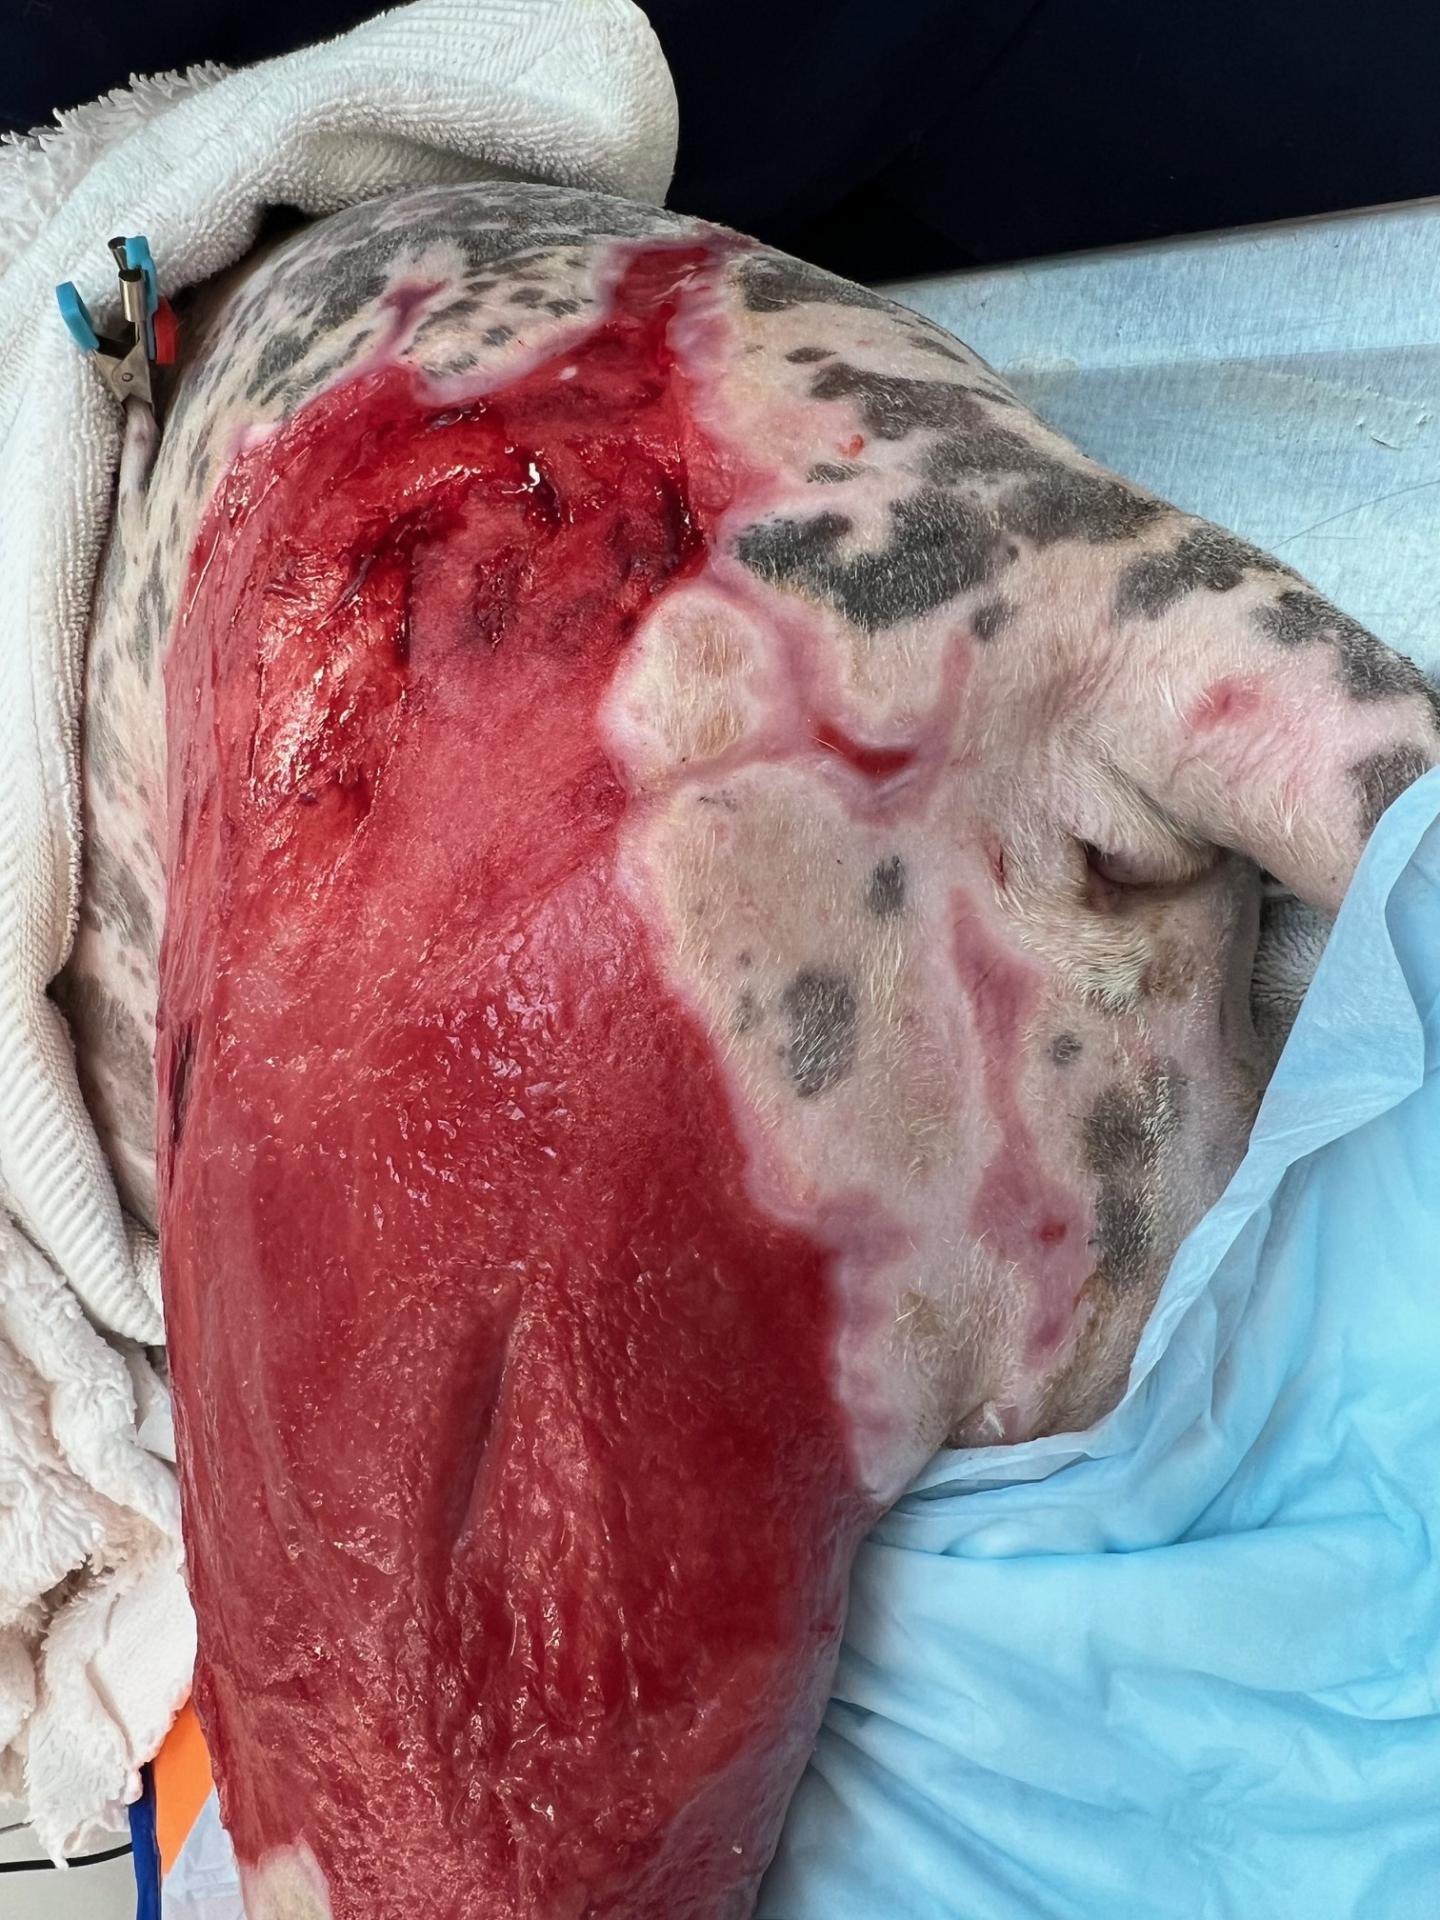
Wounds before the second round of skin grafting.
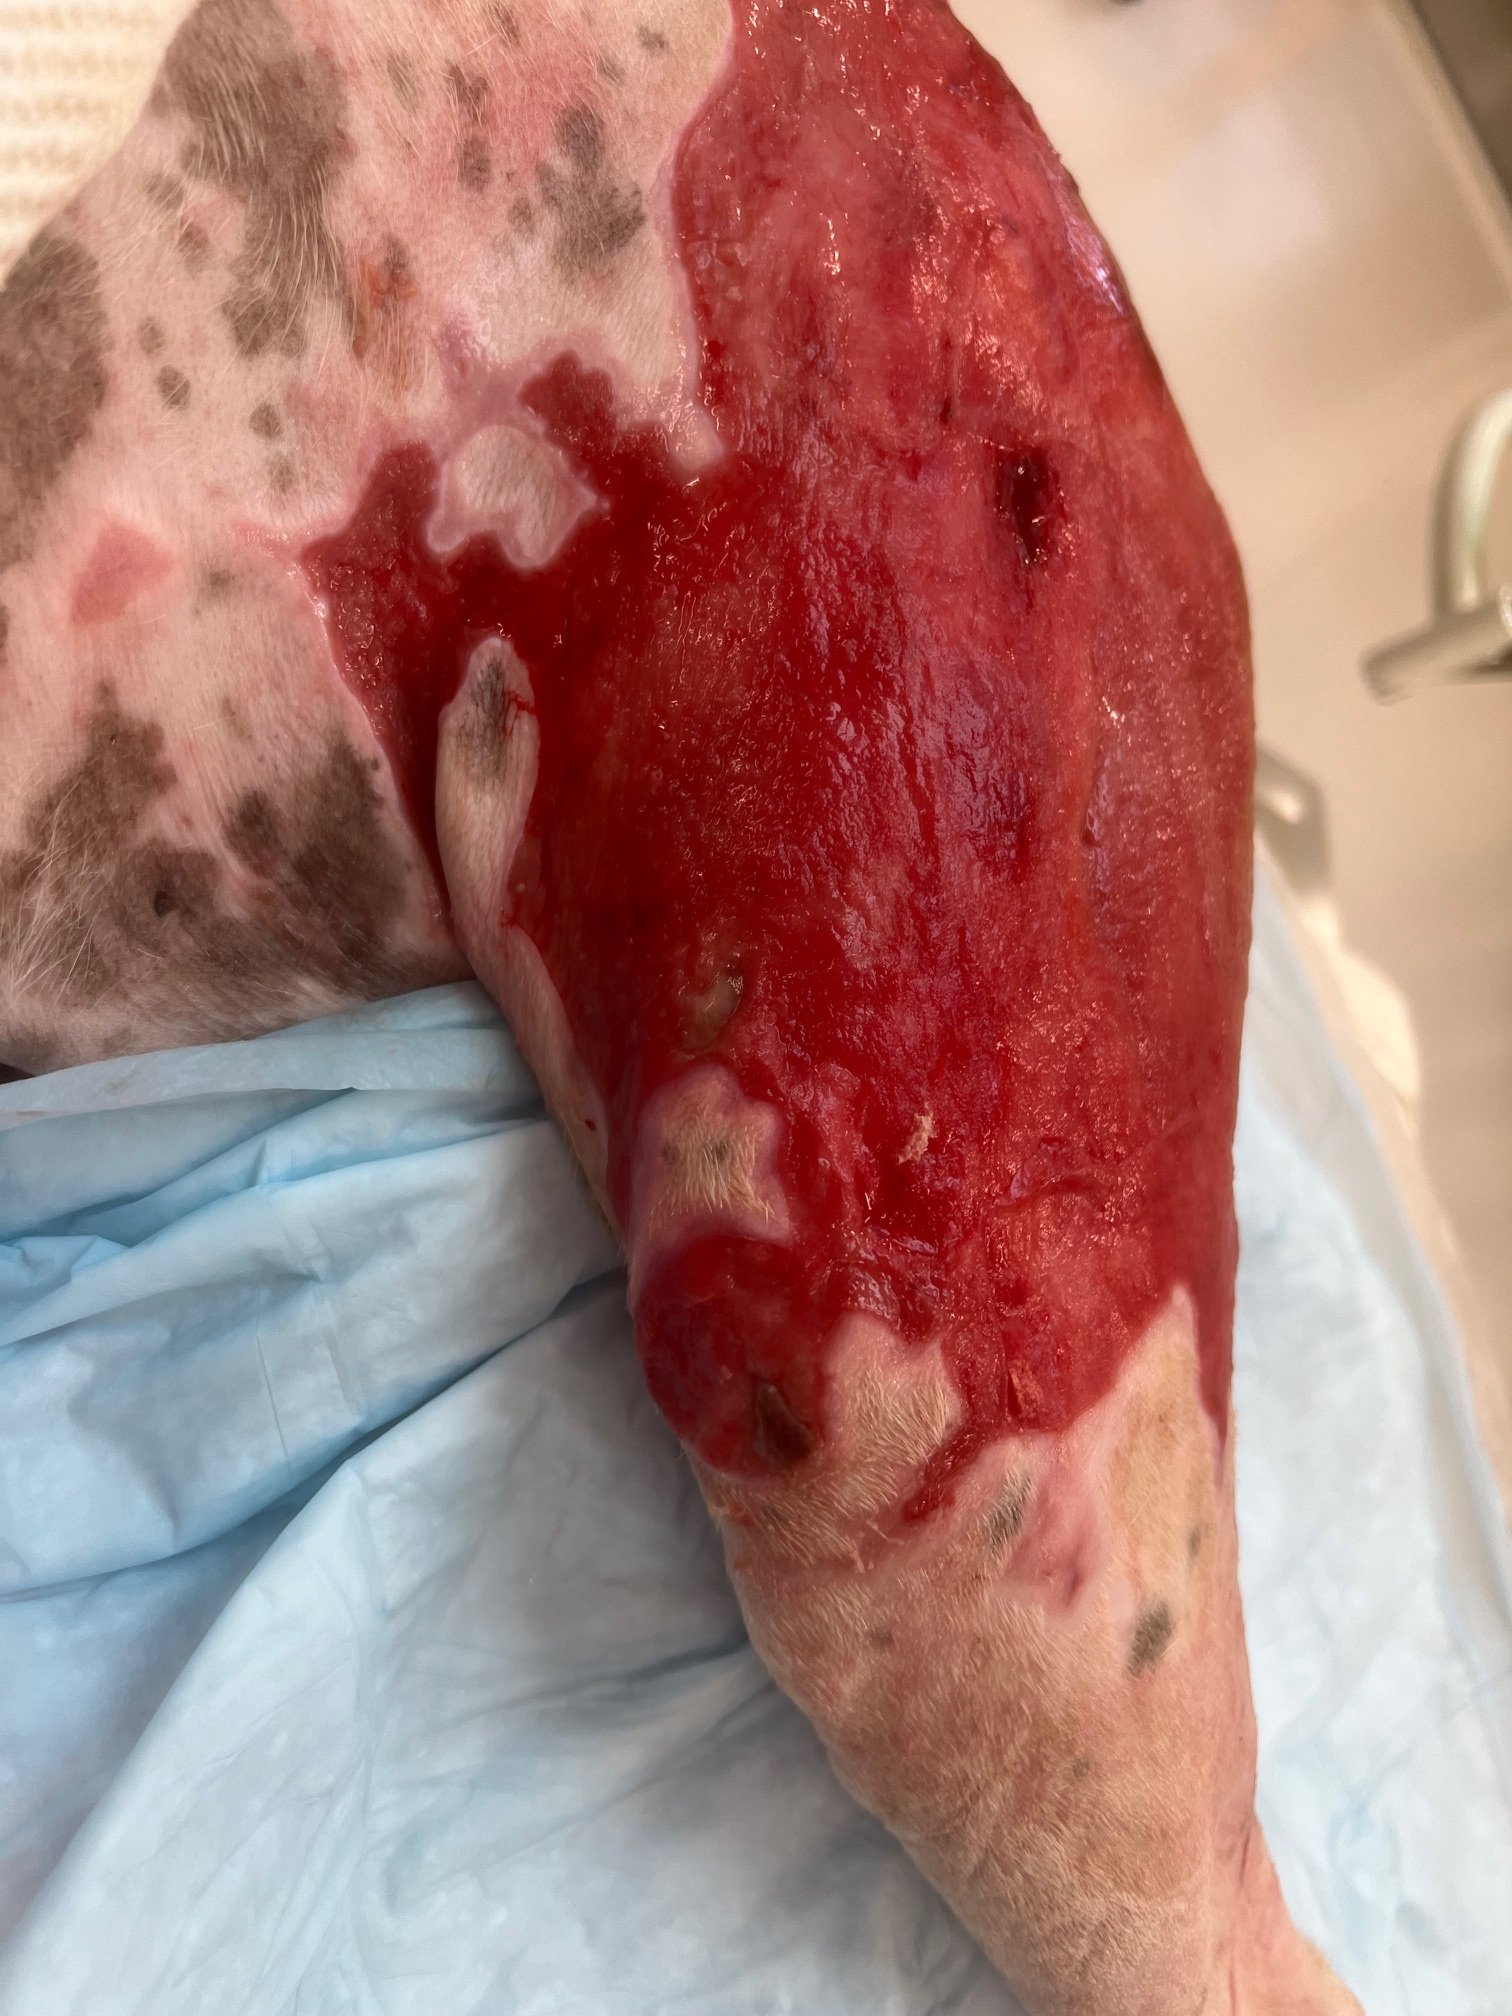
7x10cm kerecis cod fish skin grafts. skin graft sheets were initially positioned with staples over the center of the wound. The limb was placed through range of motion to check that the skin graft was not pulling away from the granulation bed. The skin graft was then secured with simple continuous nylon sutures around the periphery and throughout the middle of the graft.
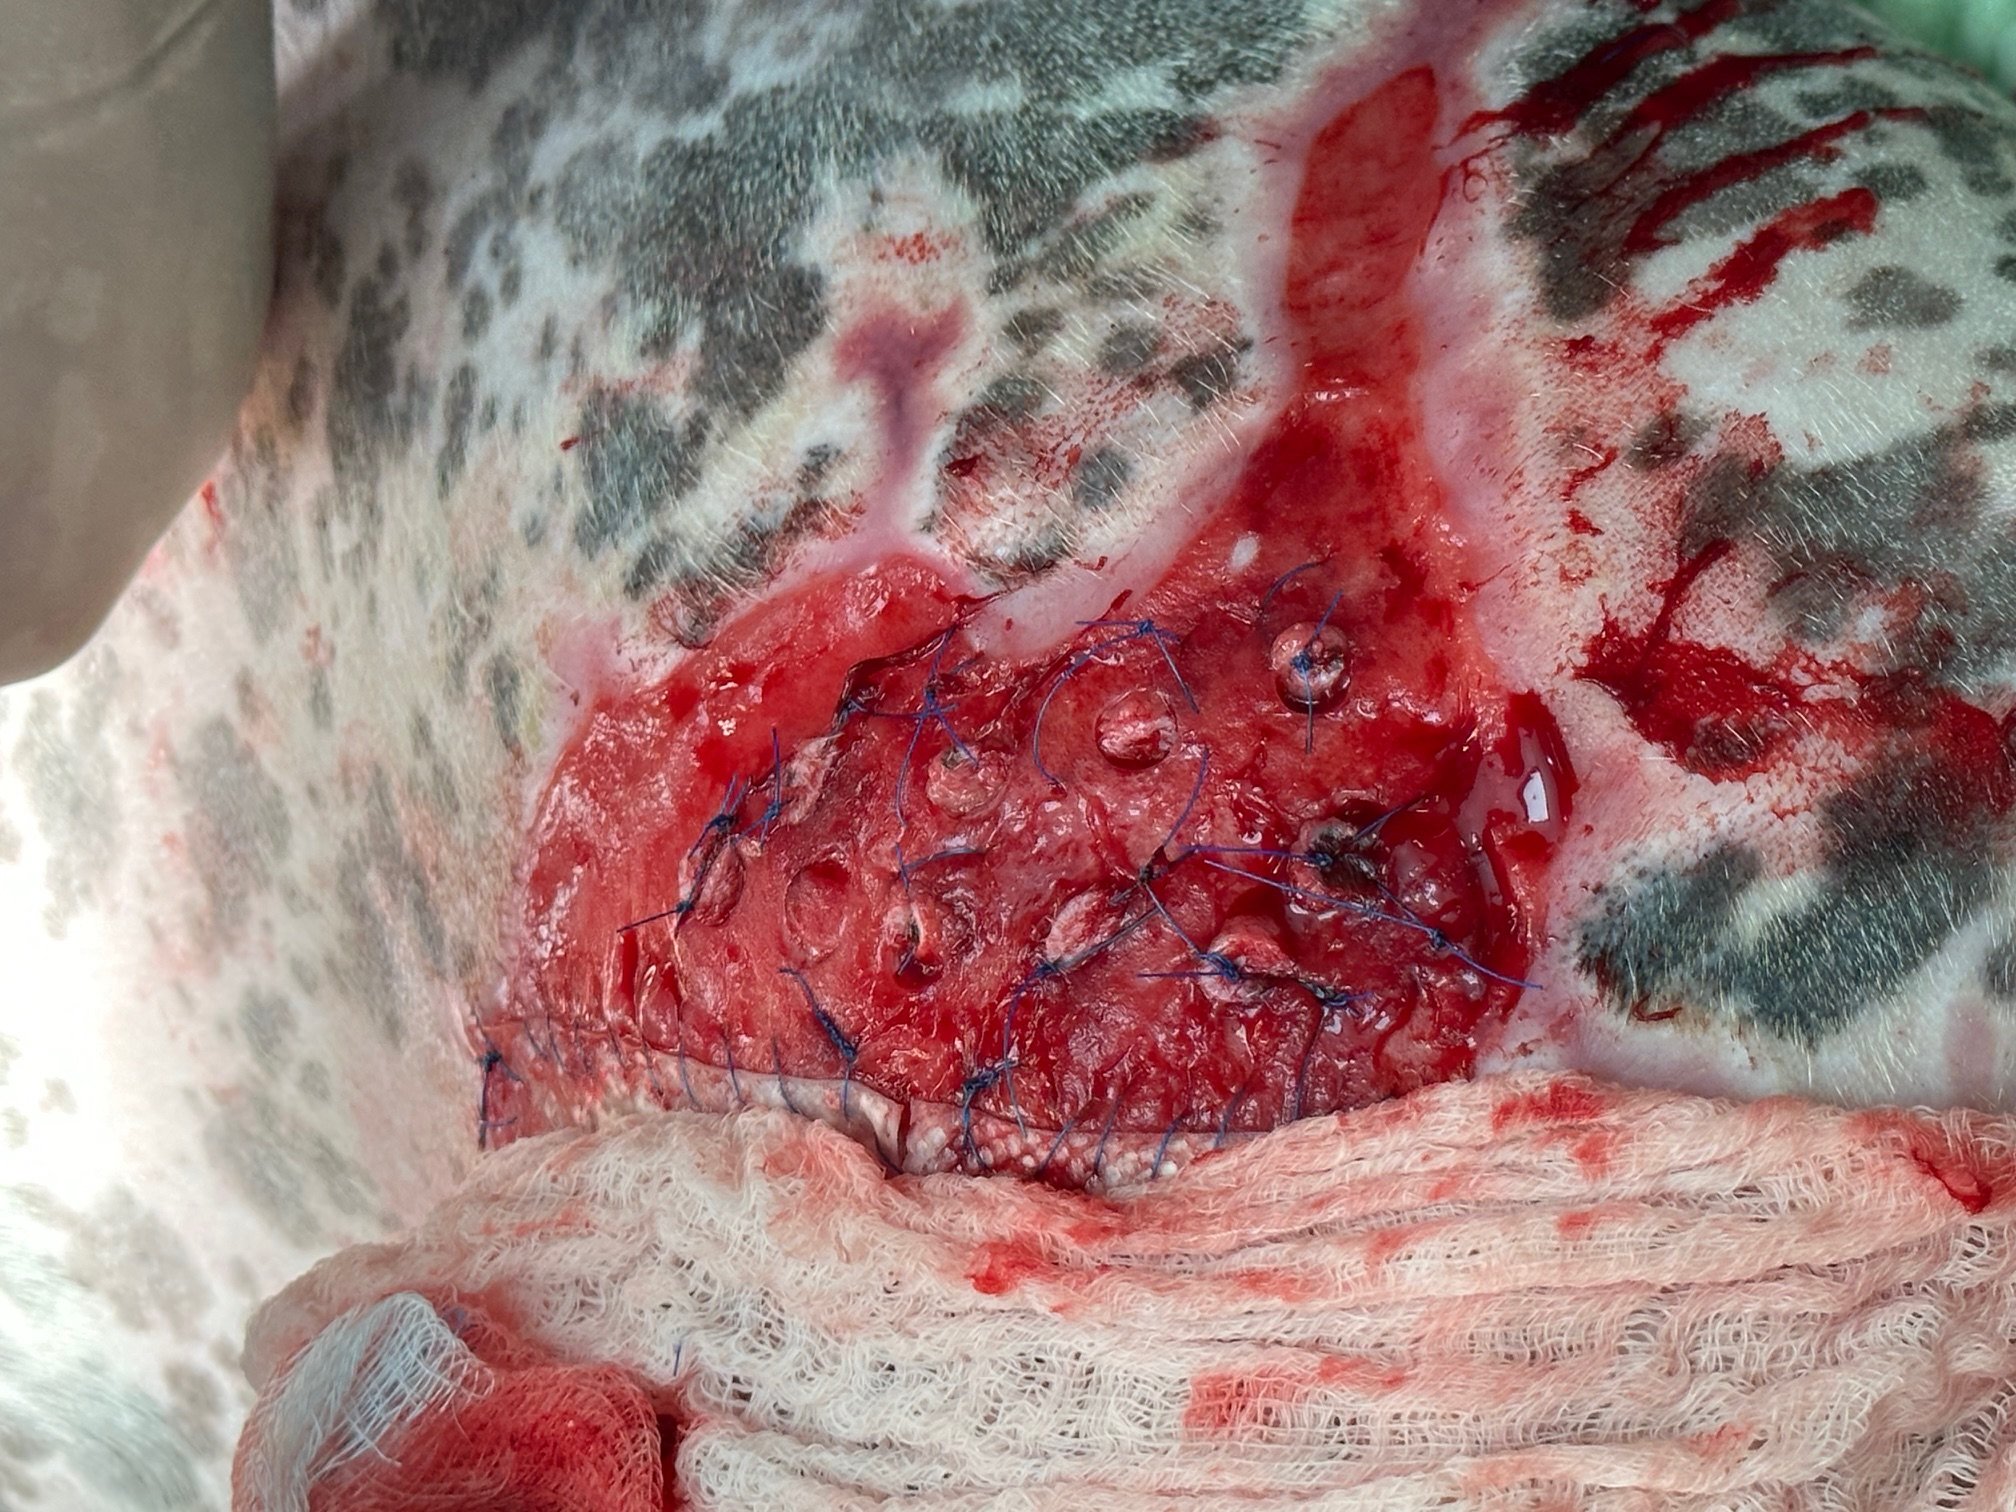
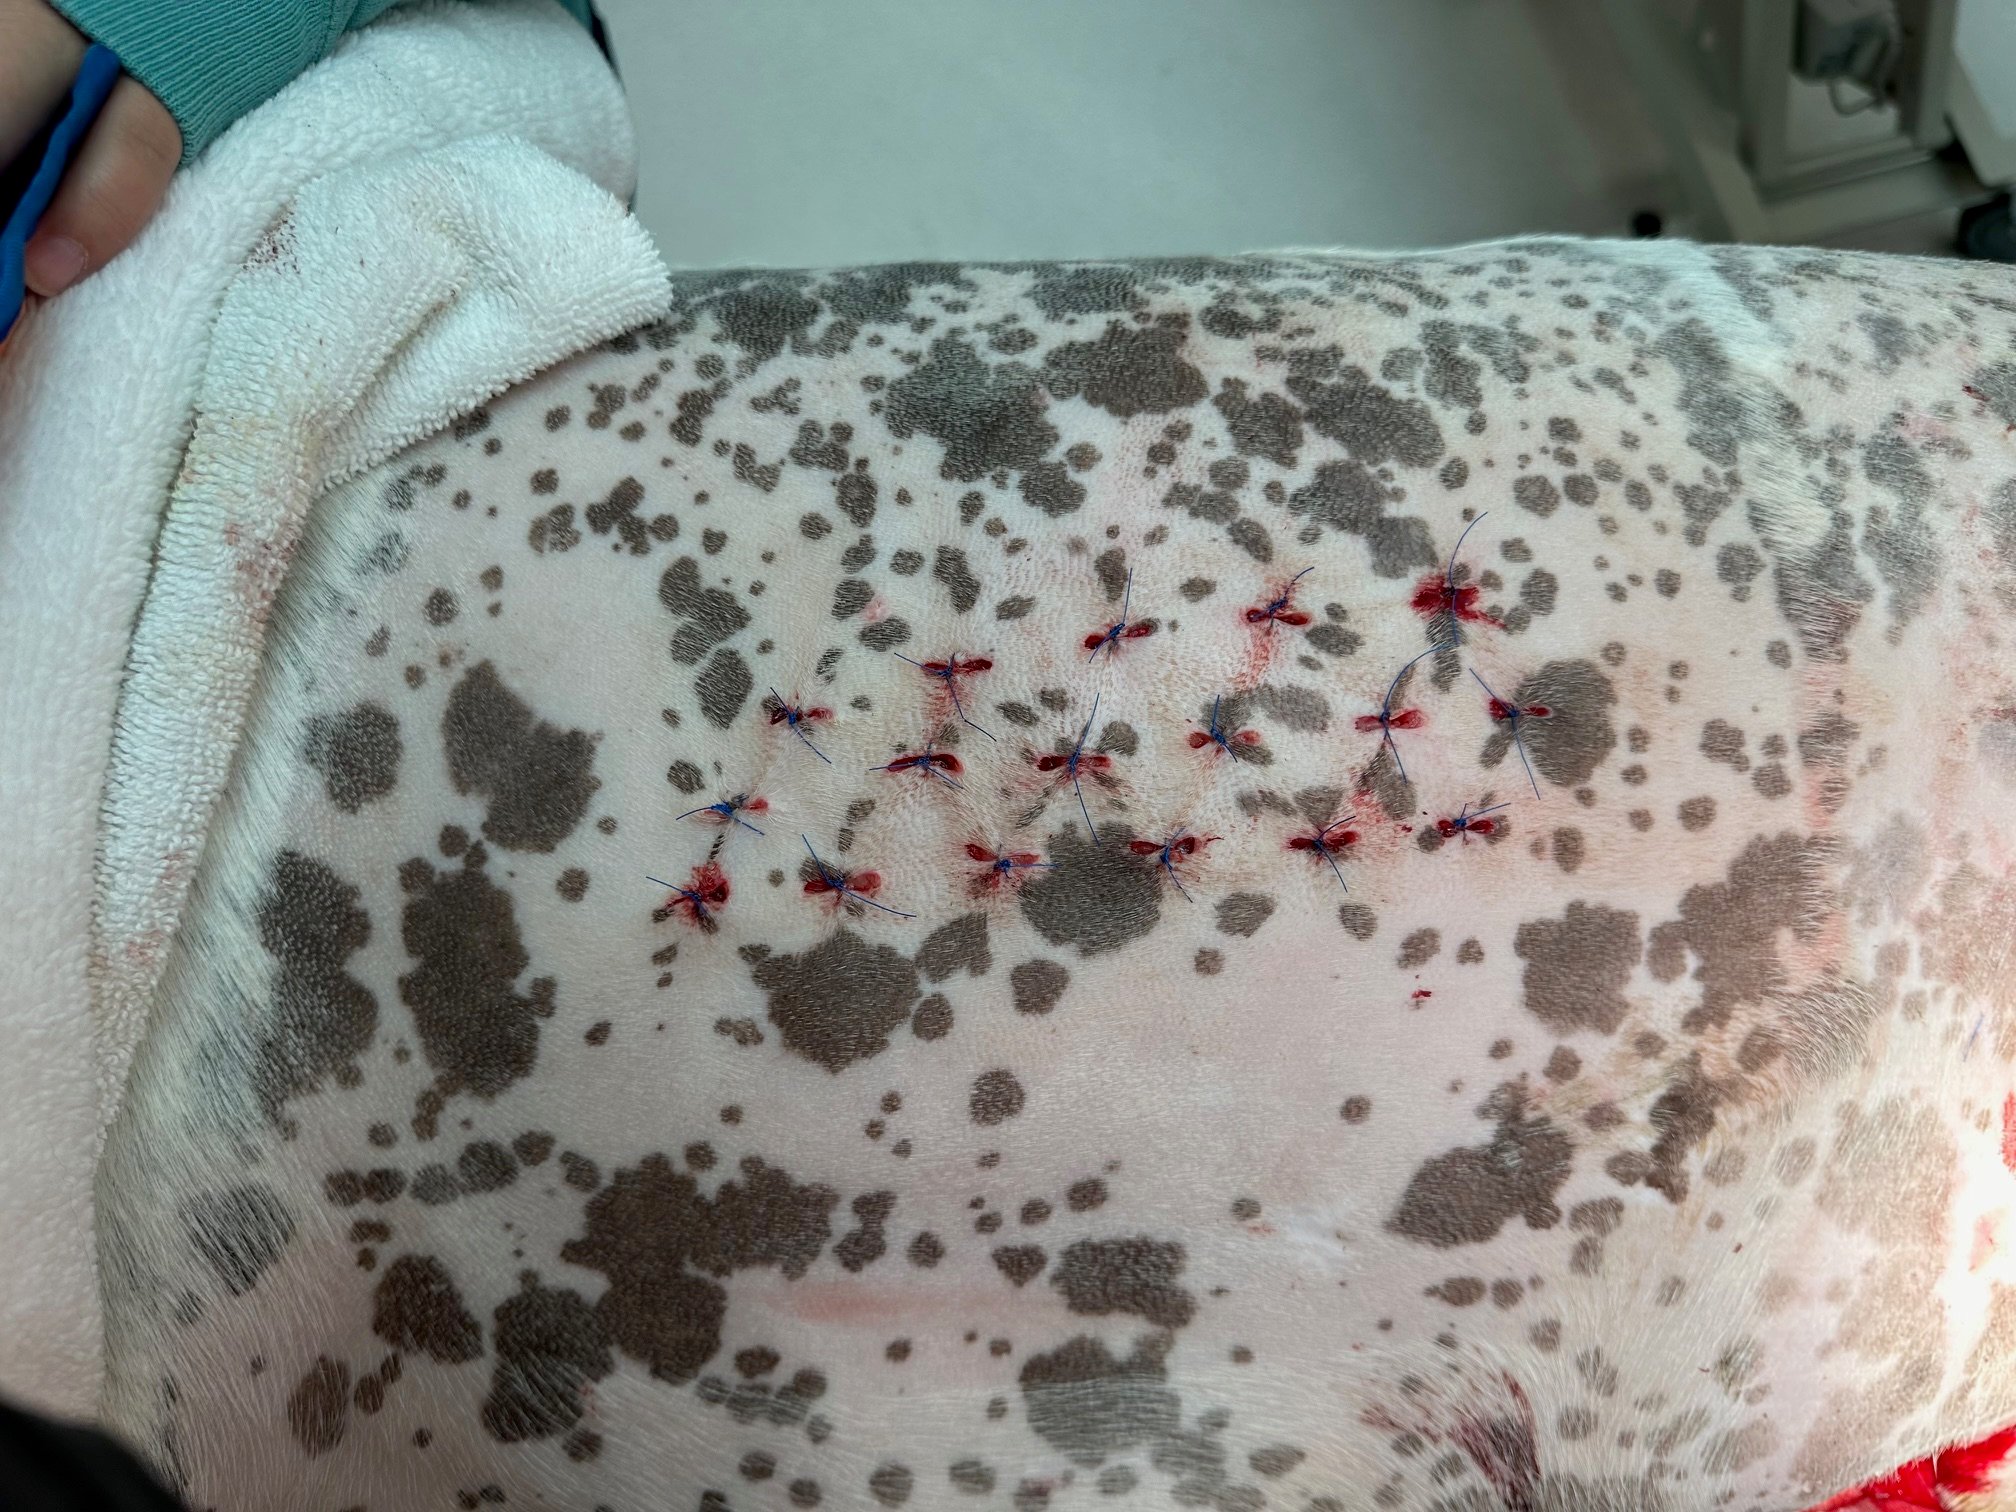
8mm biopsy punch skin grafts were obtained from the left thoracic wall and were then inserted into 6mm holes created in the granulation tissue in areas not covered by the fish skin graft and sutured in place.
Day 36
4 days post grafting
Wound vacuum had lost seal. Fluid was dripping out from under dressings. Wound had a sweet musty smell. A culture was obtained. Results came back with; Enterococcus faecalis, Enterobacter hormaechei and Pseudomonas aeruginosa. Original Culture obtained 2 weeks prior for monitoring showed Enterococcus and Enterobacter only. By the tim the results were back; the wound was no longer malodourous. The only topical treatment at this time was the continued use of the wound vacuum. The wound did not have a similar aroma after the first round of fish grafting was applied two weeks prior.
The smell had cleared up with the use of increased
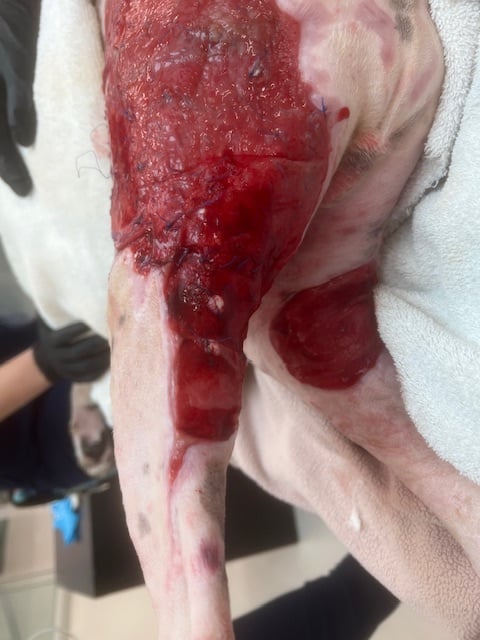
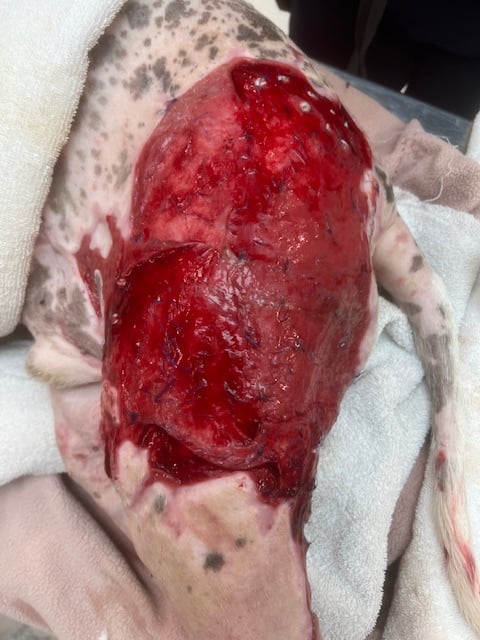
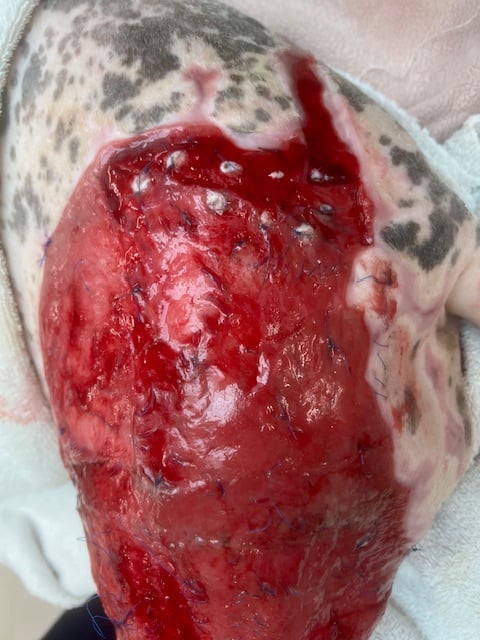
Day 44
Left pelvic Limb
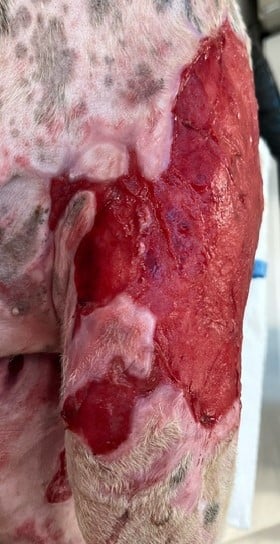
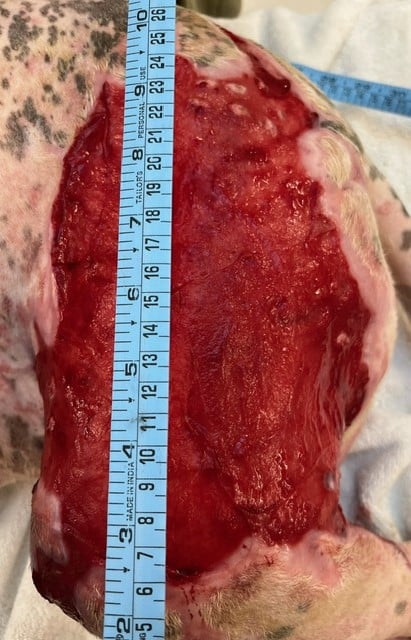
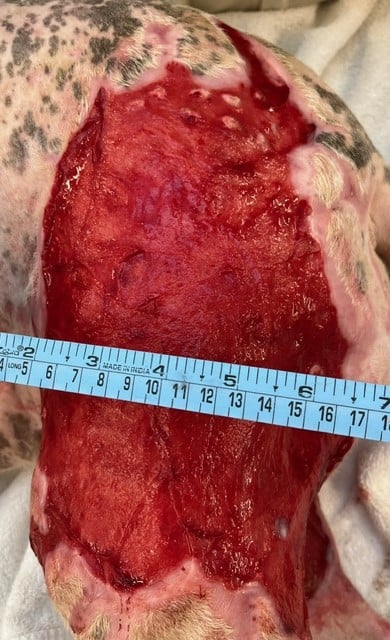
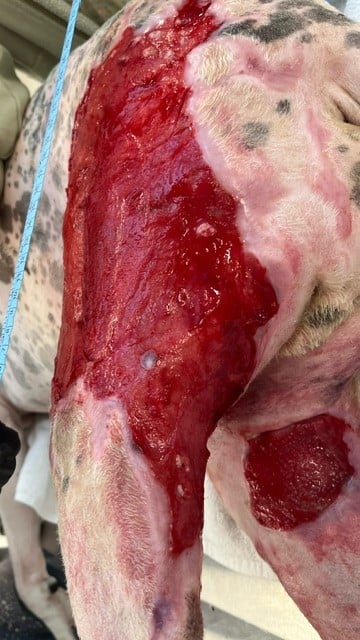
Right Pelvic Limb
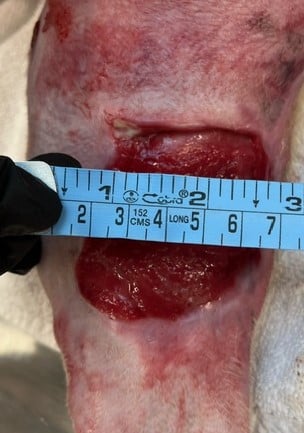
Day 47
To increase Charlies Comfort we removed the bandaging over the wound vacuum. As his wound has continued to shrink, it became easier to get a good seal with the adhesive drape material. We stopped adding laparotomy gauze to his dressing. With the wound vacuum on and working well the extra absorbent material seemed irrelevant. It stayed moist and added weight to his dressing, instead of suctioning off the extra fluid.
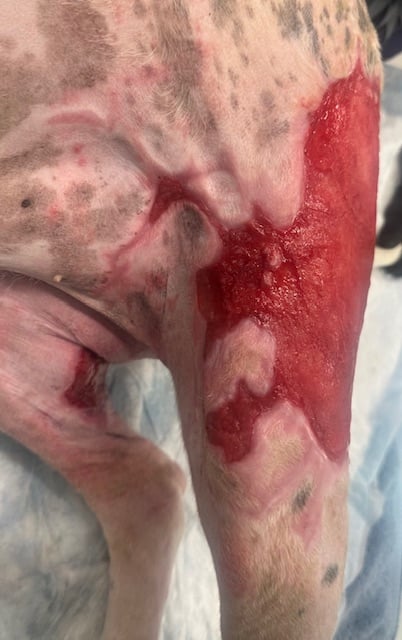
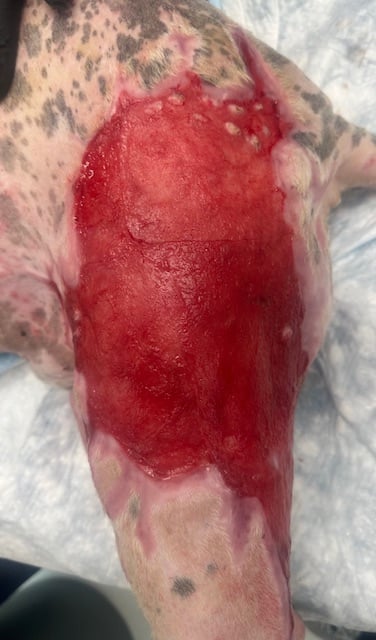
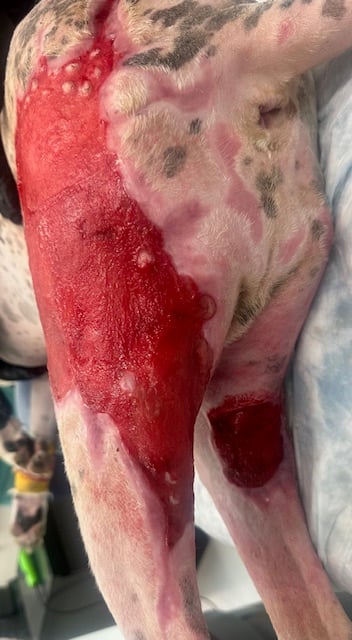
Punch Grafts, 3 weeks post grafting
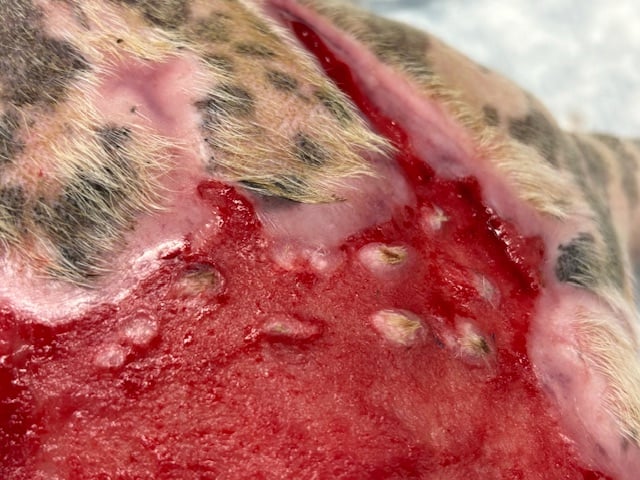
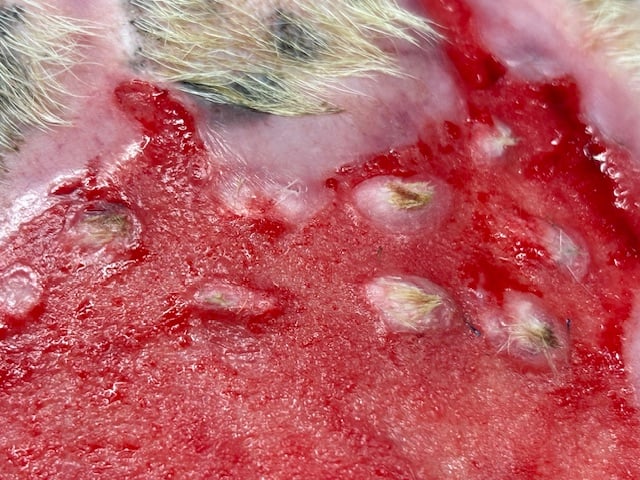
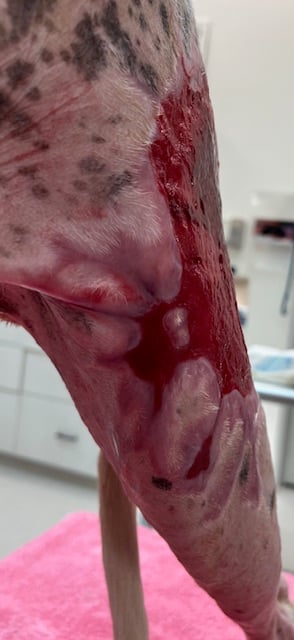
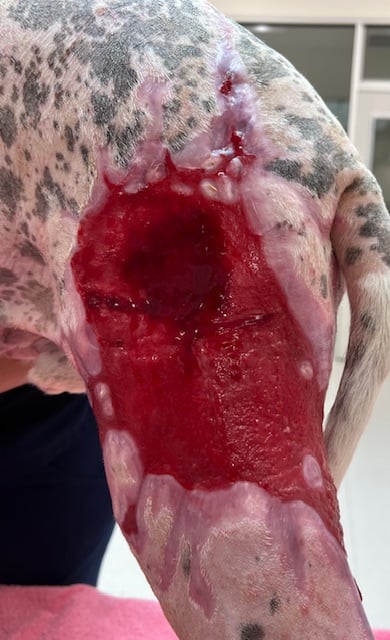
100% of the punch grafts were viable. Charlie has very thin skin, no fat needed to be trimmed off the deep side of the graft. Suturing the graft in place and securing with the wound vacuum was highly effective at preventing the grafts from dislodging. In the photos below, hair growth is observed from the punch grafts and epithelization is visible spreading out from the graft islands.
Day 53
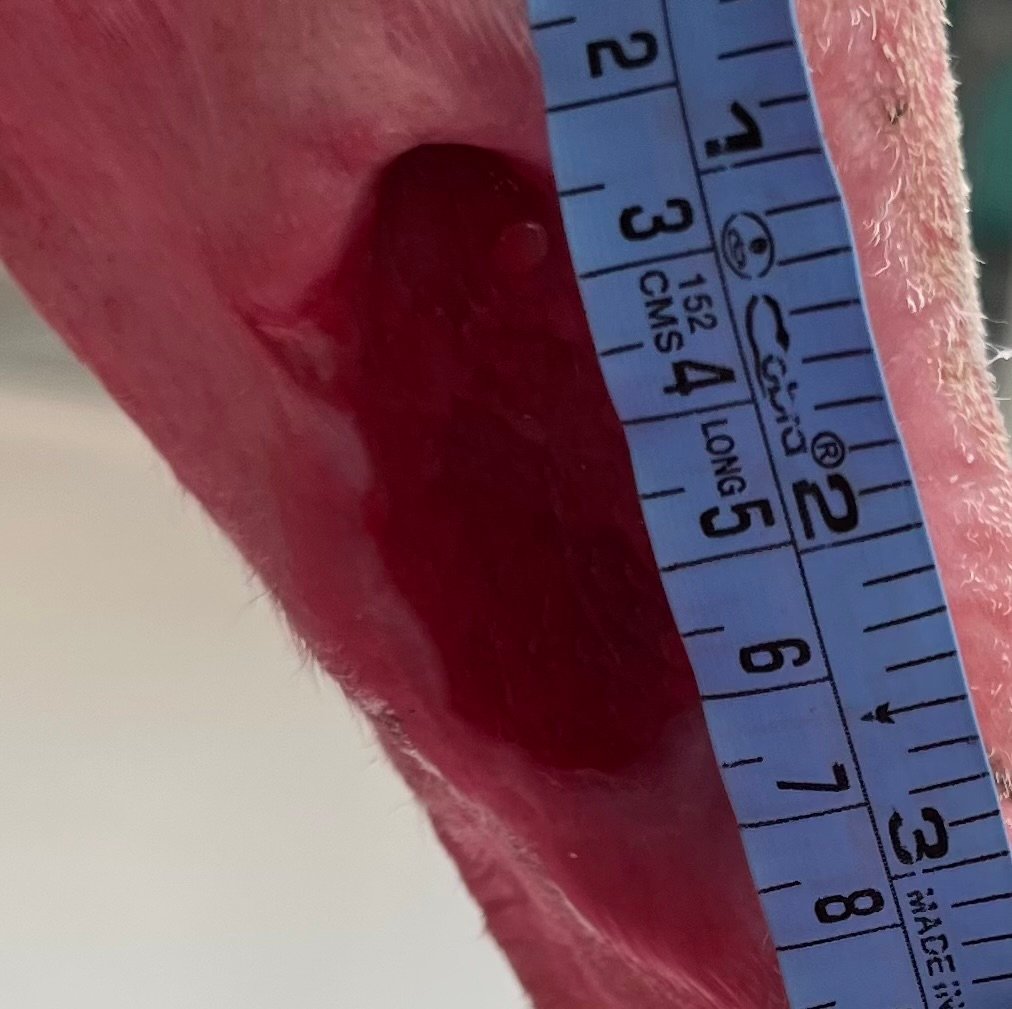
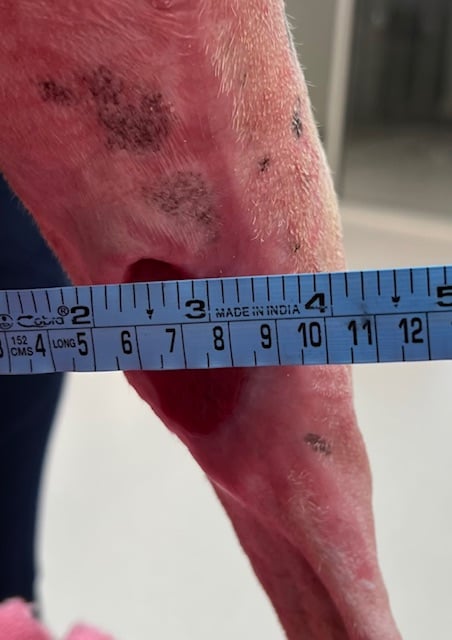
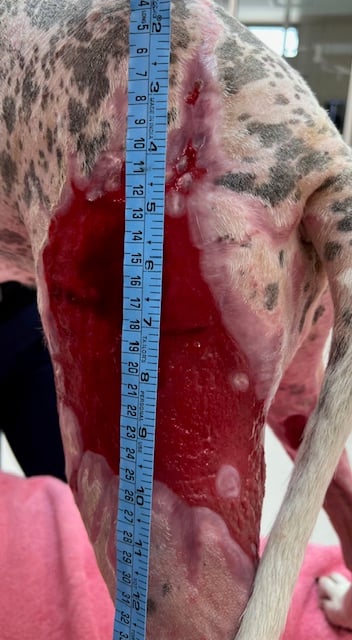
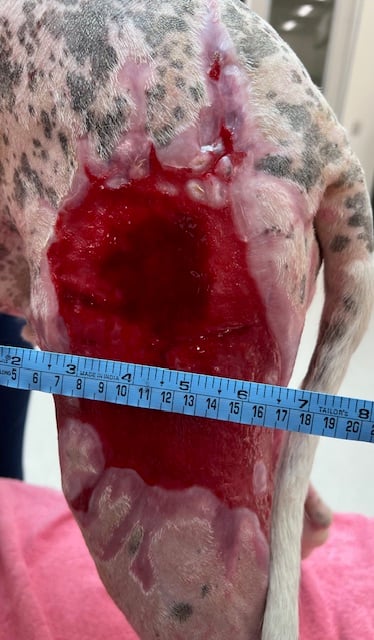
Left Leg

Right Leg
Day 56
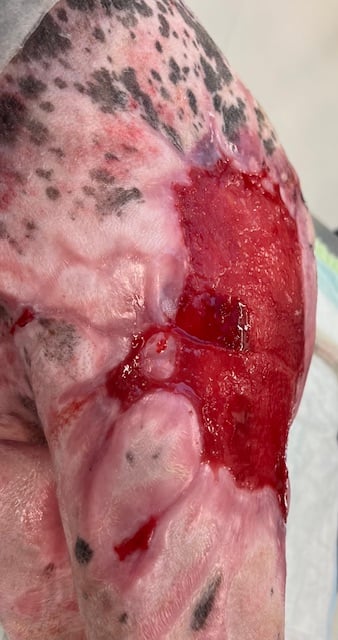
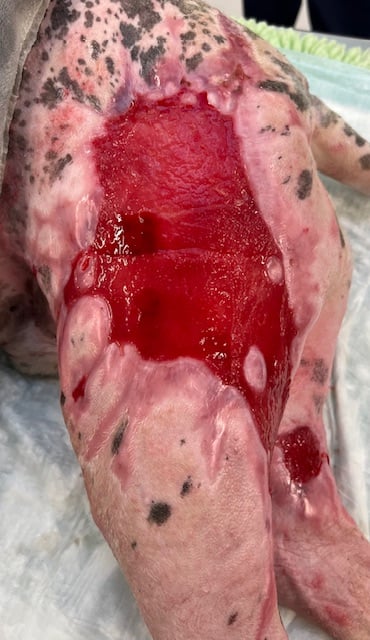
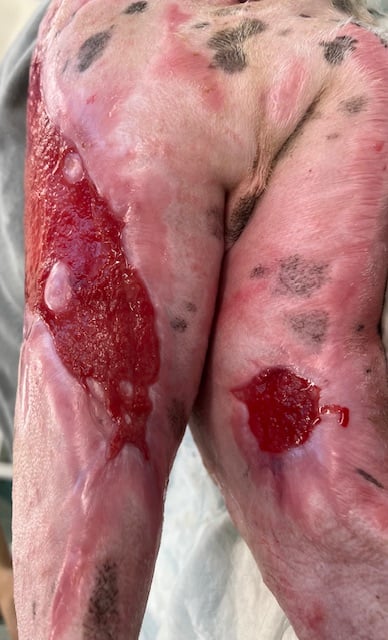
Recell Spray on Skin Cells
Day 59
Right Leg
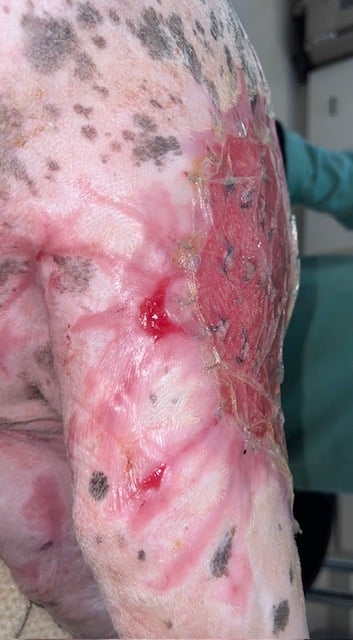
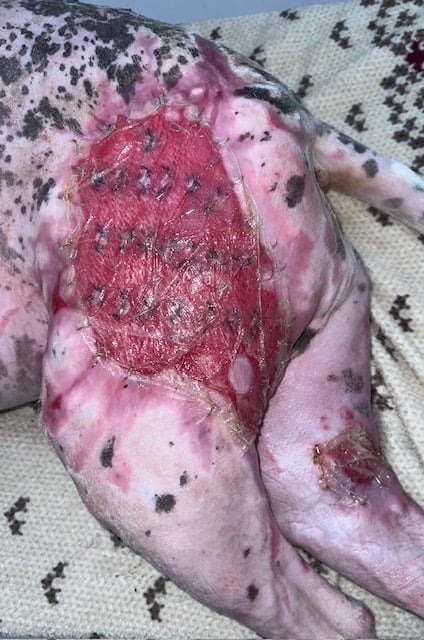
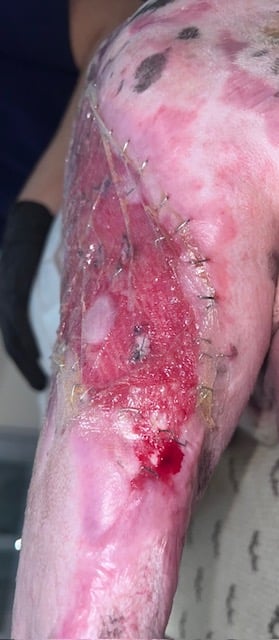
Meshed skin graft is still barely visible on the wound bed in the zoomed in photo below.
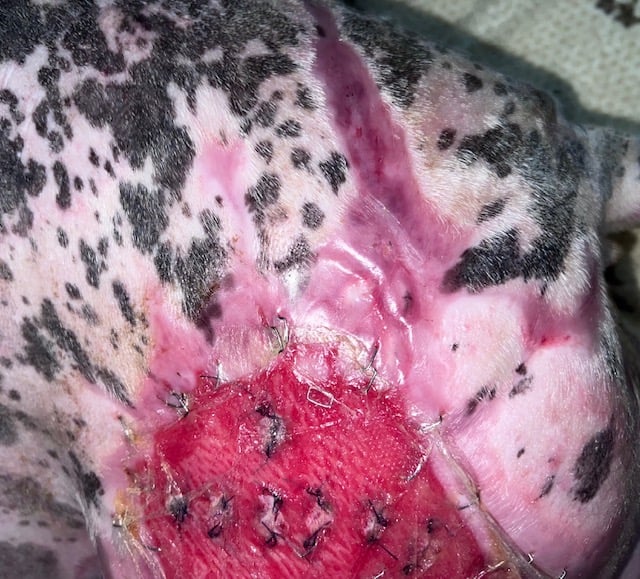
Left Leg
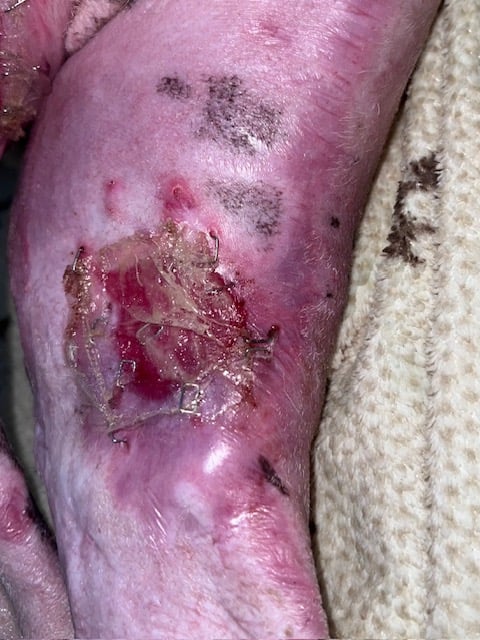
Day 69
left leg
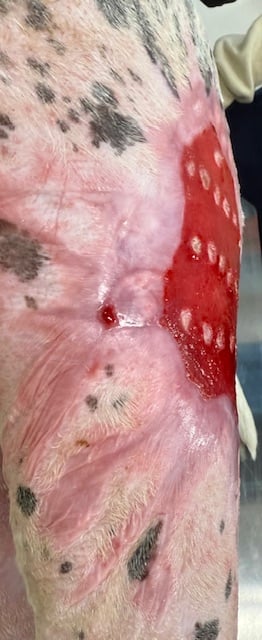
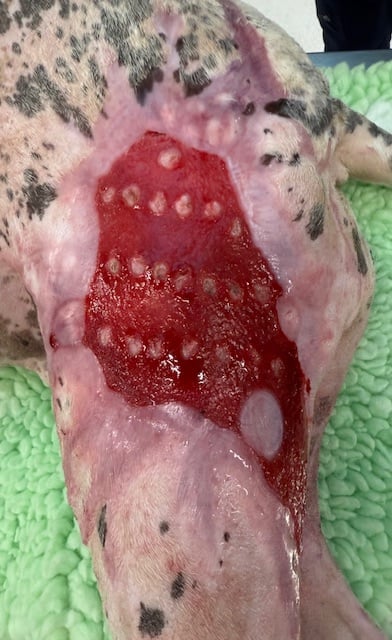

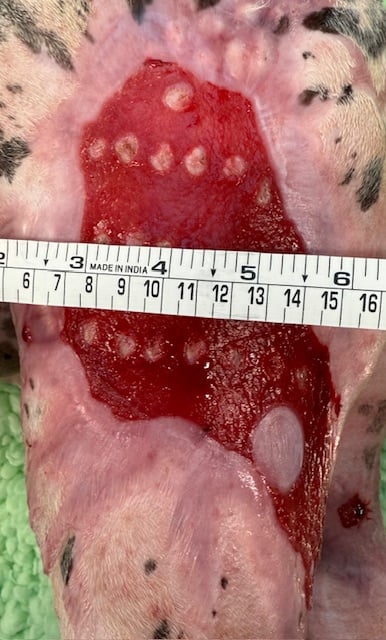
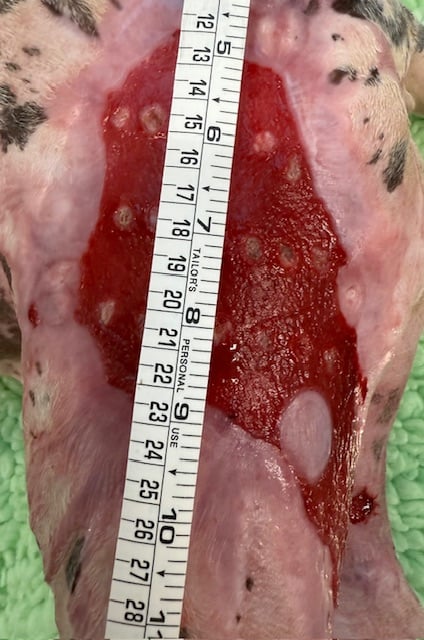
Right leg
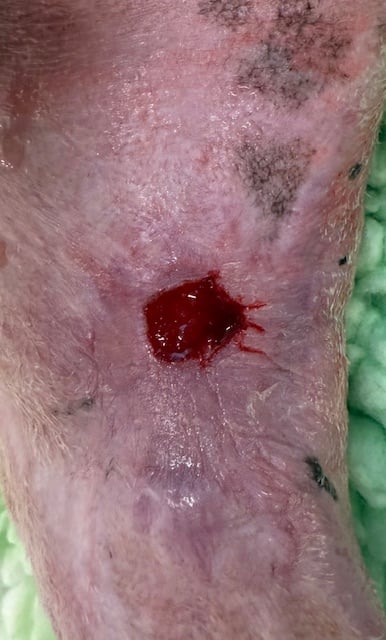
Day 85
Left pelvic limb
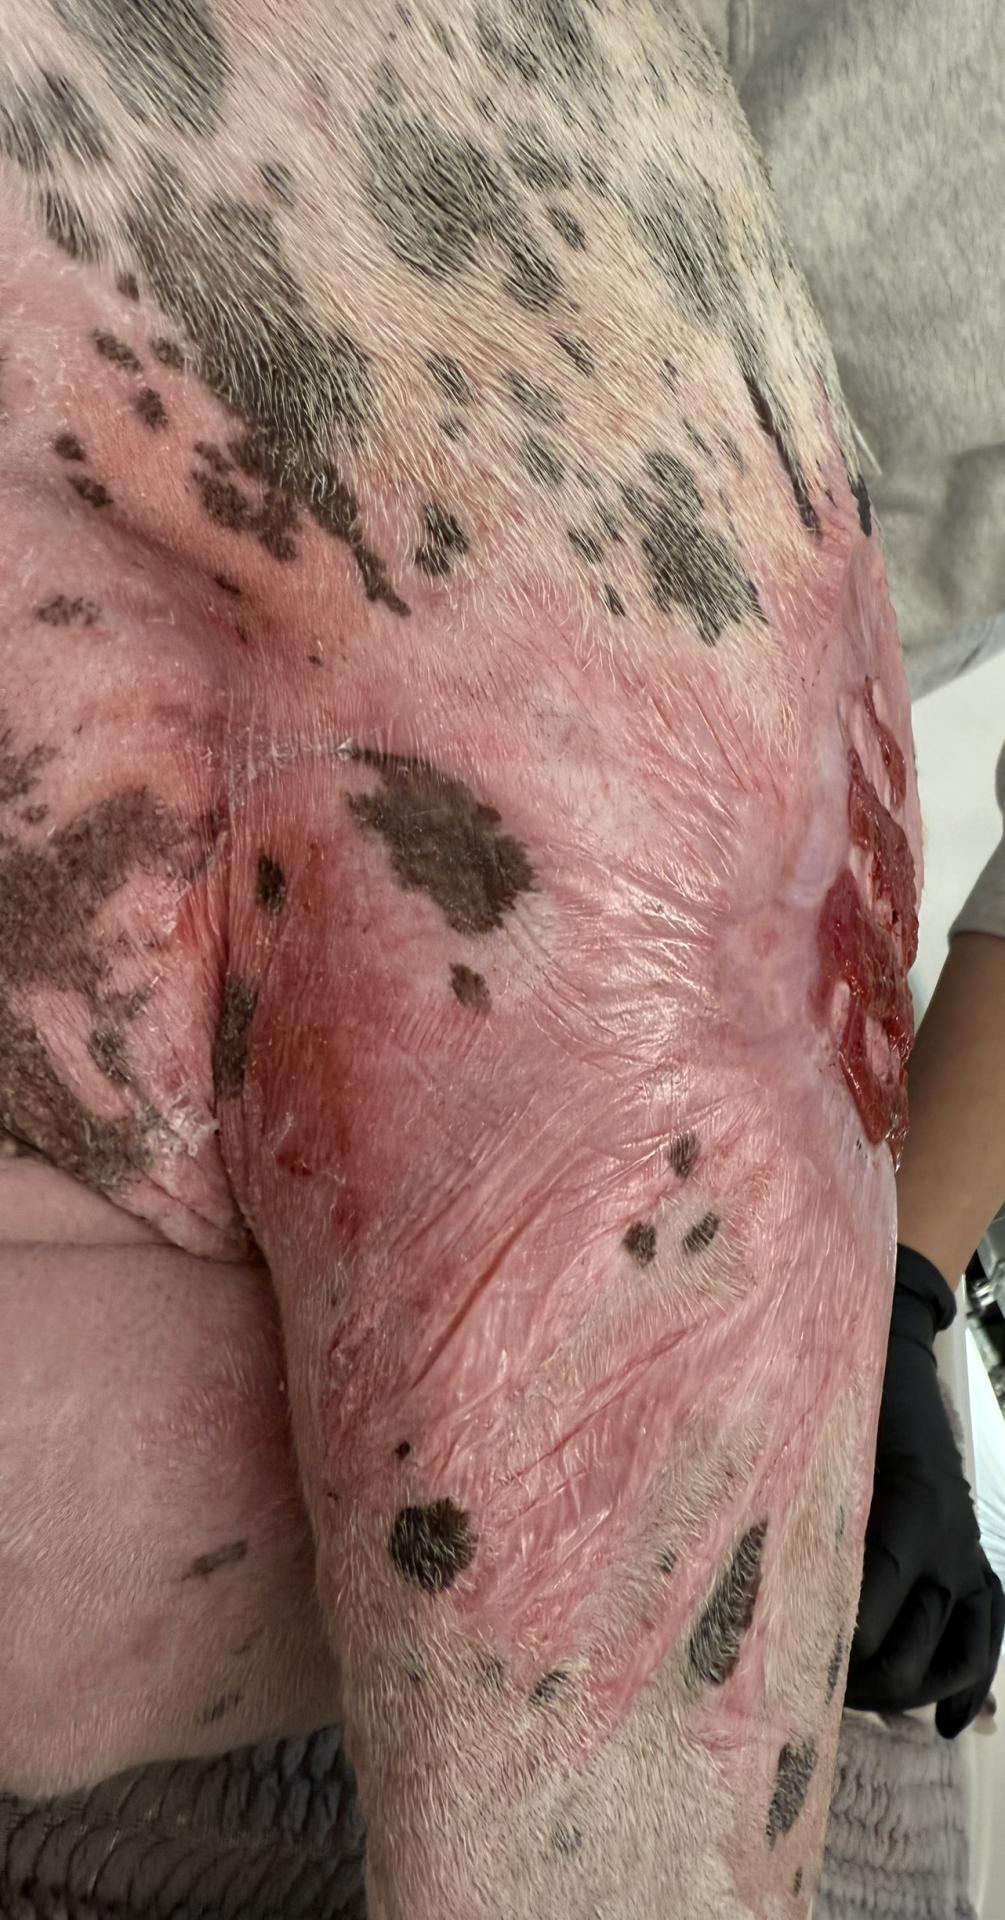
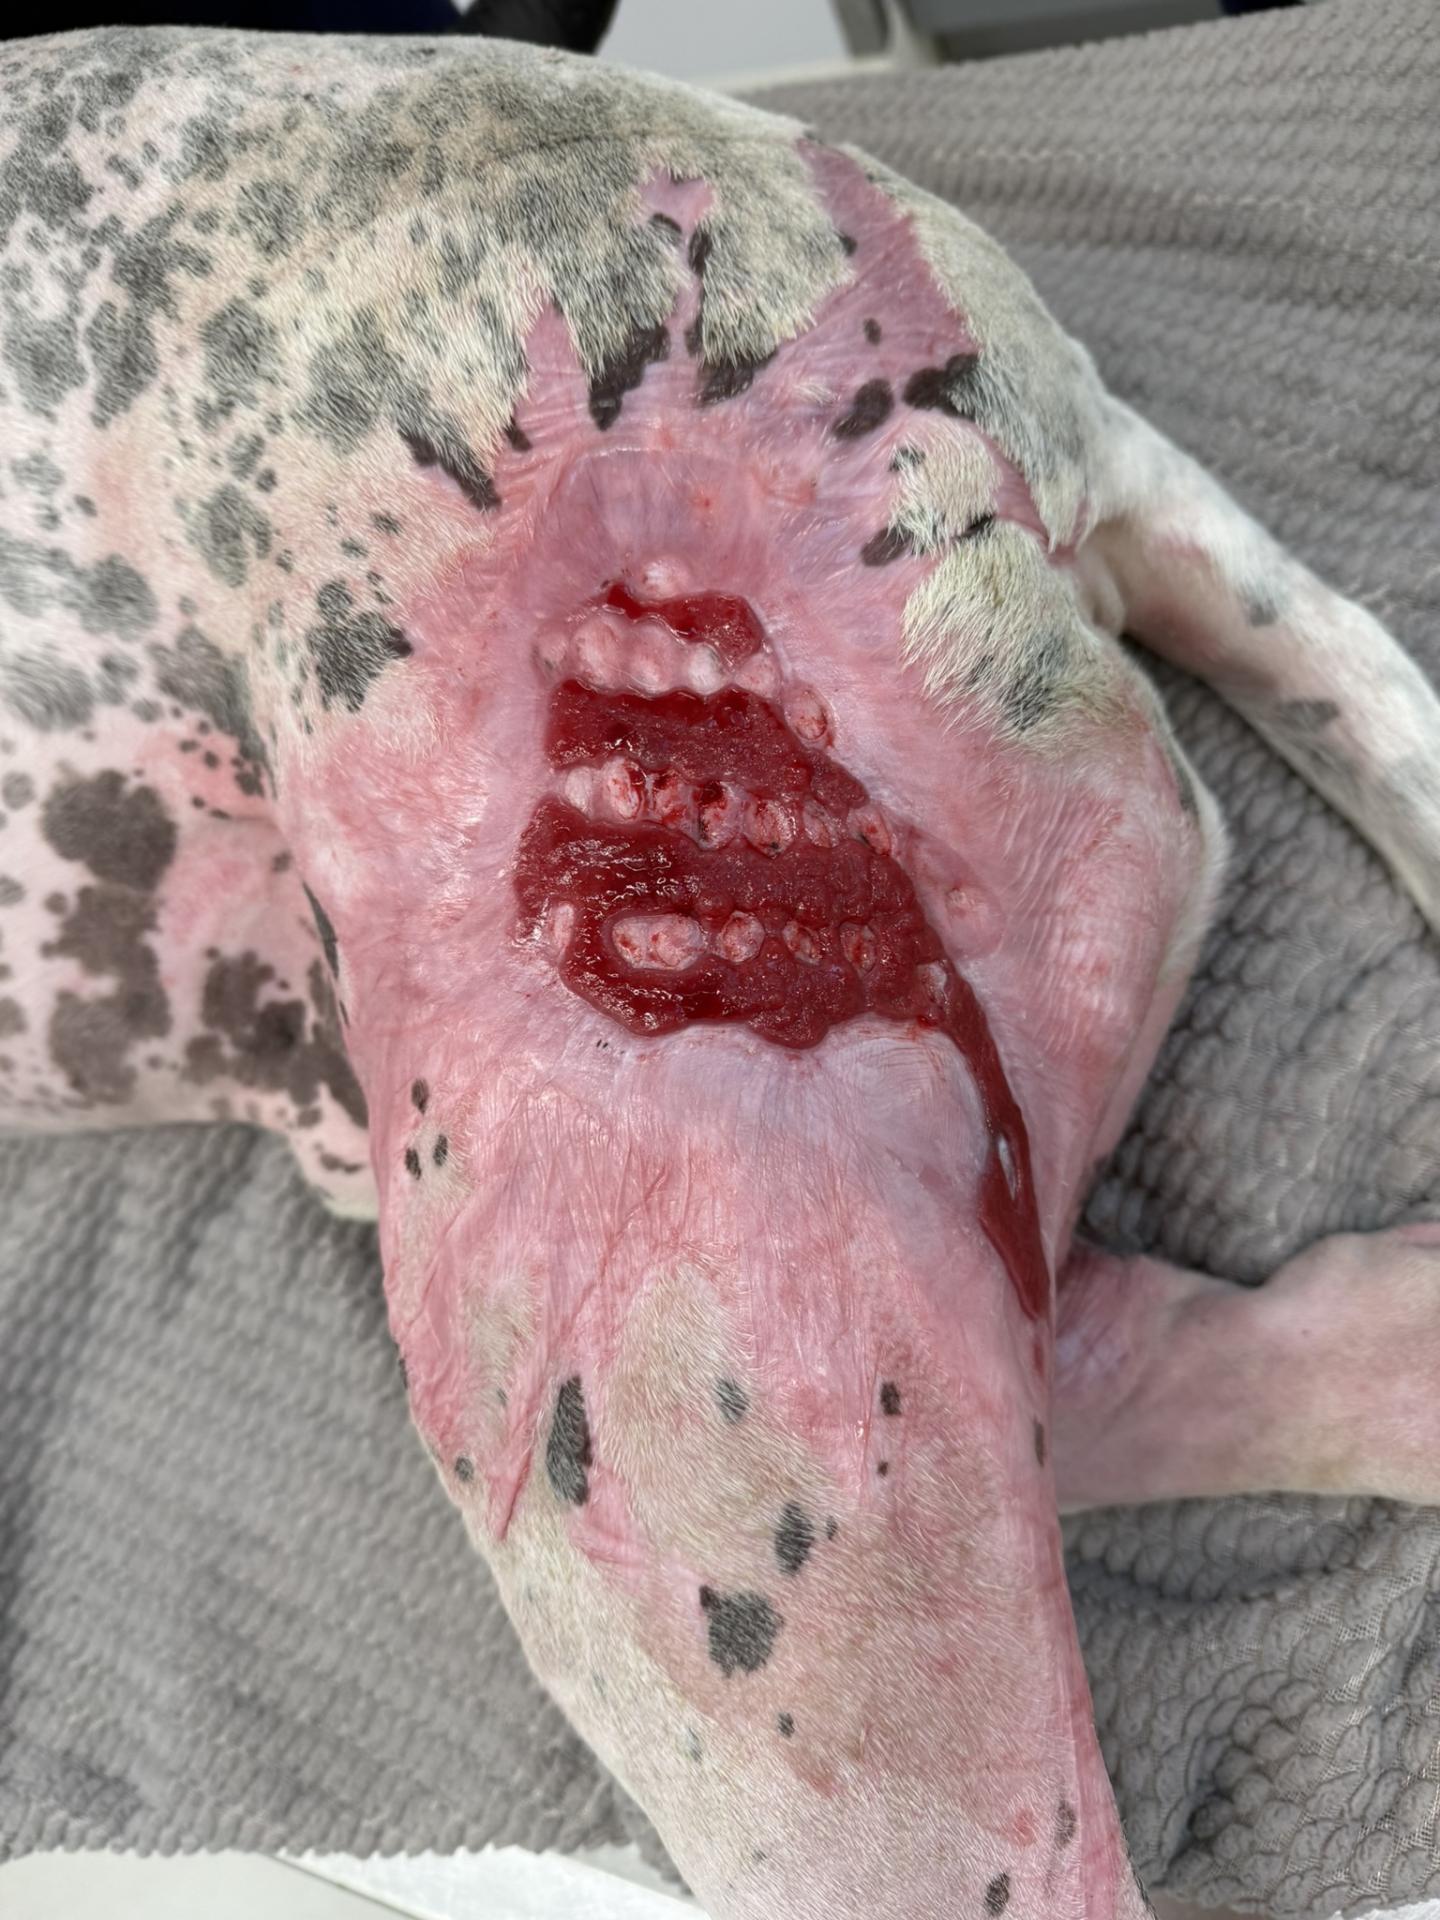
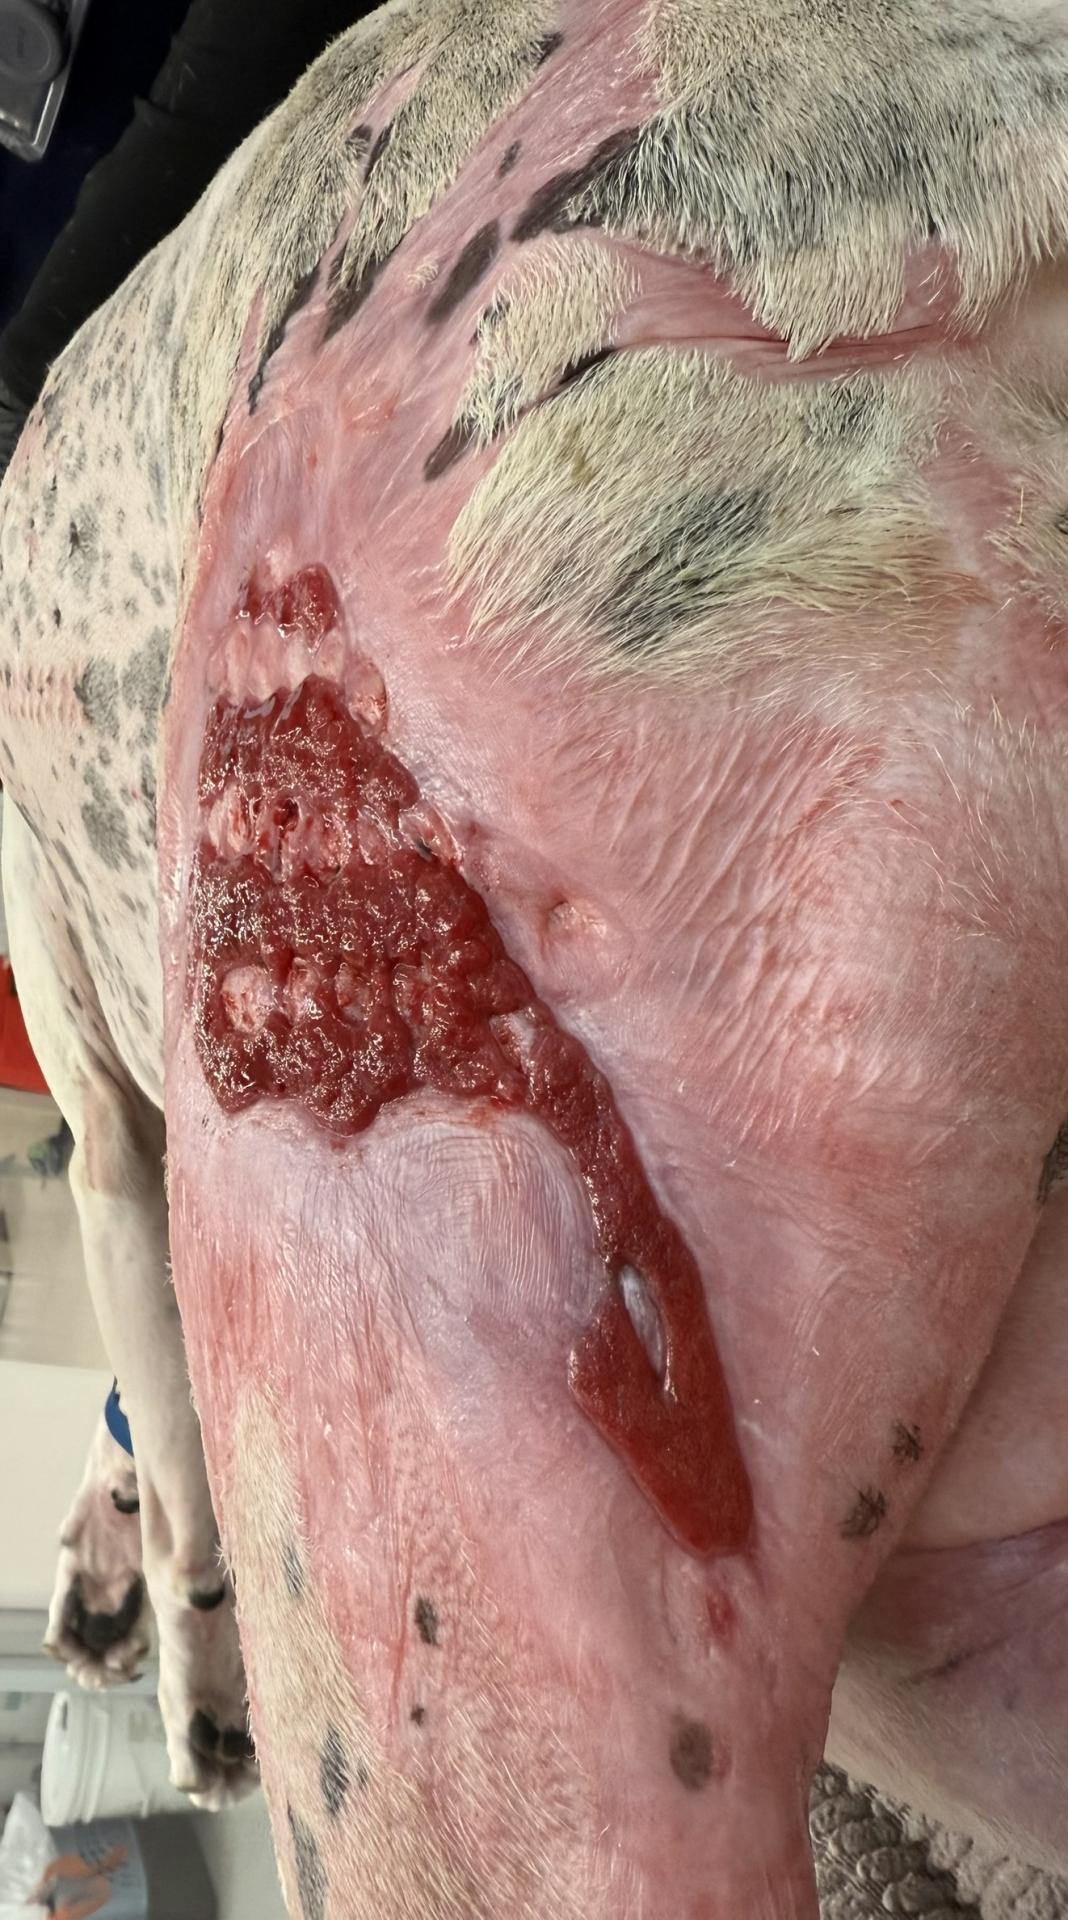
Right pelvic limb: fully healed.

